
 De
De  Es
Es  Fr
Fr 

-
-
-
-
-
-
-
-
-
-
-
-
-
-
-
-
-
-
-
-
-
-
-
-
-
-
Resizing Raster Image
-
-
-
-
-
-
-
-
-
-
-
-
-
-
-
-
-
-
-
-
-
-
-
-
-
-
-
-
-
-
Resizing Raster Image
 Ribbon: Raster – Modification >
  Change Size
Menu: Raster –  Change Size
 Command line: IMAGESIZE
 This functionality is available only in the Raster module.
It is used to bring the image size in accordance with predetermined values.
It is advisable to carry out after performing such operations as deskewing and cropping the image, as well as after scanning, which results in an image of a non-standard size. If the new image is smaller than the original one, the image is cropped. If the new image is larger than the original one, margins are added to the image. Changes are tracked in the preview window.
The operation can be applied to only one image.
Select and image and run the command.
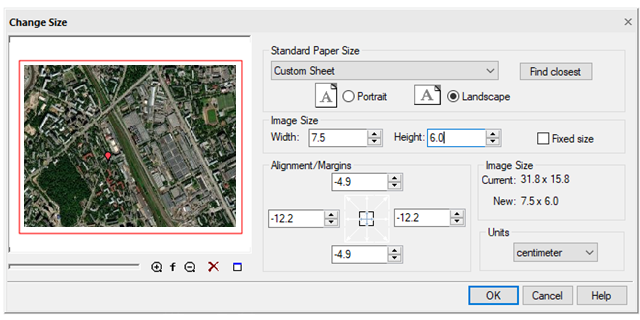
In the dialog box that appears, set the following parameters:
1. In the Units field, select measurement units from the list;
2. Determine the required image size by one of the following ways:
· Automatically determine the closest format – click the Find closest button in the Standard Paper Size section;
· In the Standard Paper Size list, select one of standard paper formats and the required orientation (Landscape or Portrait). You can customize the Standard Paper Size list in the Papers section of the Options dialog;
· Enter values in the Width and Height fields of the Image Size section;
· If you work with a color or grayscale image, the color of added image edges is specified by the Layout Background Color parameter in the Color settings section of the Options dialog box;
3. Align the image using one of arrows of the Alignment/Margins field. For example, you can align the image to the top left by clicking the top left corner arrow. To center the image, select the central button;
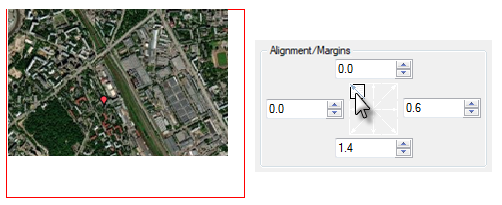
4. Specify sizes of the image margins by one of the following ways:
· Resize the image by increasing or decreasing the margins. To do this, clear the Fixed size checkbox and, using the appropriate fields in the Alignment/Margins section, increase or decrease the size of margins in required directions by entering positive or negative values in the appropriate fields;
· Align the fixed size of the image by changing the margin values. Check the Fixed size box. Then for the required image margins, enter the changed values in the appropriate fields;
5. Press OK.