-
-
-
-
-
-
-
-
-
-
-
-
Settings of Layers Profiles
-
-
-
-
-
-
-
-
-
-
-
-
-
-
-
-
-
-
-
-
-
-
-
-
-
-
-
-
-
-
-
-
-
-
-
-
-
-
-
Settings of Layers Profiles
Layers profiles are used to organize different divisions of the design work within one drawing file. Every user works with their own group of layers.
For example, you have to annotate a drawing with leaders set separately by the compliance supervisor and the technologist.
Do:
1. Switch to the Symbols tab in the Settings dialog, select the Leader note in the Notes section, in the Layer field select the <Table of layers>:
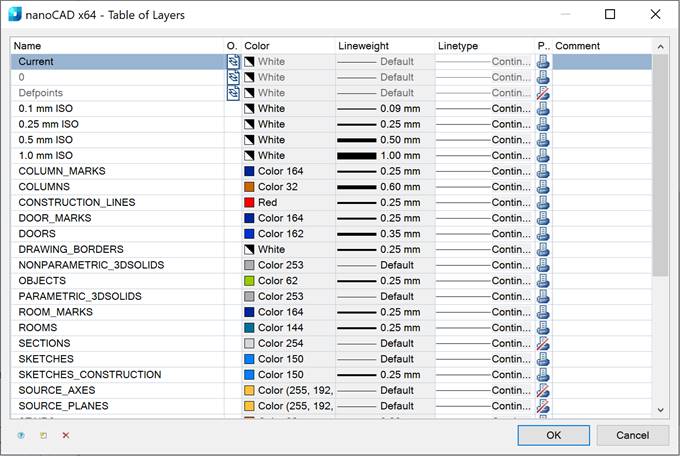
note: The  button opens the Table of layers dialog too.
2. Select the  New layer button to create a new layer. By default, a new layer will have a LayerN name, where N – layer’s number.
3. Click on the created layer’s name to rename it. Type a new name – Notes:
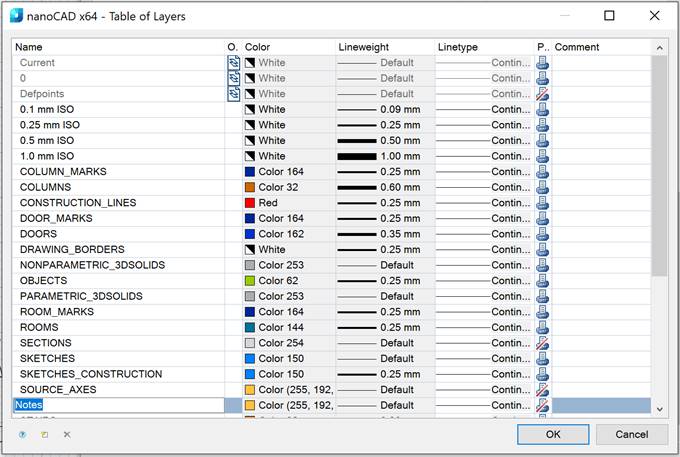
4. Select OK.
5. Select OK to close the Settings dialog box.
note: When saving settings in a configuration file (not in a current document), all notes will be created on the Notes layer by default. It does not matter whether this layer is in the document. If a layer does not exist, it will be created with the parameters specified in the Table of layers dialog box.
To separate the work of the compliance supervisor and the technologist, create layers profiles.
6. In the Settings dialog switch to the Main options tab and in the Common settings section in the Current profile select the  to open the Table of profiles dialog:
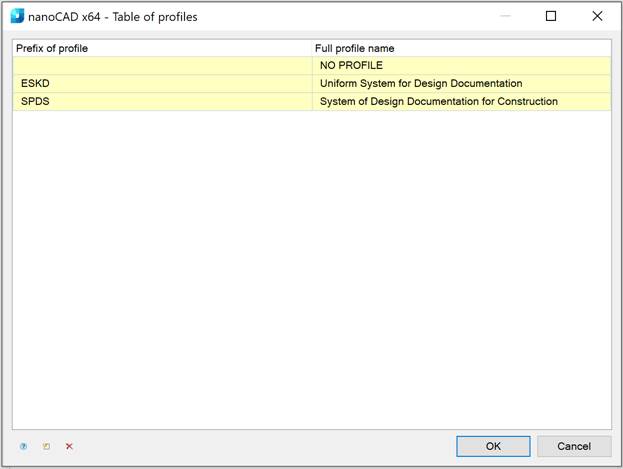
7. Select the  New profile button to create the new profile’s prefix. By default a new profile’s prefix will have a Profile1 name.
8. Click on the created profile’s prefix name to rename it. Type a new name – T_.
9. In the Full profile name column rename Profile1 to Technologist:

10. Using the same method to create the CS_ profile’s prefix:

11. Select OK to close the Table of profiles dialog box.
12. Select OK in the Settings dialog box.
13. In the Save changes? dialog box select the Save to config file and current document parameter and select OK.
As a result of the settings, according to which profile is set as current, you can create:
· Technologist’s annotation on the T_Notes;
· Compliance supervisor’s annotation on the CS_Notes;
· Leader note on the Notes layer.
To create technologist’s annotation:
1. Select CTRL + SHIFT + Q hotkeys to open the Quick Options dialog box:
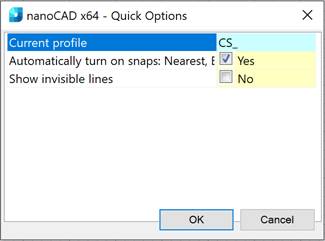
2. Select the T_ profile from the drop-down list:
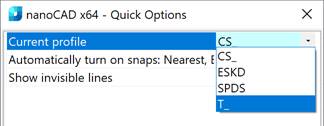
3. Select OK.
4. Create an annotation using the Notes>Universal notes command from theDraw menu. When the first annotation is being created, a new T_Notes layer is created on the Notes layer base:

To create the compliance supervisor’s annotation:
1. Select CTRL + SHIFT + Q hotkeys to open the Quick Options dialog box.
2. Select the CS_ profile from the drop-down list.
3. Select OK.
4. Create an annotation using the Notes>Universal notes command from theDraw menu. When the first annotation is being created, a new CS_Notes layer is created on the Notes layer base:

To create a universal note:
1. Open the Settings dialog box.
2. Open the Table of profiles dialog box.
3. Select NO PROFILE.
4. Twice select OK to close the dialog boxes.
5. Create a universal note. When the first annotation is being created, a new Notes layer is created:

To enhance visualization, you can set different colors for the Notes, CS_Notes and T_Notes layers.
Do:
1. Switch to the Symbols tab in the Settings dialog box and in the Notes – Universal note section select By layer in the Color and Text color fields.
2. Select OK in the Settings dialog box.
3. In the Save changes? dialog box select the Save to config file and current document parameter and select OK.
4. In the Layers dialog specify the colors for the layers.

note: Hotkeys for the Quick options dialog box are specified in the Hotkeys section in the Main options tab of the Settings dialog box:


 De
De  Es
Es  Fr
Fr  Pt
Pt 
