

 De
De  Es
Es  Fr
Fr  Pt
Pt 

-
-
-
-
-
-
-
-
-
-
-
-
Ribbon Tab
-
-
-
-
-
-
-
-
-
-
-
-
-
-
-
-
-
-
-
-
-
-
-
-
-
-
-
-
-
-
-
-
-
-
-
-
-
Ribbon Tab
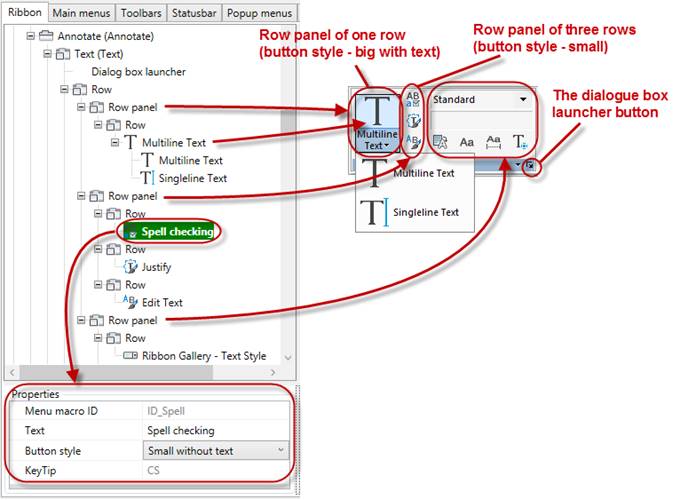
The Ribbon tab of the Customize User Interface is intended to edit the ribbon.
In the left upper part, there is a tree of ribbon elements, which presents all its tabs, context tabs, panels and commands.
A ribbon element is created and edited through its context menu. The composition of context menu commands depends on the selected tree element. The element is moved by dragging it in the ribbon tree. You can add a new command in the ribbon by dragging it from the command list in the right part of the dialog.
|
|
Attention |
|
To apply changes in the ribbon elements, use RELOADRIBBON command or hot keys Alt+R. It is not required to reboot the program. |

The ribbon contains a set of tabs on which controls and tools for creating and editing a drawing are compactly grouped.
1. A new tab is added by selecting Add tab command from the context menu of Tabs section in the ribbon elements tree.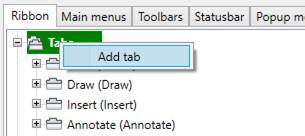
Upon the completion of all data entry, the tab will appear in the end of all tabs list.
To add a new tab immediately before the existing one, select the desired tab in the ribbon tree and select Insert tab in the context menu.
2. In the emersed Create ribbon tab dialog, fill the boxes
· UID – unique element identifier in the program;
· Name – internal name of the tab;
· Text – name of the tab to be displayed on the screen.
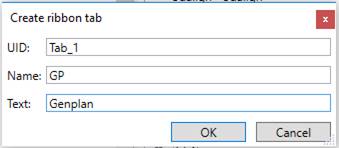
3. Click OK.
You can move any tab in the tree by a simple drag-and-drop.
There may be panels inside a tab. Each tab should obligatory contain at least one panel.
1. Select a tab in the tree list.
2. In the context menu, select a command to create the desired element:
· Add new panel
· Add existing panel
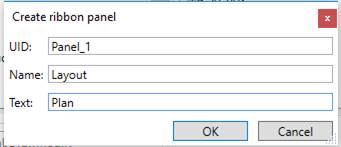
Add new panel
1. Select the command in the context menu.
2. Fill parameters in the Create ribbon panel dialog box, click OK.
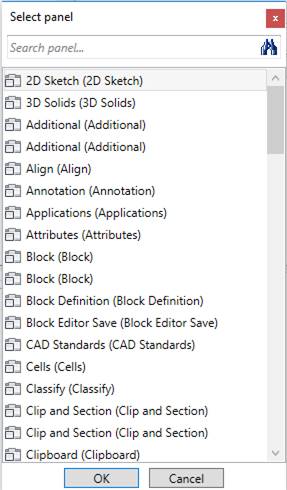
Add existing panel
1. Select the command in the context menu.
2. Select the element in the Select panel dialog box, click OK.
Context tabs become visible under certain conditions. For example, Layout appears only upon transfer to the paper space, Block Editor – when you enter block editing mode. It is impossible to add/remove context tabs. Context tab elements are created similarly to tab elements.
In each ribbon tab elements are grouped in panels – sets of commands similar in function.
Each tab should contain at least one panel. A panel can be added only to a tab or a context tab.
1. A new panel is added by selecting the Add new panel command from the context menu of the Panels section in the ribbon elements tree.
2. Fill the boxes in the Create ribbon panel dialog
· UID – unique element identifier in the program;
· Name – internal name of the tab;
· Text – name of the tab to be displayed on the screen.
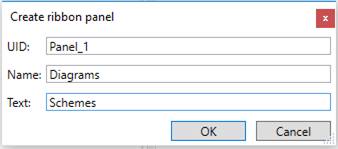
3. Click OK.
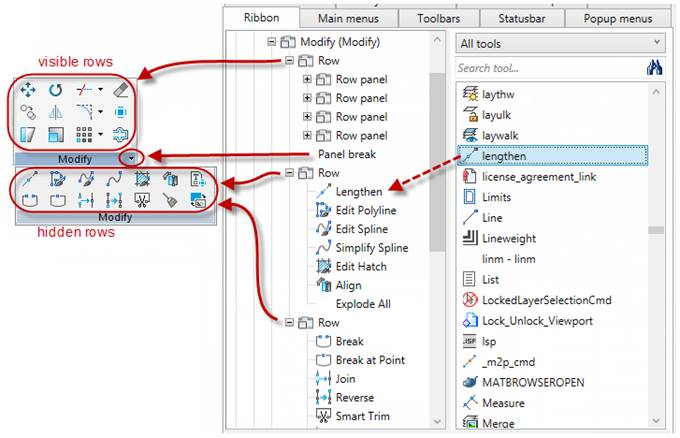
A panel can contain:
· Rows inside of which there are command buttons, lists and other interface elements;
· One panel’s dialog box that opens by  button;
· Hidden rows separator.
To fill a panel with elements, it is necessary to create at least one row.
1. Select the panel in the tree list.
2. In the context menu, select the command to create a desired element:
· Add row
· Add dialog box launcher
· Add hidden rows separator
Add dialog box launcher
A dialog box launcher is a button with an arrow located in the right lower corner of some panels and intended
1. To select the Add dialog box launcher command in the panels’ context menu.
2. In the Create dialog box launcher dialog box, to assign the command for Dialog box button, click  button.
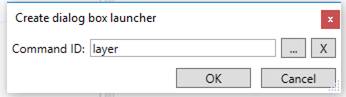
3. Select the required command in the Command ID dialog box. Click OK.
Add hidden rows separator
A separator is an arrow  in a panel name, it unfolds the display of additional panel elements. You can create a separator through the context menu by selecting the Add separator.
A tool row is a set of commands situated in a panel in one row.
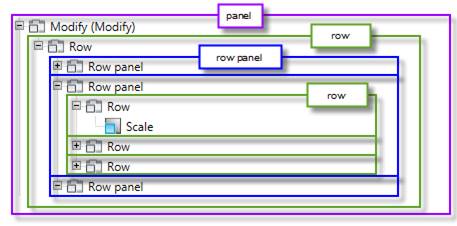
Row may include row panels, buttons, split buttons and separators.
1. Select a row in a tree list.
2. In the context menu select the command to create a desired element:
· Add button
· Add split button
· Add row panel
Add row panel
A row panel is added when it is necessary to divide a group into several vertical parts with different number of rows. A row panel can be added only inside a row.
Add button
A button can be added in a row by dragging a command from the command list on the right, as well as through the context menu.
1. Select the Add button command in the row’s content menu.
2. Set parameters in the Create ribbon button dialog box.
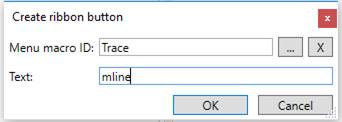
3. To assign command to the button, click button next to Menu macro ID field.
4. Select the required command in the Select command dialog box. Click OK.
Add split button
1. Select the Add split button command in the row’s context menu.
2. Set parameters in the Create ribbon dropdown dialog box.
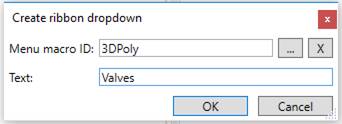
3. To assign command to the button, click button next to Menu macro ID field.
4. Select the required command in the Select command dialog box. Click OK.
You can add buttons in the dropdown list by dragging commands from the command list on the right or through the Add button command of the context menu. Parameters of the drop-down list can be changed in the Properties field.
Filling rows with commands
1. Select the command in the right window of the tools list.
2. Drag it to the required row in the ribbon elements tree.
Add separator
A separator is a line or a spacing that are added in a panel, row panel, hidden rows, dropdown list for visual separation of commands.
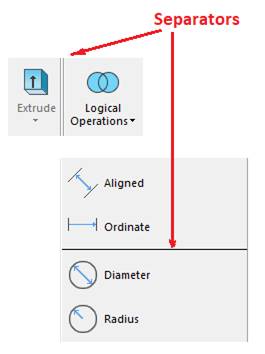
1. Select the list row to place the separator before.
2. Select Add separator in the context menu.
The Quick Access Toolbar is located at the top or bottom of the Ribbon and contains buttons for the most frequently used commands.
A button can be added to the Quick Access Toolbar by dragging a command from the list of commands on the right, or through the Add Button command in the context menu:
1. In the Create Ribbon Button dialog, click the  button next to the Menu macro ID field.
2. Select the desired command in the Select a command dialog. Click OK.
3. If necessary, correct the Text field. Click OK.
If you select a specific button and use the Insert Button context menu command, the new button will be located immediately before the selected one.
1. Select the required element in the tree.
2. Use the Delete command of the context menu.