
 De
De  Es
Es  Fr
Fr  Pt
Pt 

-
-
-
-
-
-
-
-
-
-
-
-
-
-
-
-
-
-
-
-
-
-
-
-
-
-
-
-
-
-
-
-
-
-
-
-
-
-
-
-
-
-
-
-
-
-
-
-
-
-
-
Project Manager
-
-
-
-
-
-
-
-
-
-
-
-
-
-
Project Manager
 Functional panel:Specification (Project Manager).
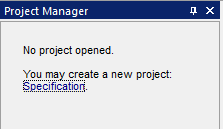
To create a new project, click on the link "Specification".
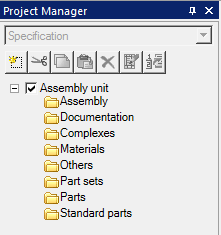
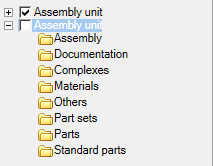
When creating a project, a head empty assembly unit is created. An assembly unit includes default specification sections.
Toolbar
 Create - the command allows you to create an entry or empty head assembly unit.

 Cut - the command cuts an entry for later insertion into another assembly unit.
 Copy - the command copies the entry for subsequent insertion into another assembly unit.
 Paste - command inserts a previously cut or copied entry. The insertion is made in the same section of the specification from where the entry was cut or copied.
 Delete - command deletes entry.
 Delete specification - the command opens the specification editing dialog.
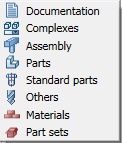
 Create position - the team creates a position on the occurrences: Assembly units, Details, Standard products, Other products and Materials.
Creating an empty head assembly unit
1. On the toolbar, click "Create".
2. In the drop-down menu, select "Create empty head assembly unit".
3. The head assembly will be created.
The active build is marked with an enabled switch.
Creating entries
1. On the toolbar, click "Create".
2. In the drop-down menu, select "Create entry".
3. Select entry.
4. In dialogue "Creating entry" fill in the required parameters. Depending on the type selected, different fields will be available.
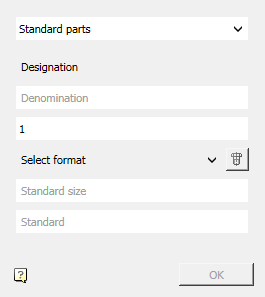
5. After entering all the necessary parameters, the "OK" button will be available. Confirm your entry.
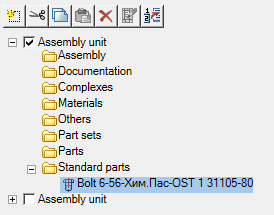
6. The entry is added to the project manager tree.
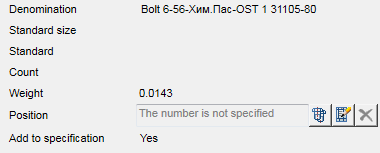
Entry Editing
1. Select an entry in the tree.
2. Below the tree will be available options panel for editing.
Create position
1. Select entry: Assembly units, Parts, Standard products, Other products or Materials.
2. Click the button on the toolbar "Create position".
3. Insert a position in the drawing and fill in the data in "Position leader edit".
4. The position field at the entry will be associated with the position in the drawing.

After creating a position, the following commands will be available:
- Show position - shows the position on the drawing.
- Edit position - open "Position leader edit".
- Reset position number - deletes position number.
Editing Performances
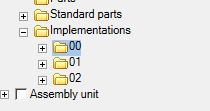
If a group type is set in the BOM settings, the sections of the performances will be available in the list of sections.

When placing the entry in the execution, the section "Executions" and the entry of the execution will be added in the tree of the assembly unit of the project manager.
The occurrence of the performance is called for editing by double-clicking the LMB. The dialogue allows you to create in the performance of new entries or copy them from the permanent data.
The dialog box consists of the sections: "Variable data" and "Permanent data".
In the section "Permanent data" are the occurrences of the specification. When you click on the "+" button, the entries are copied into the execution (in the section "Variable data").
In the section "Variable data" are occurrences of performance. Clicking on the "+" button will create an empty entry.
An empty entry can be edited by changing its Type, Designation, Name and Quantity.
To remove an entry from a performance, press the "-" button opposite the entry.