
 De
De  Es
Es  Fr
Fr  Pt
Pt 

-
-
-
-
-
-
-
-
-
-
-
-
-
-
-
-
-
-
-
-
-
-
-
-
-
-
-
-
-
-
-
-
-
-
-
-
-
-
-
-
-
-
-
-
-
-
-
-
-
-
Model check
-
-
-
-
-
-
-
-
-
-
-
-
-
-
-
-
-
-
-
-
-
-
-
-
-
-
-
-
-
Model check
 Functional panel: Model check.
Functional panel: Model check report.
This tool allows you to check your drawing for errors and non-compliance with standards.
The "Model check" functional panel allows you to check IFC models, primitives and other objects for collisions (errors in rules). The report is displayed in the "Model check report" functional panel.
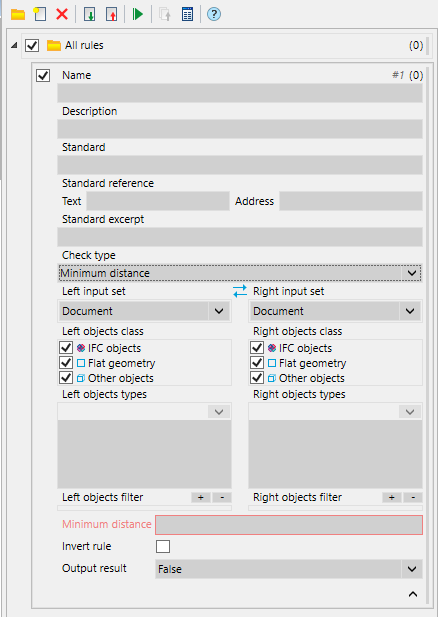
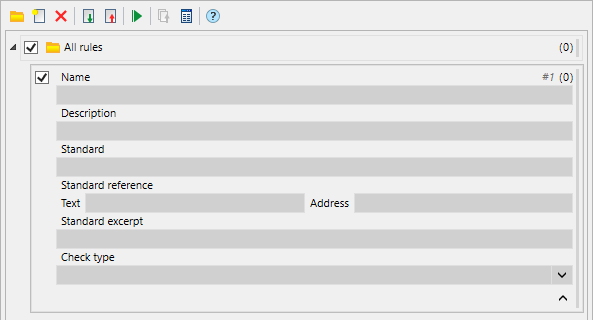
Panel "Model check"
The panel is used to configure rules and run checks of these rules. It consists of the main menu and the rules tree. Each rule has its own unique number, value with the symbol "#".
Main menu
 Add folder - adds a folder to the rules tree. The root folder is "All rules".
 Add rule - adds a rule to the rule tree.
 Delete - deletes the selected folder or rule.
 Import rules - imports rules from an external JSON file.
 Export rules - exports rules to an external JSON file.
 Start checks - launch checks of selected rules.
 Export reports - export reports to JSON files.
 Model check report - opens the "Model check report" panel.
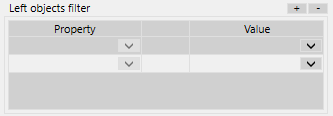
Objects filter
The object filter is a set of filter lists. The lists are managed using the "+" and "-" buttons. To add a list, you must click the "+" button. To delete a list, you must select it and click the "-" button.
Filter lists interact with each other via the logical function "OR". That is, objects corresponding to the filters of the first OR any subsequent list are taken for checking.
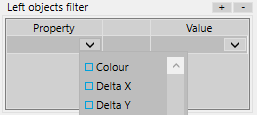
Each filter list is a table with three columns: Property, Check Method, Value.
When adding one filter line, an empty line is automatically added. To delete a line, select the line and press the "Del" key.
The lines in the list interact with each other via the logical function "AND". That is, AND the first, AND the second, AND the subsequent conditions must be met.
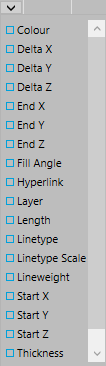
In the "Property" column, select the properties available for filtering from the list.
In the "Check Method" column, select the method for checking the value from the list: =, <, <=, >, >=, List, Regex, Formula.
The "Value" column specifies a numeric value, a semicolon-separated list, a Regex expression, or a formula, depending on the selected verification method. For convenience, the drop-down list lists all the value options for the selected object property.
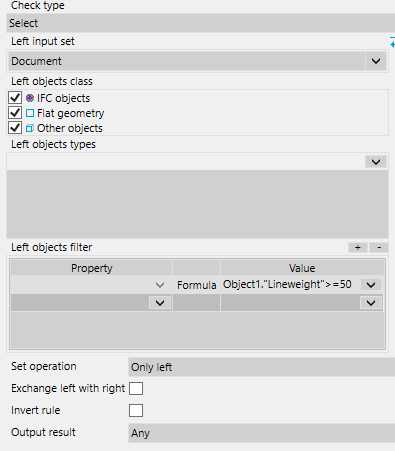
Formula
The formula is one of the comparators. Formulas can be used in object filters by properties and as a comparison mode in numeric checks.
In order to use the value of the property of the left object in the formula, the prefix is required Object1."Name of the property of the object". When accessing the property of the right object, the prefix must be used Object2."Name of the property of the object". The properties of both the left and right objects can be used in the formula simultaneously and an unlimited number of times.
The decimal separator in formulas is a period - this is due to the fact that the use of functions is allowed in formulas, for example min(0.01, Object1."Name of the object property").
Example of using a formula in a filter by properties:
Object1."Lineweight">=50
If the filtered object does not have the property specified in the formula, the object is considered to not meet the filtering conditions.
Example of using a formula as a comparison mode in numeric checks:
Length >=(Object1."Lineweight"*500)
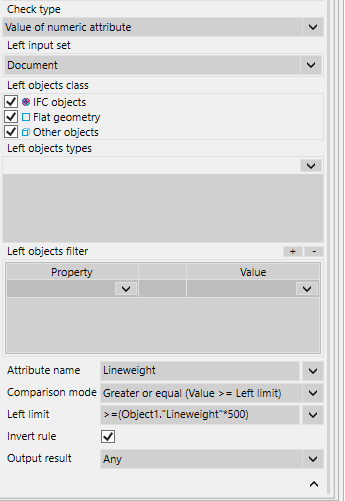
In numeric tests, the formula always begins with a comparison operator.
The value of the attribute being checked is compared with the formula value. The formula value is entered into the "Formula result" report column.
If the object does not have the property specified in the formula, or an error occurs when calculating the formula, the text "Error" is written to the "Formula result" column.
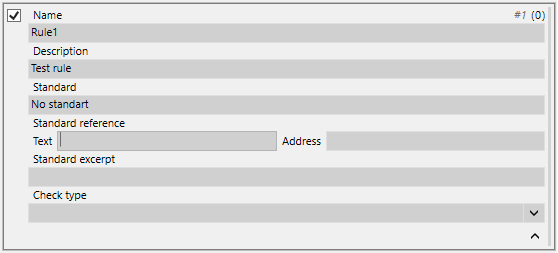
Add rule
1. Select a folder to create a rule.

2. Click the "Add rule" button. An empty rule will be added to the selected folder.
3. Enter information about the rule. Fill in the fields "Name", "Description", "Standard", link to the standard: "Text" and "Address", "Standard excerpt".
4. Select "Check type". Each verification type has its own additional fields.

Depending on the type of check, one (left) or two (left and right) sets of objects can be used. Each set has its own: input set, objects class, objects types, objects filter.
You can swap sets using the  "Exchange" button.
5. For each set, select the data source: Document, Select, Check.
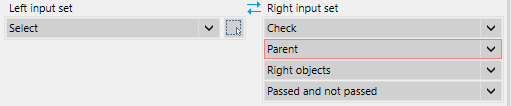
Document - all objects in the drawing are used.
Select - the selected objects on the drawing are used. To select, you need to click the  "Select objects" button, then select the objects on the drawing and press the "Enter" key. The number of selected objects will be displayed on the button.
Check - objects from the selected check are selected. In addition to the number of the original check, you must select a set (left, right, both) and a check result (True, False, Any).
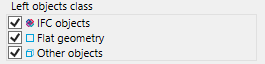
6. For each set, specify the classes of objects involved in the check: IFC objects, Flat geometry (primitives), Other objects (BIM solution objects, symbols, designations, etc.).
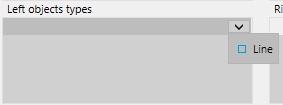
7. For each set, add an object type. The object type selection list is generated automatically depending on the selected object classes and the presence of these objects in the drawing.
8. For each set, use the filter of objects by parameters. The list of parameters is generated automatically depending on the selected classes of objects, the type and presence of these objects in the drawing. The values can be: constant, list, Regex (regular expressions) or formula.
Using the "+" and "-" buttons you can control the number of filters.
9. Set the rule parameters.
- Parameters of the selected rule - the parameters of the selected rule can be specified by a constant or a formula.
- Metric accuracy - accuracy in calculating numerical parameters.
- Invert rule - the parameter indicates that the rule can be inverted.
- Output result - determines what result to output: positive (True), negative (False) or any.

10. Done. You can run the scan and view the report.
Panel "Model check report"
The panel is used to view and audit the results of checks. It consists of the main menu and tables with the results of rules.

Main menu
 Display positive results - display rows with positive result.
 Display negative results - display rows with negative result.
 Allow selected - resolve the value of the selected row.
Export reports - export reports to JSON files.
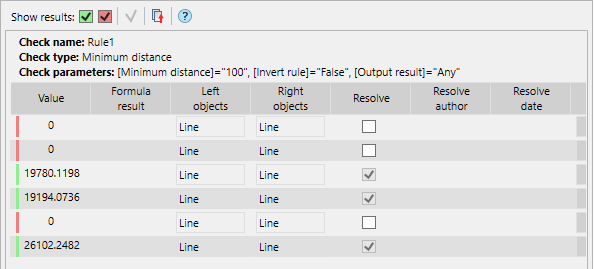
Columns
Value - the desired value between objects.
Formula result - the result of the formula calculation.
Left objects - left object type.
Right objects - right object type.
Resolve - value resolution.
Resolve author - the author who gave resolve.
Resolve date - resolve date.
Note - note on the test result.
Check and report
1. In the rules tree, select the rules to run the check.
2. Start checking the selected rules by clicking on the "Start checks" button.
3. Go to the "Model check report" panel. The panel will display reports on the selected rules.
4. Conduct a report audit. When you select a report line, objects on the drawing are highlighted for visual inspection. If the results are within the standards, check the box in the "Resolve" column and, if necessary, create a note. Resolution is set automatically for positive results.
5. If necessary, export the report in JSON format by clicking the "Export reports" button.