
 De
De  Es
Es  Fr
Fr  Pt
Pt 

-
-
-
-
-
-
-
-
-
-
-
-
-
-
-
-
-
-
-
-
-
-
-
-
-
-
-
-
-
-
-
-
-
-
-
-
-
-
-
-
-
-
-
-
-
-
-
-
-
-
-
-
Finishing
-
-
-
-
-
-
-
-
-
-
-
-
-
-
-
-
-
-
-
-
-
-
-
-
-
-
-
Finishing
On the "Finishing" tab, interior elements are indicated with an indication of finishing materials and calculation of areas. When creating a room, the finishing list is generated automatically, taking into account all openings.
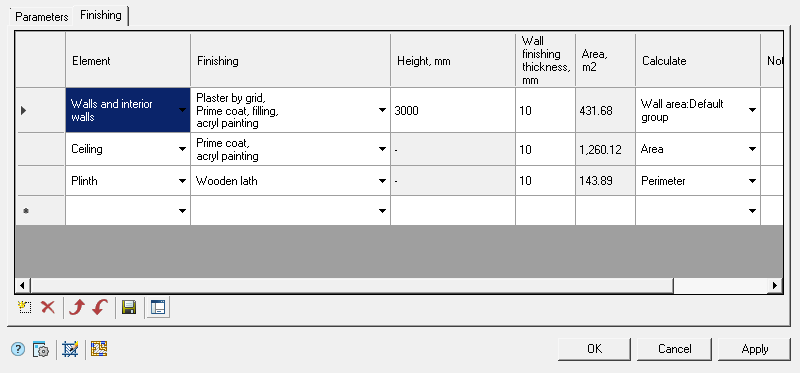
Table columns
-
Element - selectable finishing element.
-
Finishing - selection of the type of finishing produced.
-
Height, mm - element height, the field is available for editing when the "Wall area: Default group" value is selected in the "Calculate" column.
-
Wall finishing thickness, mm - entering the thickness of the finish, the field is available for editing when you select the values "Area", "Wall area: Default group" and "Perimeter" in the "Calculate" column.
-
Area, m2 - input of the finishing area, the field is available for editing when the "Modifier" and "Opening" values are selected in the "Calculate" column, for other values the area is calculated automatically.
-
Calculate - this column sets the type of finishing calculation. Each item from the list has its own calculation type.
-
Note - text box for entering a note on the trim element.
Toolbar
-
 Add - button for adding finishing line. Adds a line identical to the selected line. The line immediately following the selected line is added.
 -
 Delete - removing finishing line button. Deletes the selected line.
 -
 Up - button for changing the order of lines. Moves the selected line up one.
 -
 Down - button for changing the order of lines. Moves the selected line down one line.
 -
 Save as default finishing - button for saving the finishing pattern. A saved finishing list will be created by default in every new room.
 -
 Wall group selector - allows you to create an additional group of walls and interior walls with a finish other than the "Walls and interior walls" element. When the command is activated, an additional panel for configuring wall groups is displayed.
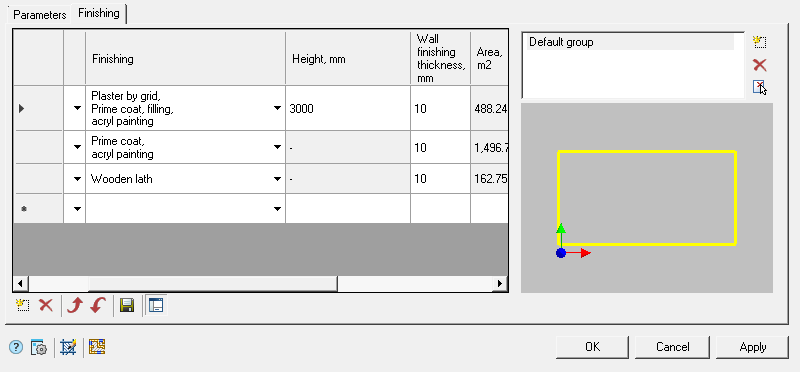
The panel consists of a list of groups and a graphic window.
The list of groups is used to display, add and edit groups. There is a "Default group" group in the list. This group belongs to the "Walls and interior walls" element and cannot be deleted. The list is controlled by three buttons:
-
New wall group - Adds a new empty group to the group list and a new element with the same name to the trim list. The name of the group is changed directly in the list of groups by pressing the highlighted group again.
-
Delete wall group - Removes a group from the list. All walls that belong to the group will be moved to the "Default group". You cannot delete the "Default group".
-
 Get from drawing - The command allows you to specify the walls of the group directly in the drawing, similar to the selection in the graphics window.
The graphic window for selecting walls is necessary for displaying and specifying the walls included in the group. To add or remove a wall from a group, click LMB on the required wall. When a wall is added to a group, the wall will be moved from the group in which it was previously, when deleted, it is moved to the "Default group".
-