Engineering analysis
IDH_MCS_06
 Main menu: Mechanical - Design - Calculations -
  Calculations wizard.
 Ribbon: Mechanical - Design -
  Calculations wizard.
 Toolbar:
  Calculations wizard ( "Design").
 Command line: MCCALC.
1. Calculations wizard allows you to edit all the calculations are available in the file - regardless of the graphics platform. To create a new calculation required, specifying the desired type, click "New calculation".
2. The calculation results can be displayed directly in the calculation manager.
3. The type and number of parameters displayed in the dialog can be edited by the user at his discretion. To do this, double-click in the right part of the dialog box cause the viewer to edit.
By default, the dialog box takes the following form:
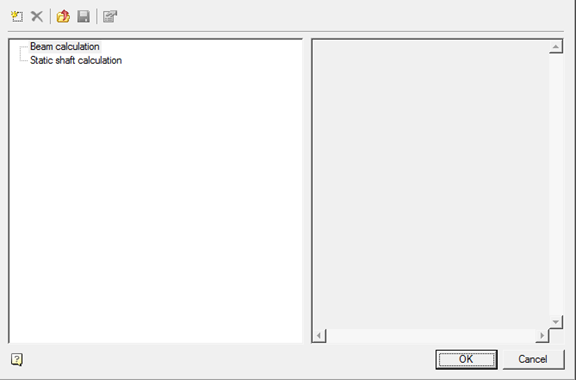
When installing the mouse cursor on the name of the calculation are available additional options.
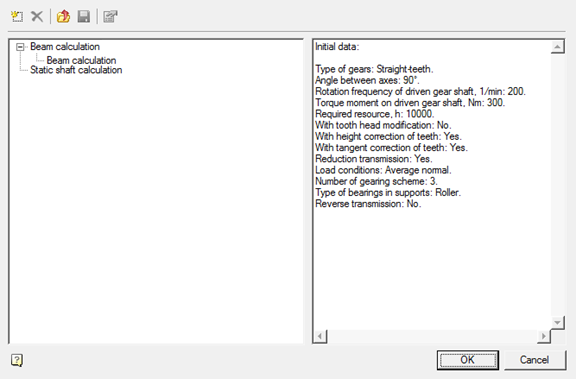
 Create - Activates the calculation type depending on the selected window.
 Delete - Removes the created calculation
 Open - Opens previously saved on the disk calculation
 Save - Saves the selected calculation on disk in a file * .mcc
 Edit - This command opens the window for editing the calculation results
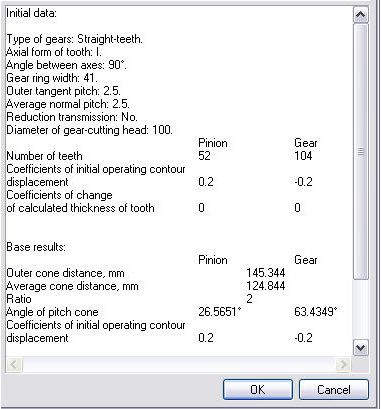
Upon activation, the report window, the user can enter their own value and remove unnecessary.
Default report templates for calculating gearing placed in a folder
C:\Program Files\Nanosoft\nanoCAD Mechanica 23\Reports Templates\
The calculation is made on the basis of GOST 21354-87 (hereinafter - the Standard) "Cylindrical gears involute external engagement for strength calculation.". The standard establishes the basic design according to the definition of the contact strength of the active surfaces of the teeth and tooth strength at bending metal cylindrical involute external gear transmission for general industrial applications with source circuit in accordance with GOST 13755-81, modulus m / 1 mm, working with lubrication oil at peripheral speeds v<=25 m/s.
Methods for rendering the gear
Designing gear can begin in any sequence. What to do in the first place - the calculation or drawing gear - it does not matter.
The wheels that were drawn without calculation, it is always possible to adjust the results of the calculation. All geometry is adjusted automatically.
Approaches to the design of the gear in nanoCAD Mechanica 23:
1. Draw gear without calculation by entering the wheel settings dialog.
2. To calculate the gear and the results of calculation render mesh.
3. To calculate the transmission stage and assign the result to the transfer were drawn without prior calculation.
4. Use the template file with the initial data on the calculated transmission gear stages and drawn by the circuit of the gearbox. By changing the raw data calculation, to update the geometry file template steps gears.
Drawing wheels (gears) without calculating
We choose to base parts of the gear pattern.
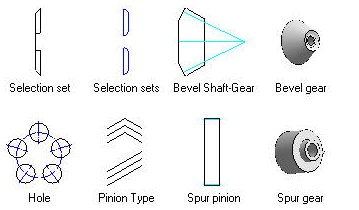
We define the insertion point and the direction of its rendering.
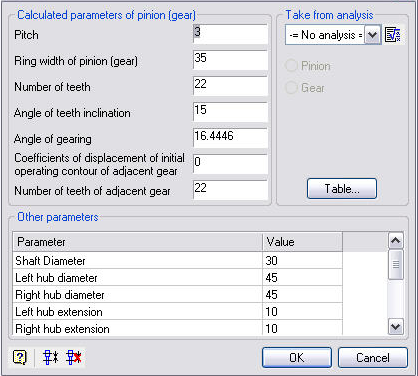
You can enter the desired design parameters designed wheels dialog. The default render wheel without calculation.

 Personal application assembly dependencies on a pair of gearing on the calculated spacing.
Drawing engagement of calculations
1. We choose to base parts of the gear pattern.
2. We define the insertion point and the direction of its rendering.
3. Since the calculation is done, select the desired calculation from the dropdown list.
4. Specify which element engagement render on the results of the calculation (wheel or gear) and click OK.
5. After drawing one element command remains active. To complete it, click with the ESC key.

 To assemble the wheels and gears on the calculated spacing options use gearing and Remove gearing.
How to set the point of insertion of the gear?
After selecting a template nanoCAD Mechanica 23 prompts you to specify the insertion point and the direction of drawing of the selected type wheel.
If the drawing already has a shaft portion, which is supposed to place the wheel, the insertion point is automatically determined by the aperture of the shaft portion of the highlighted cursor pointer.
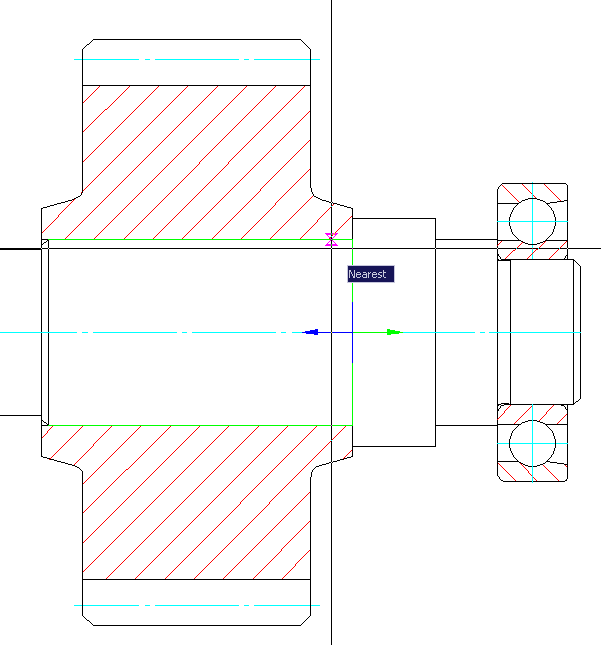
The approach to the calculation of gear
Gear is regarded as an independent object, for which the specified power and kinematic characteristics of the input or output.
Gear is an element of the designed gear. Pre-selection is carried out of the engine is determined by the overall gear ratio is carried out by a breakdown of the gear ratio gear stage determined power and kinematic characteristics of the gears of the individual stages.
In the proposed algorithm, the requirements of GOST completely soaked.
According to the calculation results can be obtained:
· geometrical characteristics of the gear train designed;
· data to monitor the accuracy of the gears;
· data to estimate the gear strength (allowable and actual voltage as in the contact and bending endurance calculation teeth, and the teeth in the calculation of the maximum load on the action);
· degree of loading gear on these kinds of stresses.
Estimator (a program for calculating the gear) allows you to perform two types of calculations:
· designing new gear for a given load, durability, desired gear ratio and other parameters;
· check the specified gear strength.
In the first case, the estimator first transfer designs (in our version - on the basis of conditions to ensure contact strength), that is, defines all of its geometric characteristics, including module and spacing, and then to check on the strength of all kinds of stress.
In the estimator of the second embodiment is not used for design, but only for testing the strength of the transmission, the geometric characteristics of which are already known or pre-defined.
For the two types of calculations in the dialog box Calculations toothed cylindrical gear are two options provided for data input:
Each type has its own form of payment report with its source data and its own characteristics of presentation of calculation results as well as its report templates.
Cylindrical Gearing Strength Analysis
 Library: Calculations - Spur gears - Cylindrical Gearing Strength Analysis
In what follows the parameters and characteristics related to the gear, given the index 1; relating to the wheel - the index 2.
The initial data are encouraged to use:
· typical transmission loading mode (GOST, features 32, p.106.) or load sequence diagram (GOST, features 14, p. 63);
· the torque on the shaft of the wheel gear - T2, N * m (if the load is variable, then how current torque accepted most of long-acting);
· Wheel speed - n2, min. - 1;
· the gear ratio gear set - u;
· the type of gears (spur, helical, herringbone);
· tooth angle -  ;
;
· offset coefficients source generating circuit - x1 and x2;
· transmission type: reversible or irreversible. By reversing or non-reversing gear transfer meant a two-way or one-way load application;
· term transmission service - Lh, h;
· material and a method of chemical-thermal hardening of gear wheels and transmission calculated;
· the location of the calculated gear in the drive according to the scheme in accordance with GOST, p. 58, fig. 13a.
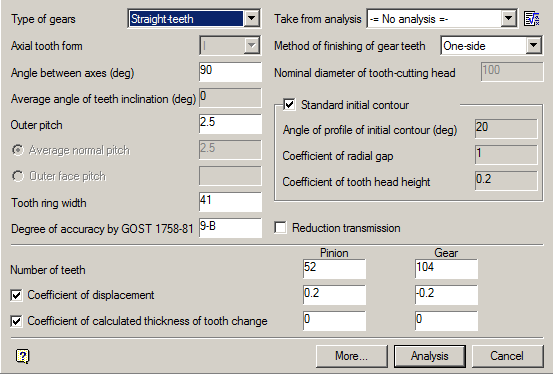
Enter the initial data for the design of the transmission by means of the dialog box, shown in figure:
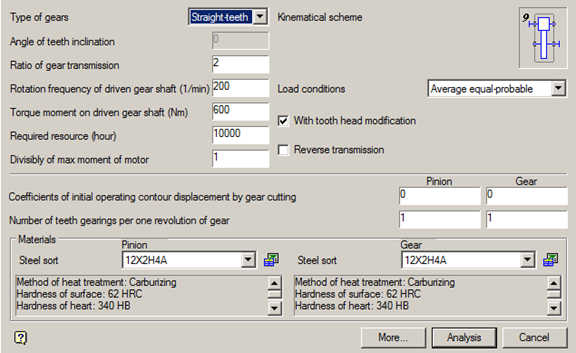
By clicking on the button "More ..." open additional field data input for the reverse gear, the method of machining the tooth flank and its heat treatment.

The drop-down list of the gear types allows you to select one of three options: spur, helical, herringbone or wheel:

When choosing a helical or herringbone wheels in the "angle of the teeth" should enter a value in degrees of the desired angle of inclination of the tooth line in the recommended range (typically 8-22 ° for helical and 25-40 ° for chevron wheels).
If this field is left blank, the program installs by default a certain angle, which lies within the specified limits. Most often, this angle imposed by the previous calculation. It can be changed either directly or by subsequent adjustment calculation.
The field is filled in accordance with the terms of reference and the expected characteristics of the engine.
Rotation frequency of driven gear shaft (1/min)
The field is filled in accordance with the terms of reference and the expected characteristics of the engine.
Torque moment of driven gear shaft (Nm)
The field is filled in accordance with the terms of reference and the expected characteristics of the engine.
The field is filled in accordance with the terms of reference and the expected characteristics of the engine.
Divisibly of max moment of motor
The field is filled in accordance with the terms of reference and the expected characteristics of the engine.
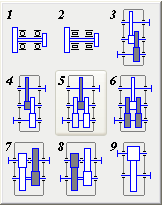
Click on the field with the image of the kinematic scheme reveals nine schemes of gear reducers, from which you can choose the layout of the gear pair corresponding to the estimated case. Estimate the case highlighted in white.
Load conditions is selected from the dropdown list.

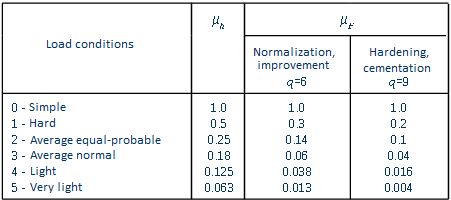
Table of values of equivalence ratios for each loading mode:
Check "With tooth head modification"
It makes active group of source data "" Reverse transmission ".
Koefficients of initial operating contour displacement by gear cutting
Number of teeth gearings per one revolution of gear
Materials of gears and their characteristics are selected from a drop down list or from the database.
 Go to the database by clicking on the appropriate button to the right of the selection grade of steel.
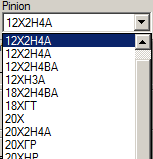
Type of material selection group gears and wheels:

For convenience, you can select to see comments to the selected material.
The group contains the following fields:
· Rotation frequenct of driven gear shaft
· Torque moment of driven gear shaft (Nm)
· Required resource (hour)
Check "Transitional surface is polished"
Check "With tooth root inclusion"
Grinding of transitional surface conditins
Activity fields depends on the chosen material

If the transition is made grinding surface of the teeth, the required grinding mode can be selected from the corresponding drop-down list.
The user can edit any of the selected characteristics of the material, but it should be borne in mind that some of them change must be accompanied by a change in the other. In particular, the limit of endurance in bending teeth, corresponding to the basic number of stress cycles  for normalized, improved nitrided and wheels, as well as the base value limit stress teeth flexural maximum load
  for normalized and improved gear depends on the hardness of the teeth.
Therefore, changing the hardness of the wheel teeth with a chemical-thermal treatment, need to change their performance and durability. If you are not sure of the correctness of the total introduced to them changes, to edit the properties of the material is better to use filling material properties dialog box (see. below).
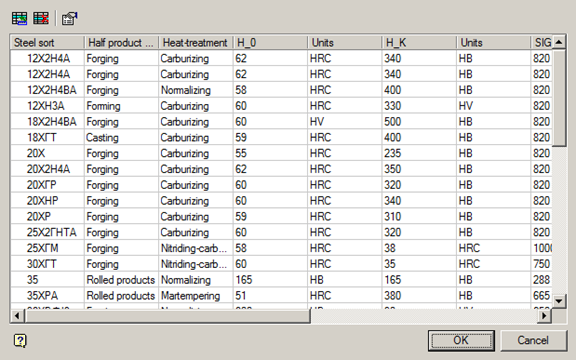
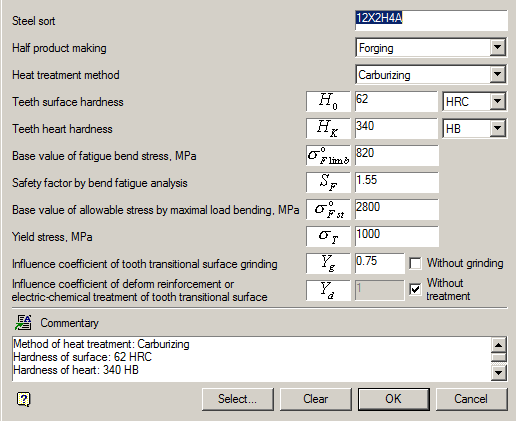
The options available in the database, with the following designations are:
|
|
Half product making |
|
|
Units of measurement of hardness. |
|
|
The choice of heat treatment of the material. |
|
SIGMA_Flimb |
The limit of endurance in bending teeth, corresponding to the basic number of stress cycles MPa. |
|
Y_g |
Factor which takes into account the impact of the transition surface grinding teeth (GOST, table. 13, p. 10.4). |
|
Y_d |
Factor which takes into account the effect of strain hardening or electrochemical treatment of the transitional surface of the tooth (GOST, table. 13, p. 10.5). |
|
S_F |
Calculated safety factor based on the bending resistance (GOST, table. 13, p. 11). |
|
SIGMA_Fst |
The safety factor in the calculation of the teeth on the maximum flexural load (GOST, table. 18, n. 2). |
|
SIGMA_T |
Yield gear material MPa. |
|
H_O |
Surface hardness of the teeth. |
|
H_K |
The hardness of the teeth of the core. |
Updating and changing the base made by the three buttons located in the upper left Materials:
 New material
 Delete material
 Edit
Edit
For example, click on the New button opens a dialog box material properties of the material. For the correct insertion of a new material in the base must be filled in all the fields of the window.

In the field of material input parameters are copied to the properties of the previously selected metal. Thus, the user is given the opportunity to create its database in relation to specific production and technological capabilities of the enterprise.
All fields of the material properties of a window can be filled by the user immediately. However, given that in accordance with GOST limits contact endurance and stamina for bending at various thermochemical treatment of steels defined by different dependencies, at this stage it is advisable to fill the database go to the next dialog box, activating the button Select ...
The corresponding filling material properties dialog box (the button Select ...) allows you to select the characteristics of aggregated groups of materials and thermochemical treatment (upper left field of the window).
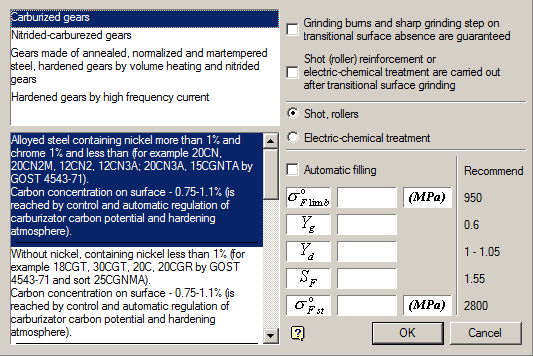
These can then be clarified in relation to specific groups of steels (bottom left margin of the window) and see the calculated values ??of the respective limits of endurance (Recommended field).
We have already said that strength characteristics of the gears of the normalized and improved, as well as nitrided steels depend on the hardness of the teeth. Therefore, in determining the strength characteristics of gears exposed to these types of chemical and thermal hardening, in advance, before calling the dialog box Filling material properties in the Properties dialog box material required hardness of the teeth must be installed.
In this case, the parameters  and
and  in the "Filling the properties of the material" will match hardness adopted.
If you agree with the results, it sets a flag in the autocomplete field.
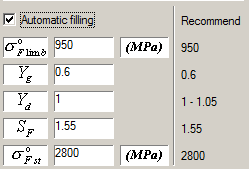
The calculated parameters are transferred to the corresponding open field characteristics of the particular material. These fields can be filled manually, if desired.
Removing material from the base

Selecting material removal cancel command does not work. To return to the base material should be re-entered.
Edit the properties of the material

When you select the Edit window Materials Database of materials displayed earlier submitted Material Properties dialog box.
In the Comment field user input, one way or another characterizing the material.

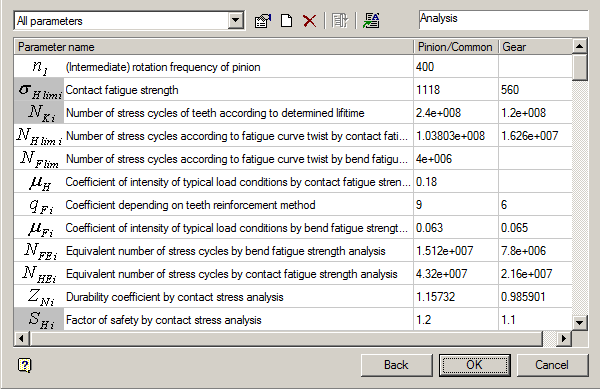
This dialog shows all the parameters of how the raw data and calculate results. By clicking the Back button, you can return to the dialog box to make changes to the initial calculation data.
Strength calculation of spur gearing
 Library: Calculations - Spur gears- Strength calculation of spur gearing
Operation of the second embodiment does not use calculators for design, but only for testing the strength of the transmission to the known or predetermined geometrical parameters.
Checking calculations has its own form of the report and data input. In all other respects similar to the method described above.
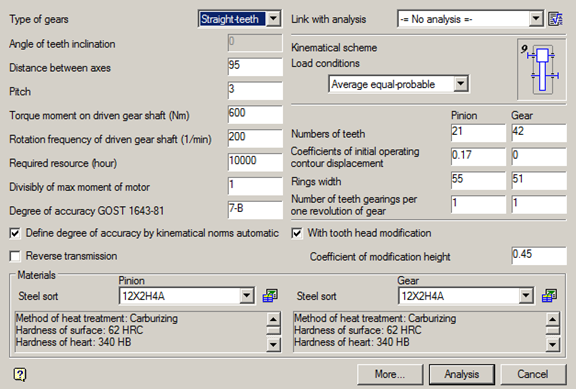
By clicking on the button "More ..." open additional field data input for the reverse gear, the method of machining the tooth flank and its heat treatment.

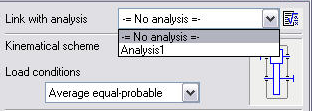
From this window, click on the icon  You can go to the Calculation wizard. If any payments were previously carried out, their results can be accessed using the drop down menu.
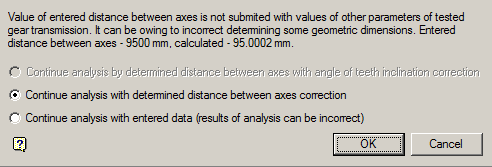
If the entered spacing does not match the entered calculation parameters, then when it changes you will receive a message which will be offered options:
· Continue with the correction of the calculation specified center distance
· Continue with the entered payment data (calculation results may be incorrect)
The drop-down list of the gear types allows you to select one of three options: spur, helical, herringbone or wheel:

When choosing a helical or herringbone wheels in the "angle of the teeth" should enter a value in degrees of the desired angle of inclination of the tooth line in the recommended range (typically 8-22 ° for helical and 25-40 ° for chevron wheels).
If this field is left blank, the program installs by default a certain angle, which lies within the specified limits. Most often, this angle imposed by the previous calculation. It can be changed either directly or by subsequent adjustment calculation.
Rotation frequency of driven gear shaft (1/min)
The field is filled in accordance with the terms of reference and the expected characteristics of the engine.
Torque moment of driven gear shaft (Nm)
The field is filled in accordance with the terms of reference and the expected characteristics of the engine.
The field is filled in accordance with the terms of reference and the expected characteristics of the engine.
Divisibly of max moment of motor
The field is filled in accordance with the terms of reference and the expected characteristics of the engine.
Degree of accuracy GOST 1643-81

The two-stage and three-stage gear units can be run on deployed or coaxial. In simple circuits deployed, each stage consists of a pair of gears. The disadvantage of such schemes - an uneven load distribution between the bearings, so that the resulting deformation of shafts occurs the load concentration along the length of the tooth, causing the need for a shaft with high rigidity.
This disadvantage is eliminated by using bifurcated stages. Preferably in the two-stage gear as forked use a high-speed, and in the three-stage - the intermediate stage.
The large width of a low-speed stage in these cases does not cause a significant load concentration along the length of the tooth due to the symmetrical arrangement of gears with respect to the supports.
Load conditions is selected from the dropdown list.

Table of values of equivalence ratios for each loading mode:

Materials of gears and their characteristics are selected from a drop down list or from the database.
 Go to the database by clicking on the appropriate button to the right of the selection grade of steel.

Type of material selection group gears and wheels:

For convenience, you can select to see comments to the selected material.
The group contains the following fields:
· Rotation frequenct of driven gear shaft
· Torque moment of driven gear shaft (Nm)
· Required resource (hour)
Check "Transitional surface is polished"
Check "With tooth root inclusion"
Grinding of transitional surface conditins
Activity fields depends on the chosen material

If the transition is made grinding surface of the teeth, the required grinding mode can be selected from the corresponding drop-down list.
Bevel Gearing Strength Analysis
 Calculation wizard: Bevel Gearing Strength Analysis.
 Library: Calculations - Bevel Gears - Bevel Gearing Strength Analysis
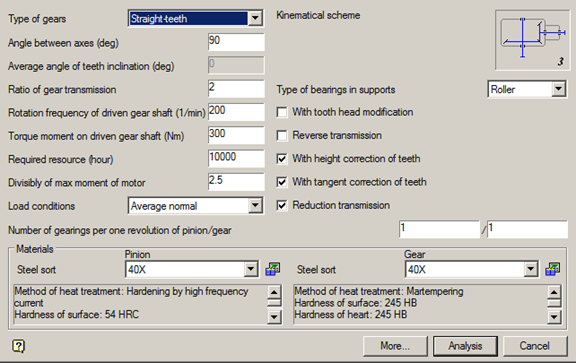
Geometric Calculation of Bevel Gearing
 Calculation wizard: Geometric Calculation of Bevel Gearing.
 Library: Calculations - Bevel gears - Geometric Calculation of Bevel Gearing
Calculation of the geometric parameters and the conical gearing elements can be made based on user input (checking the strength of finished transmission) or on the basis of the strength calculation.
 Main menu: Mechanical - Design - Calulations -
  Static beam calculation.
 Toolbar:
  Calculation beams (toolbar "MCS Calculations").
 Command line: MCBEAM.
 Library: Calculations - Loads - Beam.
 Library: Calculations - Loads - Calculations - Beam calculation (applied to the finished beam affixed to the supports, loads and moments, see. Calculation).
 Calculation wizard: Baem calculation (applied to the finished beam affixed to the supports, loads and moments, see. Calculation).
This command is used to calculate the strength of the direct beam of constant cross-section.
After selecting the command a dialog box opens beam calculation.
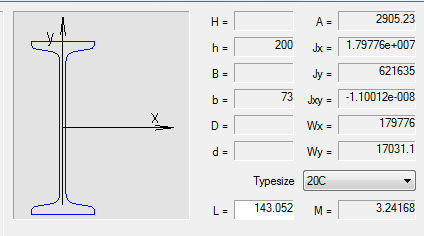
1. On the left side of the dialog box, select the cross-section of the beam.
2. Right set sectional dimensions and length L beams. For visual selection of the beam length, click  Dynamic input at the bottom of the dialog box.
3. Enter the physical characteristics of the material and the cut rotation.
4. Specify moment and the loads acting on the beam.
There are three ways to specify the section:
|
|
|
For the standard section of the database items, choose Type size from the dropdown list.
1. In the dialog box, double-click the desired type of load or moment.

2. Select insertion point or the load bearing on the beam. At the time of selecting the insertion point move the cursor to the beam to install dependencies.

3. Set the parameters or load bearing in the dialog box.
· Support
Point - the distance from the starting point to the point of insertion beam bearing in millimeters. Use keys to select the type of support.
· Concentrated load
Position - the distance from the starting point to the point of insertion beam load, mm.
Value - the value component of the load in the selected direction, H.
Point - the distance from the insertion point to the point of load application of the load in the selected direction, mm.
Diagram on the left side of the dialog box explains the meaning of the input parameter.
Tabs on the top of the window are used to select the coordinate system in which the values are set:
 Rectangular
 Spherical
 Cylindrical
· Distributed load
Position - the distance from the starting point to the point of insertion beam load, mm.
Length - length of the section, which is attached to a distributed force, KN/mm.
In input fields, set the value component of the load in the selected direction, H.
Diagram on the left side of the dialog box explains the meaning of the input parameter.
Tabs on the top of the window are used to select the coordinate system in which the values are set:
 Rectangular
 Spherical
 Cylindrical
· Moments
Diagram on the left side of the dialog box explains the meaning of the parameters.
X, Y, Z - the components of the bending moment , KN*m.
C - distance from the starting point to the point of insertion beams torque , mm.
Click  Calculate beam at the bottom of the dialog box to perform the calculation.
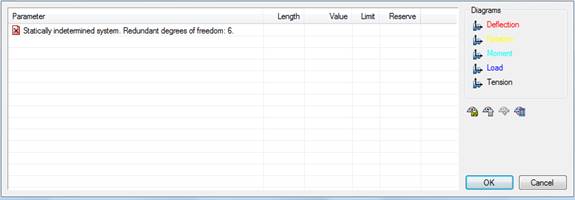
Table of results of calculating comprises calculating the maximum deflection and stress values as well as the distance from the starting point of the beam to a point at which the maximum of each parameter.
To insert a drawing graphs strain and effort to select the desired type of graph for each feature:
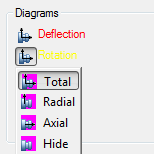
Button  Apply adds graphics drawing.

Button  Save Report. Stores the results of the calculation of the beam to an external file.
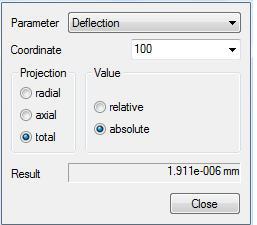
Button  Calculate value. Opens Meaning, in which parameters are calculated at an arbitrary point of the beam.
Button  Export diagrams. Sell calculation results in a table in Construction Site 23. After selecting the command, specify the insertion point on the drawing table.
Calculate section characteristics
 Main menu: Mechanical - Design - Calculations -
  Calculate section characteristics.
 Toolbar:
  Calculate section characteristics (toolbar "Calculations").
 Command line: MCGCS.
This command is used to calculate the geometric characteristics of the complex cross-sections with respect to arbitrary axes.
1. Call command.
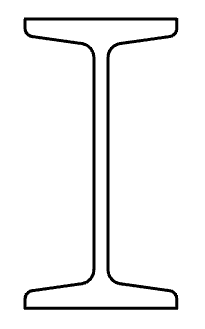
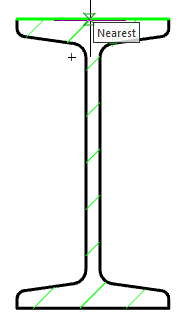
2. In the drawing, then click the area closed by one of the ways:
· Clicking inside a closed area. Automatically determined by the outer loop of the closed area, and the area is added to the set.
· Clicking on a closed polyline or circle. Adds the area bounded by polyline or circle.
|
Note: |
Repeated selection of the field deletes it from the set to calculate the cross-section. |
3. Complete the selection by clicking the right mouse button or the Enter key.
4. Specify the origin point or [central axis]. If you select the "central axis", the point of origin is automatically set in the center of mass of the cross section with an angle of rotation equal to 0 (step 5 is skipped).
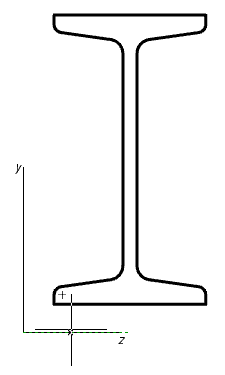
5. Specify the angle of rotation of the coordinate system.
6. In the dialog box "Geometric section properties" Adjust the characteristics included in the summary table of the results.
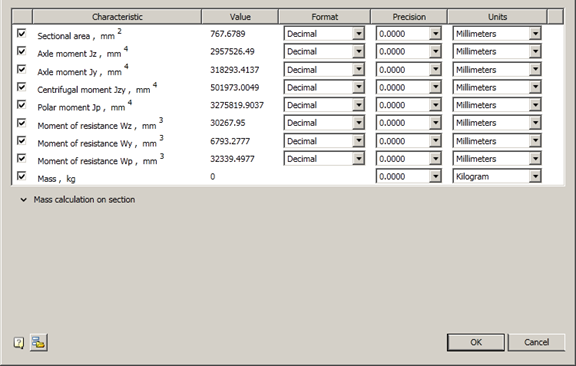
For each characteristic, you can customize your format (except weight), and the accuracy of the unit.

To calculate the weight you need to open an additional menu "Mass calculation on section", which indicate the product density and length. When you specify the length of the need to expose the units. When you specify the density, you can use the base materials, by clicking on the button  "Material selection".
Customized settings display characteristics (size, precision, units) stored for later calculations sectional characteristics. To return to the default settings, press the button  "Load default settings".
7. Click "OK" in the dialog box and enter the drawing an insertion point of the table with the calculated parameters.
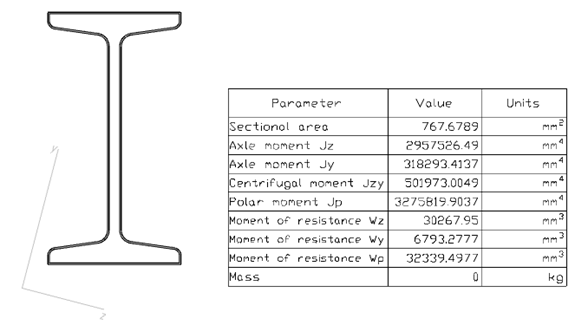
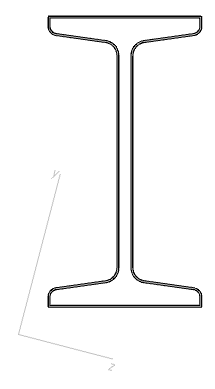
After the calculation is added to the drawing object nanoCAD Mechanica 23, comprising a cross-section schematic outline and the main central axis. The lengths of the axes are proportional to the values of the corresponding axial moments of inertia.
 Main menu: Mechanical - Design - Calculations -
  Fastening calculation.
 Ribbon: Mechanical - Design -
  Fastening calculation.
 Toolbar: Calculations -
  Fastening calculation.
 Command line: MCBOLTDESIGN.
Verification calculation to determine the admissibility of the selected thread for the specified load conditions.
The basis, when checking calculations bolts adopted methodology contained in the textbook "Kuklin NG, Kuklin GS machines Details - M .: Vyssh.shk., 1987".
In calculating the user is able to take into account the recommendations of "GOST 1759.4 - 87 Bolts, screws and studs Mechanical properties and test methods.".
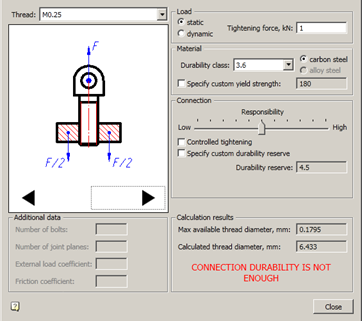
When you call the command, a dialog box "Calculation check bolt". By controlling the arrows in the graphic menu, select the version of the calculation.
1 variant - The connection is tightened during assembly, there is no external load.
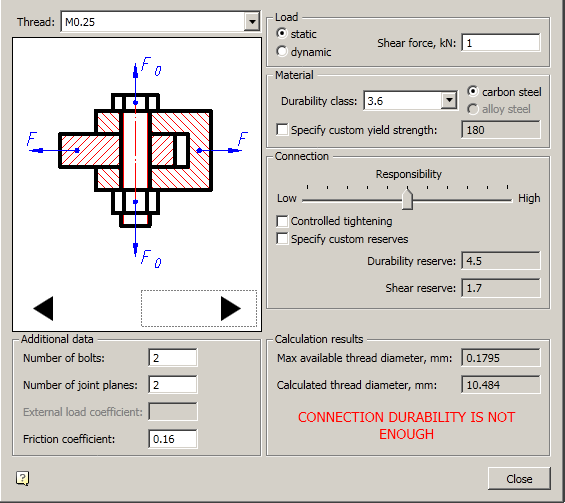
2 variant - Compound loaded transverse force.
3 variant - Connections are tight and loaded external axial tensile force.
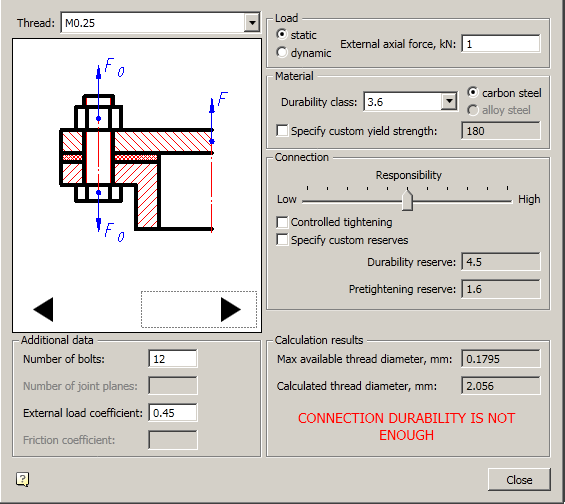
Depending on the options available to calculate the various parameters.
|
Note: |
The result of the calculation is the message in the "Results of calculation" on the sufficiency of the bond strength. Furthermore, in the "calculation results are" options are displayed: Max. valid thread diameter (mm) - inner diameter of the thread selected bolt; Current thread diameter (mm) - the calculated internal diameter. If the first parameter is greater than the second, the strength is sufficient. |
Teams of calculating dimensional chains are located in the Object Manager nanoCAD Mechanica. To access it you need to switch to the "Dimension chains" panel object manager nanoCAD Mechanica.
· Toolbar
It proposed two methods of calculation: minimum-maximum method and the probabilistic method.
Measures involved in the calculation may be specified as one or several separate drawings.
The project is monitored dynamically link with the size of the drawings. If the size is different from the drawing or missing from the drawing, it will be highlighted in bold.
Calculated closing unit contains the calculated values of the nominal value, the upper ES and lower EI deviations. All dimensions are displayed in the 1: 1 scale.
In edit mode, you can create new master links, remove the entire branch graph, edit size, surface combine different branches (the movement of the nodal points "grips").
At the end of the table shows the calculation of the calculated deviations closing units.
It supports only linear dimensional chains.
Nominal closing link:

n - number of units, except the locking.
The upper limit deviation of the closing unit:

Lower limit deviation of the closing unit:

Nominal closing link:

ES - upper deviation;
EI - lower deviation;
n - number of units, except the locking.
The upper and lower deviation of the closing level will be symmetrical:

t - risk ratio.

P - risk percentage;
?2 - coefficient taking into account the law of distribution of real denominations.
Adopted 1/9 for the Gaussian distribution, for the distribution of 1/6 and 1/3 Simpson for uniform distribution.
|
Note: |
When calculating the maximum / minimum denomination of an unknown can be set on a single link, the upper deviation of the unknown - on the other, the lower - in the third. The probabilistic method such chain is not counted. |
 Project
Group size may contain several cycles of size.
 View thumbnails while editing the graph.
 Drawing
Group sizes, taken from a drawing. Path Drawing dropped, compared to only a name, that is the size of the C: \ Work \ Drawing1.dwg and C: \ Acad \ Drawing1.dwg will be placed in the same group "Drawing1".
 Dimension
Dimension added to the drawing.
Next to the icon indicates the value of the size tolerances. Instead, you can enter any name (for example, the width of the bearing).
The value of the dimension can be viewed in a tooltip. If the dimension of the drawing was linked text below the dimension line, its name will be assigned automatically. To display the nominal, enter an empty name.
The dimension can be edited by double-clicking or from the context menu.
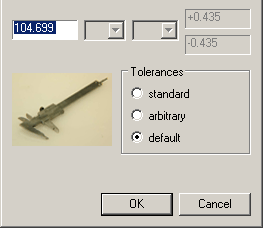
 List of adjacent dimensions
The icon reflects the relative position of a given size (blue rectangle) and the adjacent (green rectangle).
 Unknown closing link
You can add a calculation for editing or drawing a graph by adding the size in which the value and / or deviations are "?". It contains a list of increases  or decreases
  dimensions (presumably).
 Switching link
It contains the calculated values of the deviations:
· face value  ;
;
· upper deviation  ES;
ES;
· lower deviation  EI.
EI.
|
Note: |
When you edit or delete any dimension calculated counting all units nulled.In project dynamically tracked due to the size on drawings. If dimension different from the drawing or missing from the drawing, it will be highlighted in bold fonts. Again take the value from the drawing context menu (How drawing). |
 Create calculation
If the button is not available, were selected to be the calculation start or finish editing the graph.
The project can be any number of calculations. They are translated independently. By default, a calculation is named "New".
 Open project
Projects are stored in a special format SPJ. If an existing project is not saved, it will be lost. Warnings are not provided.
Project files can be transferred to other folders on other machines. The relative path from the project file to the file associated drawings should not be modified so as not lost contact with the size of the project in the drawings.
 Save project
 Save project as…
 Add dimensions
From the selected objects based on the current filter will be selected either all or only the horizontal or only the vertical dimension. In the column all sizes will be rotated horizontally.
 Change filter
Setup select the type of dimensions (horizontal, vertical).
 Start/finish editing
The beginning and the end of the calculation of dimensional chains. This command displays the current drawing on the graph for the current calculation.
Pressing will clear the graph with the drawing and will in the calculation of the changes.
In edit mode, you can create new master links, remove the entire branch graph, edit size, surface combine different branches (the movement of the "grips").
 Set to drawing
Makes changes made in the current account, the original drawings. Warnings are not provided!
 Get from drawing
Fixes dimension values to those given in the drawings.
 Calculate chain
Calculates all master links the current calculation.
 Create report
It puts the current drawing table the report and the distribution schedule tolerances.
 Closing link
Adds closing link. The command is only active during editing of the graph. After pressing need to sequentially select two surfaces of one or more branches of the graph (in the drawing).
 Non-specified limiting tolerancies

Sets limiting tolerancies for unspecified tolerances. Limiting tolerancies is selected from the drop down menu.
 Calculation method
Accurate (high / low) and probabilistic.

Risk - the probability that the real value of size does not provide a closing link in getting the calculated border. The possible values are from 32% to 0.001%. Recommended - 0.01%.

The law of distribution of real values of size. From left to right: a normal distribution (Gaussian), triangular (Simpson) and linear (uniform).
If the law is unknown, it is recommended to take a linear distribution.
 Help...
1. By clicking on the icon "Create calculation" in the browser creates a folder sizes. By default, it is named "New".


2. After clicking on the icon  "Add dimensions" the drawing must specify the dimensions involved in the calculation.
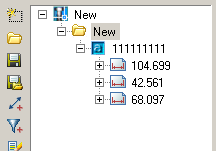
Information on the selected size appears in the browser.
3. Press  "Start/finish editing".
4. Becomes available team  "Closing link". Enter the drawing the locking unit (multiple master links).
5. After selecting press the trailing links  "Start/finish editing". The information in the browser changes.
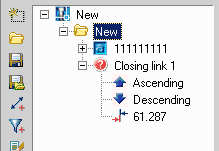
6.  Calculate chain. The browser displays the results of the calculation.
 The calculation results are displayed in a table in the drawing by clicking on the icon "Create report".


 De
De  Es
Es  Fr
Fr  Pt
Pt 


