Drawing design
IDH_MCS_08
 Main menu: Mechanica - Drawing title/borders -
  Drawing title/borders.
 Toolbar:
  Drawing title/borders ( "MCS Drawing title/borders").
 Command line: MCFORMAT, FORMAT.
· Filling in the fields of the title block
· Drawing title/borders recognition
Each format type is an element of the database nanoCAD Mechanica23, which is located in the folder "Drawing border templates" library nanoCAD Mechanica23.
emplates major labels and additional fields are located in the subfolder formats "Title block templates". Renaming or deleting existing items in the folder "Drawing border templates" would make it impossible to insert existing formats.
Insert the format by clicking on the icon  Drawing title/borders. This dialog box appears Format:
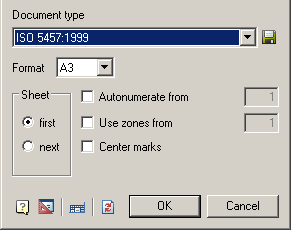
This window is defined by:
· Format.
· Sheet.
· Autonumerate from.
· Use zones from.
· Center marks.
After selecting the type of document, as well as the size and orientation of the sheet is inserted into the selected format.
· To edit the frame size, double-click the left mouse button on the contour of the frame.
· To edit the text in the title block, double-click on the text of the left mouse button.
· To edit entries in the title block, double-click the left mouse button on any line of the title block.
If you remove the first sheet of the scope of its information from the title block is automatically transferred to the second sheet.
To save the settings template attached stamps and their parameters in the database, click on the button  , then enter the path stored in the database and the template name.
To change the line frames the template files, edit the frames and other fields.
"Document Type" - Select the document type from the list format template in section database. Depending on the document type is changed appearance and availability of individual dialog items "Format".
"Format" - the choice of the size of the sheet on the basis of standard size and multiplicity (not available for the types of documents based on the standard ISO, because the multiplicity inherent in the choice of format).
"Leaf" - the choice of template title block for the first or subsequent sheets.
"Orientation" - select page orientation (vertical or horizontal).
"Autonumerate from" - Automatic Numbering sheets. It lets you specify the number of the first sheet.
"Use zones from" - avtoprostanovka zones. It lets you specify the number of the first zone.
 Edit main stamp
After you select the document type and size under the proposed set the insertion point of the frame. If you press Enter or right mouse button, the lower left corner of the frame is aligned with the coordinate 0,0.
 Set default stamps - restores the template format those stamps which were overwritten while maintaining format template database.
Filling in the fields of the title block
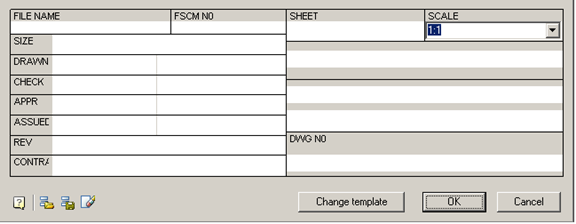
To fill the title block fields and additional graph, double-click on any line of the title block.
The main inscription is filled directly into the dialog box, "Stamp"
While filling in the title block previously entered information stored in the section "History" menu. To open the context menu, place the cursor in an editable field and click the right mouse button.
Recent values can be saved in the section "Recent" menu.
Automatically fill fields of the title block
 Save as default
The command saves the current filling of the stamp in the memory. In the following fields will be filled automatically stamp
 Load defaults
The command loads the stored filling.
 Clear
Clear
The team clears stamp field
 Change template
The command opens a drop-down menu to change the pattern of the stamp.
Drawing title/borders recognition
 Main menu: Mechanica - Recognition -
  Drawing title/borders recognition.
 Toolbar:
  Drawing title/borders recognition ( "MCSRecognition").
 Command line: MCRECF.
Master recognition format enables automatic search and replace formats created from individual primitives nanoCAD, transforming them into an object of the "Format" nanoCAD Mechanica23. Initial primitives are in the drawing.
Recognition takes place in two phases: the first searches for the formats in their dimensions, the second selected title block. Selection is made by comparing the serial patterns of stamps from the library with the existing geometric objects in the drawing. The remaining seals are installed by default. After the successful recognition format graphs stamps are automatically filled with values from the drawing, and the format is placed on the current layer.
Creating custom formats and stamps
Before you create a custom size or stamp is necessary to draw a pattern nanoCAD means in accordance with the required desired view object being created. When drawing templates should adhere to the following rules:
· The template can contain lines, arcs, and circles, text (single-line and multi-line), the objects of the library of standard parts nanoCAD Mechanica23, blocks nanoCAD;
· the thickness of the lines that are assigned to the template thickness is not equal to zero, and not "layer" to be adopted in accordance with the thickness of the closest standard value;
· the color lines and text included in the template will be saved according to the selected values;
· multiline text (mtext) is inscribed in the boundaries of the rectangular area of text is selected when you create it.
You can use overhead lines and graphic objects, which are not drawn when inserting format or stamp in the drawing.
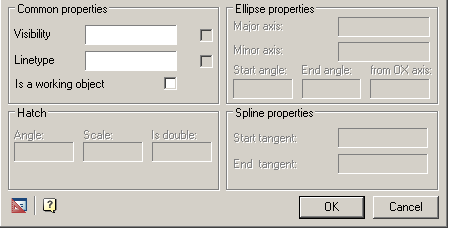
To install a drawing object as a service, use the button  "Set parameter" toolbar MechWizard, select the object, and in the dialog "Object properties" check the box "Is a working object":
· Use the links in the templates
Use the links in the templates
Custom format may contain links to templates stamps available in the library. To add a stamp in the format used by the relevant rules.
Stamp Position and orientation when you insert a drawing format will be determined by the insertion point and orientation of text links:
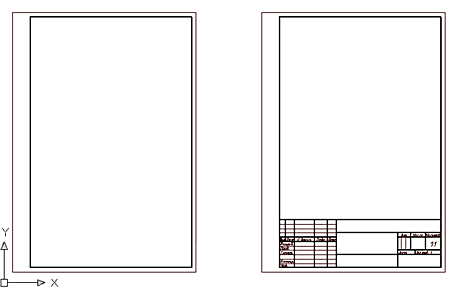
the figure shows the format template added referring to stamp basic inscription. When you insert a drawing format drawn stamp recorded in the library under the specified name.
the format can be added to any number of references to the stamps from the library.
In the pattern of the stamp may be used special signage text fields.
Text added to the template and starting with the single character "$", is recognized as a reference pointer on the field (the Count) input. In the input field of the dialog box, you can edit the stamp to record the text (for example, the name of the developer or check). Name field can contain characters of the Latin alphabet and the national or spaces. Dimensions of the input fields are defined primitives surrounding the insertion point, the reference index. If you found another symbol "$", the text after it considered the description field:
$Field_name [$field definitions].
the contents of the text box will be displayed in the list of object properties.
To limit the size of the input field or eliminate overlapping fields in the dialog, you can use the service line.
To create a stamp based on an existing base in the sample, the sample to be inserted into the drawing by setting in the dialog box "Stamp" mode "Display field names"  . After insertion into the drawing die can be used as the layout of the new stamp.
Standard fields stamps have a description in Russian (GOST), English (ISO) or German (DIN) language, the values of the fields available in the list of object properties.
|
Name |
Description |
Contact with the properties of the document Inventor |
Note: |
|
$Designation |
Description |
+ |
|
|
$DrawingName |
Name |
+ |
|
|
$Drawing type |
Drawing View |
|
|
|
$Material |
Material |
+ |
|
|
$Litera 1 |
Letter 1 |
|
|
|
$Litera 2 |
Letter 2 |
|
|
|
$Litera 3 |
Letter 3 |
|
|
|
$Mass |
Weight |
|
|
|
$DimScale |
Scale |
+ |
Sets the size of generated within the format |
|
$Sheet |
Sheet |
+ |
Changes in the automatic numbering |
|
$SheetCount |
Sheets |
+ |
Changes in the automatic numbering |
|
$Add.text |
Position the additional inspection |
|
|
|
$Author |
Developed |
+ |
|
|
$Control |
checked |
+ |
|
|
$TechControl |
Technical control |
+ |
|
|
$Add.subject |
Last additionally checked |
+ |
|
|
$NormControl |
the Regulatory Control |
+ |
|
|
$Approve |
Approved |
+ |
|
|
$Author (sign) |
Developer Signature |
|
|
|
$Control (sign) |
the signature checking |
|
|
|
$TechControl (sign) |
Signature of the technical control |
|
|
|
$Add.subject (sign) |
Signature additional inspection |
|
|
|
$NormControl (sign) |
Text regulatory control |
|
|
|
$Approve (sign) |
the signature approving |
|
|
|
$Author (date) |
the date of |
+ |
|
|
$Control (date) |
Date of Inspection |
+ |
|
|
$TechControl (date) |
Date engineering controls |
+ |
|
|
$Add.subject (date) |
Date further verification |
+ |
|
|
$NormControl (date) |
Date of regulatory control |
+ |
|
|
$Approve (date) |
Approval Date |
+ |
|
|
$Original # |
Part Number script |
|
|
|
$Sign & date 1 |
Signed and dated 1 |
|
|
|
$Instead # |
Instead, inventory number |
|
|
|
$Duplicate # |
Inventory number duplicate |
|
|
|
$Sign $date 2 |
Signed and dated 2 |
|
|
|
$Reference # |
the reference number |
+ |
|
|
$First use |
the primary use |
+ |
|
|
$Format |
Format |
+ |
|
|
$Enterprise |
Enterprise |
+ |
|
In the pattern of the stamp can be used table nanoCAD Mechanica23. Included in the stamp table when you insert a drawing can be edited as regular tables nanoCAD Mechanica23 (except that the die table can not be modified in the editing mode screen).
Converting from previous versions - In file %ProgramData%\Nanosoft\nanoCAD Mechanica23\DataRO\ru-RU\settings.xml defined fields for name mapping formats of old and new versions. If an entity applies the custom stamps of previous versions, the names of the fields, you can add them into the appropriate section of this file.
Integration with other objects nanoCAD Mechanica23
Tables - Format allows you to use tables as stamps. This preserves virtually all the functionality built-in table.
Universal marker - The values of any fields format can be used in a universal marker.
Dimensions - When you create within the format size, the size takes out set in the title block of the format.
Legend roughness - The format may be associated with the designation of a roughness surfaces unspecified. Icon roughness is automatically transferred to the upper right corner of the format.
Property document - The value of the standard field format is synchronized with the attributes of the file in which it was created.
Technical conditions - Format calculates the coordinates of the columns to accommodate the technical requirements.
Attribute documents TechnologiCS - Exchange values between the fields and the format of the document attributes. You can set the matching fields automatically (by the same name), and then specify manually. Establishing appropriate stored for later use.
Zone format - The format can be calculated, is there any point in it. If so, you can receive the designation area containing the point.
 Main menu: Mechanica - Drawing Title/Borders -
  New border wizard.
 Toolbar:
  New border wizard ( "MCSDrawing Title/Borders").
 Command line: MCFORMATWIZ.
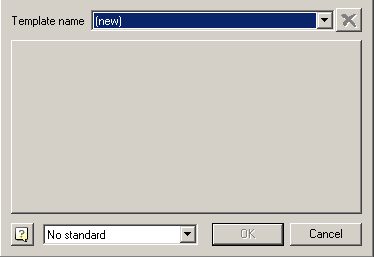
To change the existing format, select it from the drop-down list of templates. The field, located in the center of the panel will be a general view of the selected format.
To add a new format, select the drop down list "Template name" paragraph (new).
Click the left mouse button on the center field, select the drawing created by pre-layout format template, and confirm the selection click OK.
In the dialog box "Format creation" will be recognized image format.
If you create a new format after closing the dialog box by pressing OK, a dialog "Create element", which follows the format and select the name of the folder in the library of standard parts, which will save the created format:
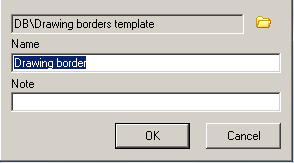
By default the path "DB \ Drawing borders template". If you want to keep the format in another folder, press  and select the folder that appears in your browser.
|
Note: |
See stamp UID by inserting the drawing title block of the database manager nanoCAD Mechanica23.At the command prompt displays the hexadecimal object UID |
Predefined templates are stored in the formats "DB \ Drawing borders template". It is recommended that the new template is stored in the same folder, but when loading the template can be seen the whole base.
Frame custom format has a fixed size - the one set in the template. There is a special recognition mode that allows the use of standard scalable framework with their stamps. To enable this mode, select from the list in the dialog master the standard by which the frame will be built. In this mode, all of the graphics in the template are ignored, except for text and bounding box. The frame can be of any size - in the final format it replaced with standard frame. All texts are considered names stamps. There are two variants of binding stamps:
· If the text begins with the "#" symbol, it is stored offset from the insertion point to the nearest corner of the bounding box.
· If the symbol "#" no stored offset from the text insertion point to the bottom left corner of the bounding box.
|
Note: |
Standard sizes have patterns in the database - their patterns are embedded in the program code. |
 Main menu: Mechanica - Drawing Title/Borders-
  New title wizard.
 Toolbar:
  New title wizard ( "MCSDrawing Title/Borders").
 Command line: MCSTAMPWIZ.
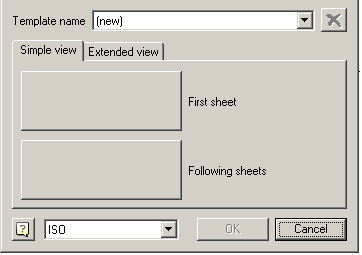
To change an existing stamp, select it from the drop-down list of templates.
To add a new format, select the drop down list "Template name (new)".
A template stamp can have up to four different graphical representations: simple and full (advanced) type, including the form of the first sheet and the view for subsequent sheets.
Select one of the tabs: "Simple view" or "Extended view". Click the left mouse button on one of the fields marked with a stamp type, and select the drawing template you created earlier mock punch. Confirm the selection click OK.
In the dialog box "Create stamp" will be recognized image of the stamp.
If you create a new stamp, after closing the dialog box by pressing OK, a dialog "Create element", where you must enter the name of the stamp, and choose a library of standard parts folder in which to save the template created by the stamp:

New templates stamps recommend that you save to the folder "DB \ Drawing borders template \ Title block templates".
If the layout for the die table to use, it will retain its editing capabilities even being introduced to the format. For these tables are only supported editing in place.
The pattern die may be up to four types:
· the main type of the first sheet,
· he main type of follow-up sheets,
· an expanded view of the first sheet,
· an expanded view of the next sheet.
The texts, starting with the single character "$" are recognized as the names of the fields. The editing dialog stamp they will be displayed in the form input fields. Name field can contain spaces and extended characters. Dimensions of the field defined primitives surrounding the point of its insertion. If you found another symbol "$", the text after it considered the description field. This text will be displayed in the list of properties:
$<name_field>[$<description_field>]
To limit the size of the field or eliminate overlapping fields in the dialog, you can use the service line. This is a primitive with zero thickness or line marked as the utility from mcWizParam. Set the parameter.
If you set daw "Work object", then stamped on tobrazhatsya these primitives will not.
To create a stamp based on an existing base in the sample, the sample to be inserted into the drawing, and in his dialogue press  "Show Field Names". View selected stamp button "View".
After that, the object can be divided (explode), edited and used as the layout.
The dialogue is a choice of the standard, which is taken from a stamp. This standard is used for the selection of the frame formats in recognition of the primitives.
 Main menu: Mechanical - Tables -
  Tables.
 Ribbon: Mechanical - Symbols -
  Tables.
 Toolbar:
  Tables (on toolbar "Tables").
 Command line: MCTABLE.
Causes dialog box to insert a new table.
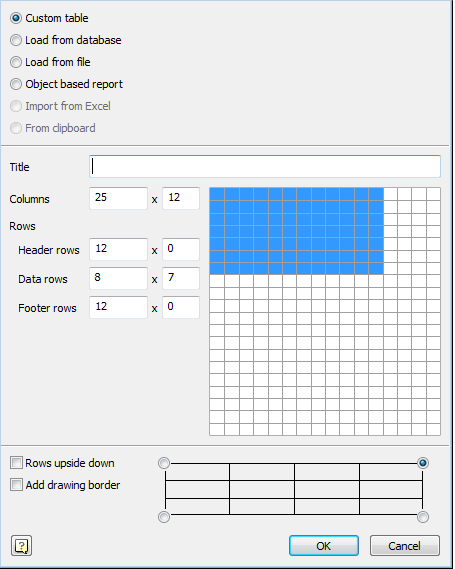
· To create a custom table, select Custom. In input fields specify the dimensions of the created table, or on the layout, drag the mouse to the right as many rows and cells as required. When subsequent editing the number of rows, columns, cell sizes can be changed.
· To insert a standard table, select load from database. You can insert a standard table of the base elements Building site . In the dialog box, select the table you want. Database elements Building site is available for all major types of standard tables.
· To insert a table from a file, select Load from file.
Click Browse and select the file table.
Supported formats:
· tbl - tables files
· dat - data file or a text file
· mdb - database Microsoft Access
· xls - Spreadsheet Microsoft Office Excel
· xlsx - spreadsheet Microsoft Office Excel 2007
· csv - table cell separated by commas
· txt - standard text file
· xml - XML document
· odf - OpenDocument Format.
When loading a table of xlsx, xls file, you must select the Excel document sheet.

|
Important! |
Select the sheet can be made after a table is loaded from the file. |

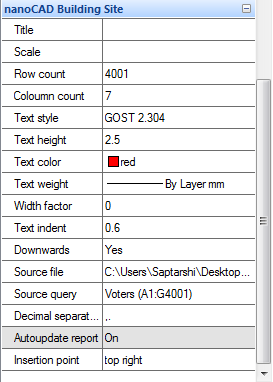
In the properties of a table row source file displays the path to the source file of the table.
Select line Request to enter the desired page of the document. Then in the Table Editor, click  Update Table from an external source.
When loading a table from a file mdb drop-down list displays a list of database query.

|
Note: |
To import tables from files, you can drag a file from Explorer to the dialog table . When you drag a file from Windows Explorer in the imported table is added to the existing table. When you drag a file from Windows Explorer dialog box replaces the existing table to be imported. |
· To generate a report based on a sample of objects, select the objects in the sample report.
·
To make a selection of items, click Select.
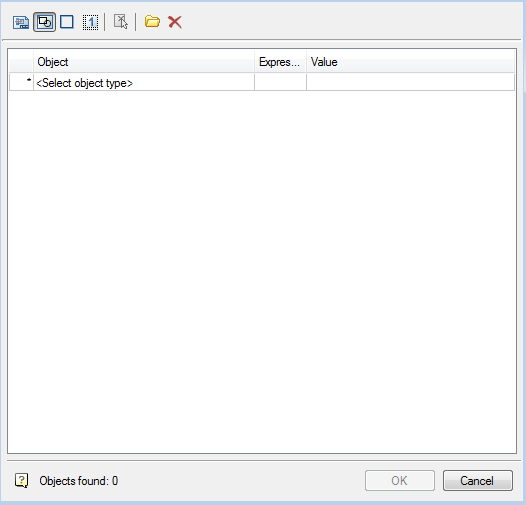
The search conditions are set in the Quick selection dialog.
Further dialogue is given based on what the attributes are and creates a report on the selected objects.
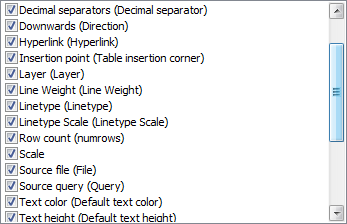
Includ attributes for the report in the list by selecting flags
· All- selects all attributes
· None - the choice is removed from all the attributes
· Invert - inverted selection attributes
The table is created with a template report form
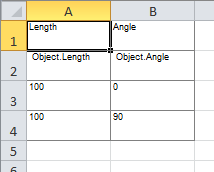
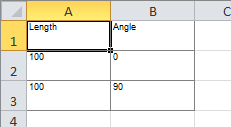
=Iff(Exist(Object."Autoreport");Object."Autoreport";"")
This formula checks whether there is a line for the attribute named Autoreport, and displays its value in a cell. Otherwise, leave the cell blank.

The number of columns in the table determined by the number of selected attributes.
· To import a table from Excel, select Import from Excel. To activate this item, the document should be opened.
· Select the insertion point of the table.
· 
· Select the numbering of rows in the table.
· 
If the switch rows upside down is enabled, the line numbered in reverse order.
· When the checkbox  after you insert the table will start a dialogue format.
· Click OK and the insertion point on the drawing table.
|
Note: |
If the drawing pre-select a group of objects, and then run the |
 Main menu: Mechanical - Tables -
  Import table from Excel.
 Ribbon: Mechanical - Symbols -
  Import table from Excel.
 Toolbar:
  Import table from Excel (on toolbar "Tables").
 Command line: MCTABLEEXCELIMPORT.
Transmits data from an open book MS Excel.
· In an open Excel worksheet, select the cells whose data you want to import into a table nanoCAD Mechanica 23.
· Go to the nanoCAD, editor of the table, and then click Import tables from Excel.
· Data will be transmitted to the table.
 Main menu: Mechanical - Tables -
  Export table to Excel.
 Ribbon: Mechanical - Symbols -
  Export table to Excel.
 Toolbar:
  Export table to Excel (on toolbar "Tables").
 Command line: MCTABLEEXCELEXPORT.
Designed to transmit tabular data in MS Excel. After clicking on the button opens a new Excel workbook and it migrates all the tabular data with formatting cells established in the table.
|
Important! |
The tables nanoCAD Mechanica23 not to Excel the following data: · Blocks nanoCAD · Formatted text · Formulas that do not match the format of Excel |
 Main menu: Mechanical - Recognition -
  Table recognition.
 Ribbon: Mechanical - Utilities -
  Table recognition.
 Toolbar:
  Table recognition (on toolbar "Recognition").
 Command line: MCRECTABLE.
Table recognition enables automatic search and replace tables created from individual primitives nanoCAD object "Table" nanoCAD Mechanica23. Sources are primitives for drawing.
1. Use the command table recognition.
2. Specify the drawing point at the table.
The table is created in the current layer. Dimensions of the recognized table are rounded to integer values.
Text belongs to the workpiece table is recognized as the values of the respective cells of the table.
Real dimensions of the original graphics are multiplied by the scale design, so if it turns out the table with zero height lines, you need to change the scale clearance in accordance with the size of the original graphics.
Editing a table in the drawing
 Main menu: Mechanical - Tables -
  Edit table in-place.
 Ribbon: Mechanical - Symbols -
  Edit table in-place.
 Toolbar: Tables -
  Edit table in-place.
 Command line: MCIPEDITTBLIPEDITTBL.
 Shortcut: CTRL+RBM on table frame.
When editing a table on-screen, the "Edit Table" toolbar appears.

The active cell is highlighted with a green frame. The text entered into the cell is automatically pre-pressed.
 Group cells.
Serves to combine adjacent cells into one.
Procedure:
· Call command.
· Pick the first corner point of the selection.
· Pick second corner point of selection.
· Selected cells will merge.
 Ungroup cells.
Undoes the grouping of a previously merged cell from multiple cells.
Procedure:
· Call command.
· Pick the first corner point of the selection.
· Pick second corner point of selection.
· Selected grouped cells that fall within the selected area will ungroup.
 Split cells.
Serves to divide cells into several smaller cells.
Procedure:
· Call command.
· Pick the first corner point of the selection.

· Pick second corner point of selection.

· In the "Split" dialog box that appears, enter the required numerical values for repartitioning.
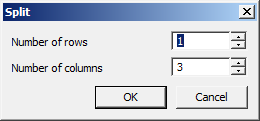
· This will result in a new breakdown.

|
Note: |
When using the "Split" command, the height and width of adjacent cells may be lost. |
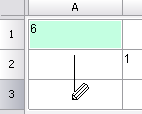
 Pencil.
Serves for splitting cells into several by creating additional borders.
Procedure:
· Call command.
· Pick the first point of the dividing line on the table border.

· Pick the second point of the dividing line on the table border.

· The cells that the dividing line will pass through will be split into new cells. Each cell is independent.

 Add row. Adds one row at the bottom of the table.
 Add column. Adds one column to the end of the table.
 Insert row. Adds one row to the current position of the table cursor.
 Insert column. Adds one column to the current position of the table cursor.
 Delete row. Deletes the row containing the selected cell.
 Delete column. Deletes the column that contains the selected cell.
 Row properties. Changes the height of the row containing the selected cell. A dialog box is called up in which to specify the line height in millimeters.

The "Start new page" parameter splits the table in an arbitrary place, i.e. where the cell is selected. Other pagination methods are available in the full editor interface.
 Column properties. Changes the width of the column that contains the selected cell. Enter the column width in millimeters in the dialog box.
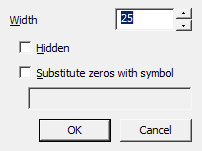
The "Hidden" option hides the selected column. You can return visibility to a column from the full editor interface.
The "Substitute zeros with symbol" parameter replaces the null values of the column cells with the row data. In this case, the format of the cells must be numeric.
 Cell properties. Calls up the "Cell Properties" dialog box, which configures the properties of the selected table cell.
 Cells properties. Setting properties of a group of table cells. Select the required cells and in the appearing "Cell Properties" dialog box set the parameters of the selected table cells.
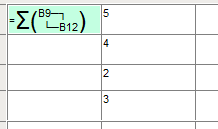
 Sum
Sum
Calculates the sum of the selected area.
Procedure:
· Select the result cell.
· Call the command.
· Pick the first point of the marquee.
· Pick the second point of the marquee.
· The formula will be entered into the result cell.
 Selective sum
Calculates the sum of the selected cells.
Procedure:
· Select the result cell.
· Call the command.
· Specify cells. Press "Enter" to finish.
· The formula will be entered into the result cell.
 Quit. Exits the table screen editor. You can also exit the on-screen table editor by right-clicking on an empty space in the drawing.
The interface is opened by double-clicking on the table, or by selecting the "Edit" command from the context menu of the selected table.
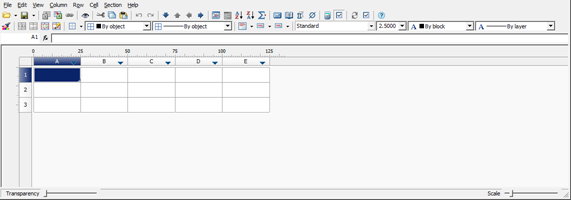
The dialog box contains:
· main menu;
· toolbar;
· parted cells with names (addresses) of rows and columns;
· status bar with transparency and scale caret;
The names (addresses) of rows and columns are adopted similarly to the MS Excel spreadsheet editor. Vertical columns from left to right are named in alphabetical order in English letters (A, B, C, D,…, Z, AA, AB, etc.), horizontal rows are named in numbers in order.
When you click LMB on a row or column name, it is selected.


To select the entire table, select a rectangle at the intersection of the row and column names.

The shortcut "Ctrl + scrolling mouse wheel" allows you to change the scaling of the table.
The shortcut "Ctrl + click mouse wheel" sets the default table scaling.


When "View sorting" is enabled, sort buttons appear on the right side of the column headings. This sorting is intended to improve the convenience of entering data in the spreadsheet editor and does not affect the state of the table in the drawing.
The button has three states: "Not", "Ascending", "Descending".
|
Not |
|
|
|
Ascending |
|
|
|
Descending |
|
|
Sorting features:
· Enabling sorting on one column disables sorting on other columns.
· Rows are sorted whole, not just the column.
· Strings are sorted within a section.
· The merging of cells is not broken.
· After enabling view sorting, the vast majority of commands are blocked. Allowed: exit, edit single cells and change sort mode.
Cell color
|
|
- cell containing expression; |
|
|
- non-editable cell, for example, in a report; |
|
|
- cell with an error in the expression; |
|
|
- cell containing report section data; |
Filling adjacent cells with data
To speed up data entry into the table, automatic data filling functions are used. The spreadsheet editor can automatically continue a series of numbers, combinations of numbers and text according to a given pattern. You can quickly fill in different types of data series by selecting multiple cells and dragging the fill handle.

Filling cells with a sequence of numbers or combinations of numbers and text according to a given pattern:
1. Select the first of the filled cells.

2. Enter an initial value for a range of values.

3. Enter a value in the next cell to set the fill pattern.

For example, if you want the sequence 1, 2, 3, 4, 5 ..., enter the values 1 and 2 in the first two cells. If you want the sequence 2, 4, 6, 8 ..., enter 2 and 4. If you need sequence 2, 2, 2, 2 ..., the second cell can be left blank.
As the sequence is completed, it continues as shown in the table below.
|
Initial value |
Continuation of the series |
|
1, 2, 3... |
4, 5, 6 ... |
|
1st period, 2nd period |
3rd period ... |
|
Product 1, Product 2 |
Product 3 ... |
4. Highlight cell or cells containing seed values.

5. Drag the fill handle over the range you want to fill.

The cells will be filled with the specified sequence of numbers.

To fill in ascending order, drag the handle down or to the right. To fill in descending order, drag the handle up or left.
File
· Open file... - loads table data from a file. Files available for download: * .tbl, * .dat, * .mdb (only for 32-bit Windows), * .txt, * .csv, * .xml, * .xls, * .xlsx. When you select an Excel file, only the first sheet of the workbook is inserted.
· Open database... - opens a dialog of library to select a table saved in the database.
· Save as file... - writing a table to an external file *.dat, *.txt, *.cvs, *.xml, *.xls.
· Save to database... - writing the table to the base of elements.
· Edit Form... - opens the form editor. Using the form, you can filter data, control the composition and style of the table.
· Show Form... - opens the table filter form.
· Imtort from Excel - the command transfers the results of calculating tabular data from an open MS Excel workbook. The content of the active sheet or a selected range of cells is transferred.
· Export to Excel - the command is designed to transfer tabular data to MS Excel. After clicking the button, the "Conversion options" dialog opens. After specifying the options, a new Excel workbook is opened and all tabular data is transferred into it, while maintaining the cell formatting set in the table.
· Close - saves changes and closes the editor.
· Close without saving - closes the editor without saving changes.
Edit
· Undo - undo the last action.
· Redo - redo the last undone action.
· Cut - cuts data from selected cells to the clipboard.
· Copy - copies data from the selected cells to the clipboard.
· Paste - pastes data from the clipboard.
Pencil - serves for splitting cells into several by building additional borders.


· Select material... - This tool is designed to insert into a table, technical requirements and technical characteristics of a formatted line-record for material and assortment. Clicking on the button brings up the "Material" dialog box.
· Auto calculate expressions - controls the mode of automatic recalculation of values of table cells. By default, the auto-recalculation mode is on.
· Recalculate - serves to recalculate data in a table after editing cell values or correcting formulas.
· Auto update reports - controls the mode of automatic recalculation of the report. The mode is on by default.
· Reports - update of the report.
· Synchronize - updates the table with data from a linked file. Available if the table was loaded from a file. For correct synchronization, the data changed in the file must be previously saved.
View
· Show rulers - switch, controls the display of the ruler.

· Show expressions -switch manages the formula bar display.

· Formula visualization - switch, controls the display of the formulas in cells.
· Zoom to objects - centers the original report objects in the drawing.
· View sorting - controls the display of the sort buttons of the view.
|
Turned on |
Turned off |
|
|
|
· Calculator... - the command calls calculator.
· Notebook... - the command calls notebook.
Column
· Add column - adds a new empty column after the selected column.
· Insert column - adds a new empty column before the selected column.
· Delete column - deletes the selected column.
· Hidden - switch, hides the column. The column appears in the editor but does not appear in the drawing.
· Properties... - open properties of column.
Row
· Add row - adds a line below the selected one.
· Delete row - deletes the selected row.
· Hide row - hides the line. The line is not visible in both the editor and the drawing.
· Show hidden rows - shows hidden lines. To use the command, you must select several lines between which hidden lines are located.
· Sort ascending - sorts the table in ascending order relative to the selected column.
· Sort descending - sorts the table in descending order relative to the selected column.
· Custom sort... - opens a dialogue "Collections editor".
· Merging and Grouping... - opens a dialogue "Row grouping and merging".
· Start new page - switch, controls the page break before the selected line.
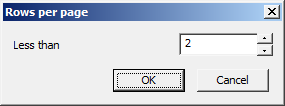
· Limit rows per page... - opens the "Rows per page" dialog, which indicates the maximum number of lines per page. If there are more lines, a page break is inserted.
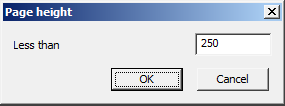
· Limit page height... - opens the "Page height" dialog in which the maximum page height is indicated. If the page height is greater than the specified height, a page break is inserted.
· Single page - the command removes all created page breaks.
· Up to down - switch, controls the data display sequence.
· Properties... - opens string properties.
Cell
· Edit - puts the cell into edit mode.
· Expression... - opens a dialogue "Expression builder".
· Properties... - opens a dialogue "Cell properties".
· Group - merges the selected cells.
· Ungroup - corrodes the selected cells.
· Split... - splits a cell into multiple rows and columns. When the command is called, the "Split" dialog appears.


· Cut - cuts data from the selected cells to the clipboard.
· Copy - copies data from the selected cells to the clipboard.
· Paste - pastes data from the clipboard.
· Clear - clears the selected cells.
· Insert table - pastes a range of cells copied from Excel.
Section
· Header of first page - adds a header for the first page.
· Header of following pages - adds a header for pages.
· Header of last page - add a header for the last page.
· Insert Data section - inserts a data section. If the selected cell is in the data section, then an empty row is added.
· Insert Report section - adds a report section. Used when building reports.
· Footer of first page - adds a footer for the first page.
· Footer of following pages - adds a footer for pages.
· Footer of last page - add footer for the last page.
· Open - allows you to choose one of two commands:
 Open file- loads table data from a file. Files available for download: * .tbl, * .dat, * .mdb (only for 32-bit Windows) * .txt, * .csv, * .xml, * .xls, * .xlsx. When you select an Excel file, only the first sheet of the workbook is inserted.
 Load from base- opens a dialog of standard elements to select a table saved in the database.
· Save - allows you to choose one of two commands:
 Save to base- writing the table to the base of elements.
 Save to file- writing a table to an external file * .dat, * .txt, * .cvs, * .xml, * .xls.
·  Import table from Excel - the command transfers the results of calculating tabular data from an open MS Excel workbook. The content of the active sheet or a selected range of cells is transferred.
·  Export table to Excel -the command is designed to transfer tabular data to MS Excel. After clicking the button, the "Conversion options" dialog opens. After specifying the options, a new Excel workbook is opened and all tabular data is transferred into it, while maintaining the cell formatting set in the table.
·  Update table from external source - updates the table with data from a linked file. Available if the table was loaded from a file. For correct synchronization, the data changed in the file must be previously saved.
·  Pan and zoom view to show objects - centers the original report objects in the drawing.
·  Cut selection - cuts data from the selected cells.
·  Copy selection - copies data from the selected cells.
·  Paste from clipboard - pastes data from the clipboard.
·  Undo last change - undo the last action.
·  Redo last change - redo the previously undone action.
·  Move row down - moves the selected line down.
·  Move row up - moves the selected line up.
·  Move column left - moves the selected column to the left.
·  Move column right - moves the selected column to the right.
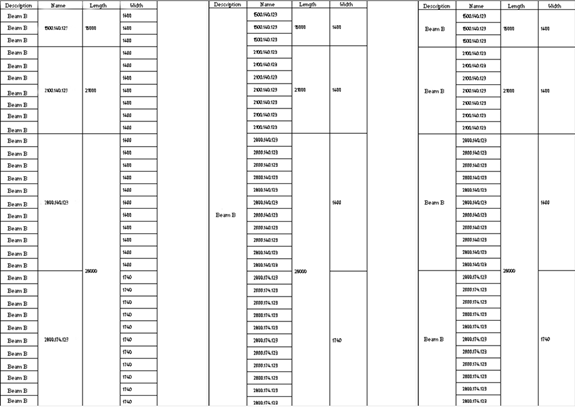
·  Page division -the tool is designed to split the table into separate parts, without losing integrity. With this function it is possible to split a large table in order to fit on the format, and still retain the ability to edit the table as a single object.
·  Open form - opens the table filter form.
·  Sort ascend - sorts the table in ascending order.
·  Sort descend - sorts the table in descending order.
·  Create summary function - sums the contents of the selected cells.


Procedure:
1. Select the cell in which you want to calculate the amount, press  "Create summary function".
2. Select the cells whose contents you want to summarize, press "Enter".
·  Open calculator - the command calls calculator.
·  Open notebook - the command calls notebook.
·  Insert material - This tool is designed to insert into a table, technical requirements and technical characteristics of a formatted line-record for material and assortment. When you click on the button, a dialog box is called "Material".
·  Special symbols - inserting a special character from the list.
·  Recalculate table - serves to recalculate data in a table after editing cell values or correcting formulas.
·  Automatic calculation - controls the mode of automatic recalculation of values of table cells. By default, the auto-recalculation mode is on.
·  Update reports - update of the report.
·  Automatic report update - controls the mode of automatic recalculation of the report. The mode is on by default.
·  Group selection - serves to combine the selected table cells into one.
·  Ungroup selected cells - cancels the merge for the selected cells.
·  Change number of rows and columns - serves to change the number of rows and (or) columns in the selected range of cells.
Procedure:
1. Select one or more cells and call the command.
2. In the "Split" dialog box that appears, enter the desired numeric values to stake.

·  Split table cell with pencil tool - serves for splitting cells into several by building additional borders.


To split a cell with the mouse cursor, specify the start and end points of the segment that will divide each cell it crosses into two.
Right-clicking on a cell border removes that border.
·  Select cell style - calls the window for applying the style to the selected cells.
· Text alignment - serves to control the placement of text in selected cells. Additional buttons are available by pressing the black triangle. The purpose of the buttons is clear from the figure on each of them.

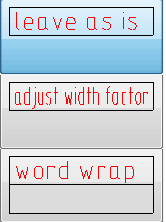
· Fitting text horizontally - controls the horizontal alignment of text in the cell. The following options are available in the drop-down list:
 No horizontal tolerance
 Shrink horizontally
 Word wrap
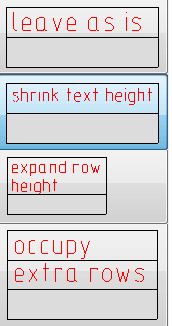
· Fitting text vertically - controls the vertical alignment of text in the cell. The following options are available in the drop-down list:
 No vertical tolerance
 Shrink text height
 Expand row height
 Add virtual rows
· Borders - is designed to control the display of the borders of the selected cells. When you click on the black triangle, additional buttons for displaying borders become available. The purpose of the buttons is clear from the figure on each of them.

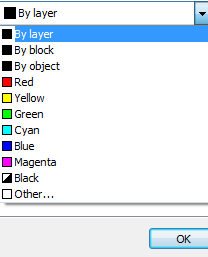
· Color of borders - drop-down list for choosing border colors. To set the border color, you must first select a color and then select the border (using the  "Borders" command) to which you want to apply the specified parameters.

· Lineweight of borders -drop-down list of border thickness selection. To set the border thickness, you must first select the thickness and then select the border (using the  "Borders"command) to which you want to apply the specified parameters.

· Text style - drop-down list for choosing the text style of the cell.
· Text height - drop-down list for selecting the height of the cell text.

· Text color - drop-down list for choosing the color of the cell text.
· Text weight - drop-down list for choosing the thickness of the lines of the cell text.

· Selected cell coordinate field - displays the coordinates of the selected cell (s) and allows you to enter them.

· Row expressions - formula input field. The line is displayed if the "Main menu - View - Show expressions" switch is active.

Gestures are designed for quick access to commands from the main menu of the table editor. Gestures made with pressed RMB in the table editor.
|
Note: |
If when the prompt appears gesture command being executed, you can omit the RMB. |
Right - Calculator

Left - Notebook

Up - Expression

Down - Cell properties

Right hook - Return

Left hook - Cancel

The closed area of the selected cells in a clockwise direction - Connection (merged cells pre-allocated)

Result:

The closed area of the selected cells counterclockwise - Disconnection

Result:

Symbol "z" on select cells - Clear (pre-clean cell is released)

Result:

Editing the size of rows and columns
To modify the row height or column width, move your mouse to the border of the row or column. Click the left mouse button and holding the button down drag the border. The move will be highlighted by the current value of the row height or column width, as well as its new size.
Resize a row or column can also be done in the properties dialog box, selected by pressing the right mouse button on the header row or column.
1. In the properties dialog box, specify the height (width) in millimeters.
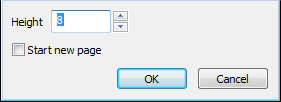
2. In the Properties dialog box of the column switch is available Hidden. With it, you can disable the display of the selected column in the drawing, however, the Editor will be displayed.
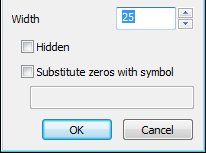
You can also hide a column from the context menu for the column.
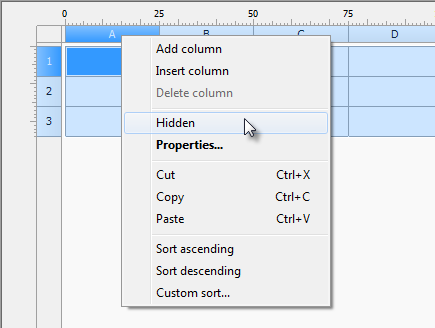
Command string Replace null values (for numeric cells with the value zero, the cell must be a numeric format), replaces the contents of the cells specified text.
|
Important! |
Format text in a cell value is set in the properties of the cell on the tab Content . |
Close the dialog by clicking OK.
In the dialog box Properties parameters are set for table cells.
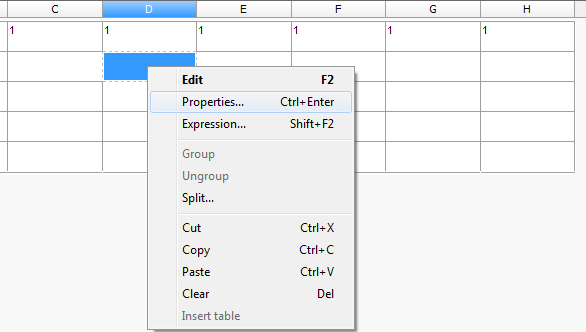
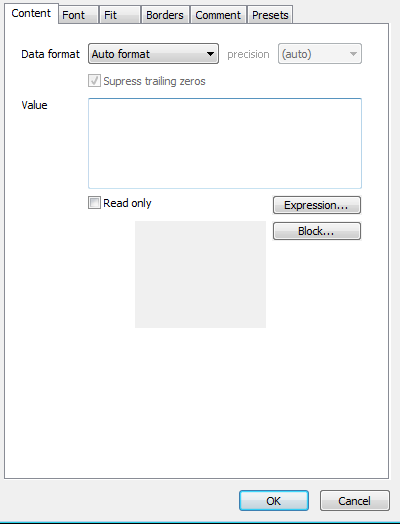
To edit the properties of a single cell in a table full editor, select the desired cell and issue Properties from the context menu or by pressing Ctrl + Enter, double click on the cell, as a gesture to "down" on the cell. The effect of this command is similar Cell Properties screen table editor.
To edit multiple table cells in the full editor, select the desired cells and issue the Properties from the context menu. The effect of this command is the same action as Properties screen editor table.
|
|
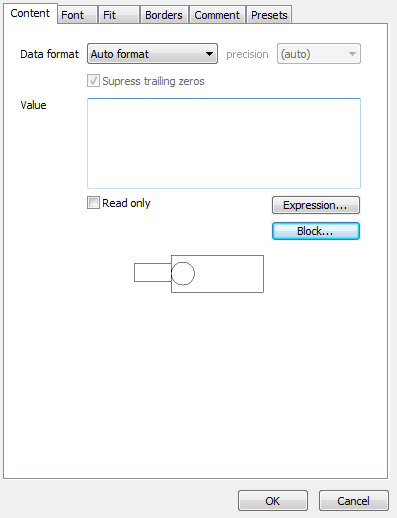
There are six tabs:
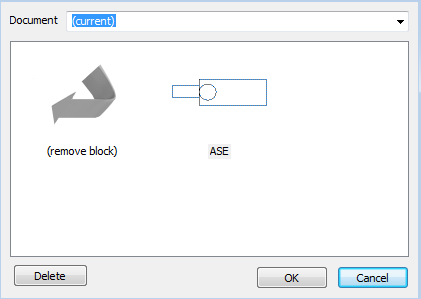
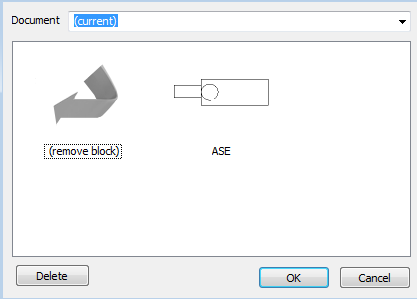
Select the list that appears in the desired unit from the current drawing file. If necessary, select another file using the menu View.
After selecting a unit, it is displayed in the properties window of the cell, as well as in a table cell.
To disconnect the unit, press the Remove block in the block selection.
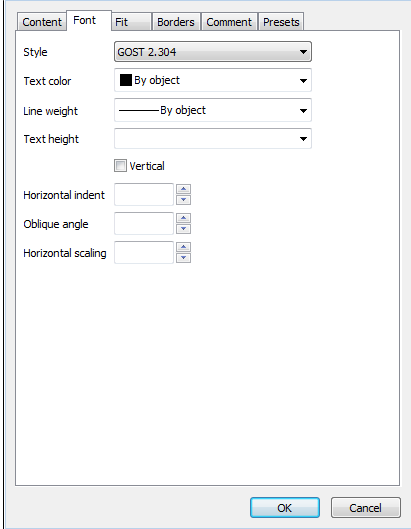
· Bookmark Font. This specifies the text font, color symbols, line thickness, font height, offset from the cell boundaries, the angle that defines the direction of the text, as well as the aspect ratio of the text.
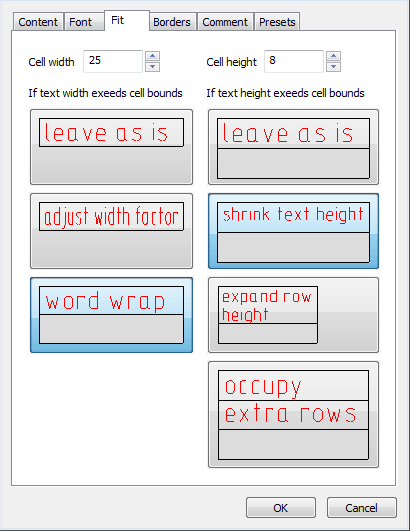
Switch Vertical change text direction to vertical. Empty fields oblique Angle and horizontal scaling means that the values are taken from the text style and horizontal indent - that the value is taken from the table settings. · Bookmark fit
This specifies the cell, cell as well as parameters of inscribing text into the cell. If the text width exceeds cell bounds
If the text height exceed cell bounds:
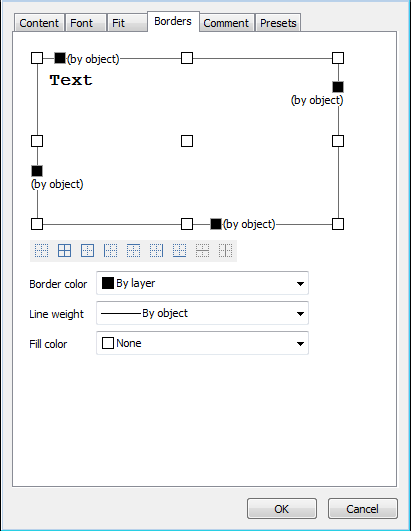
Mode Occupy extra row does not change the number of rows in the table, the desired row is made higher by the required number of times and line. · Bookmark borders. Here you specify the type, color, thickness of the boundary line of the selected cell, you can manage the display of individual cell borders. Enable or disable the display of individual boundaries, you can use buttons
or in the preview by clicking the left mouse button near one of the cell borders. Alignment of text within a cell preview is set by clicking the left mouse button.
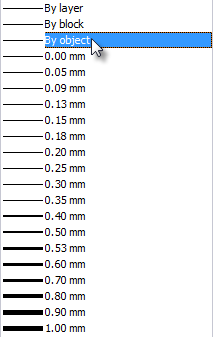
To determine the weight of the individual borders, click the left mouse button on the line (By layer) and choose the thickness of the drop-down list.
Color, line thickness for the cell borders, and cell shading can be set from the menu.
To apply the changes in color and thickness, click on the desired boundary. Can also be selected by using the display boundaries.
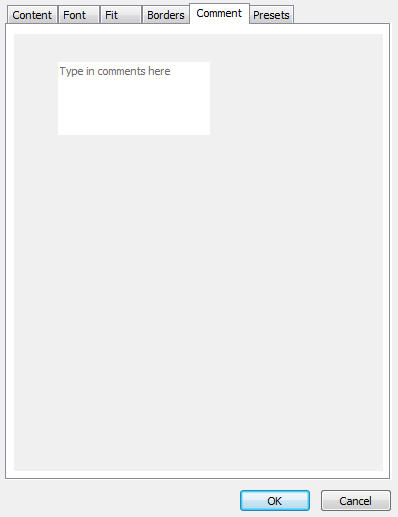
· Flag Comment. A field for entering a comment.
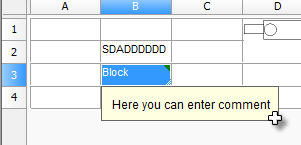
Cell with the comment is displayed in the editor by a green label, which displays a hint when you hover the mouse on it.which is displayed a hint.
· Bookmark Styles. Here you can set the style for the cell.
To create a style, right-click in the blank area of the Style tab, then on the shortcut menu, select Create.
To work with a style template, open the context menu style.
|
Style assignment to table cells is performed by the command  "Select cell style" in the toolbar of the table editor or tab "Fit" in dialogue "Cell properties". he choice of style is carried out in the graphics window. Also, styles can be created and edited using the context menu.
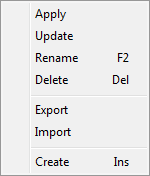
· Apply - the command applies the selected style on the cell (group of cells).
· Update - the command replaces the selected style with the style of the selected cell.
· Rename - command allows you to rename the name of the style. The name of the style is generated automatically during creation.
· Delete - command removes the selected style from the list.
· Import - command imports style in * .mcd format.
· Export - command exports the style in * .mcd format.
· Create - command allows you to create a new style.
Creation order:
1. Set the cell style.
2. Open the style window
3. Select the "Create" context menu command.
4. A new style will be created. The name of the style is generated automatically during creation.
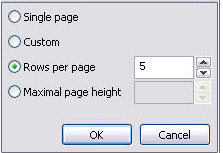
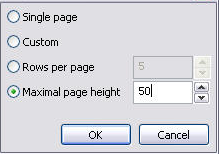
 Division by page. tool is designed to separate the table into separate parts, without losing its integrity. With this feature, you can split a large table in order to place a format, while preserving the ability to edit the table as a single object.
· When the command a dialog box appears page division.
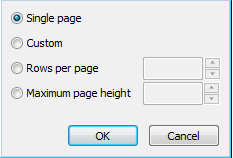
· Switch single page disables table division.
· Select the method of dividing the table:
1. Custom- The table can divided into any parts.

Page break before a row is set by start new command from the context menu.
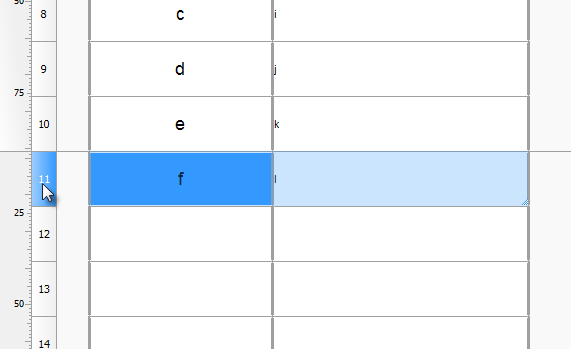
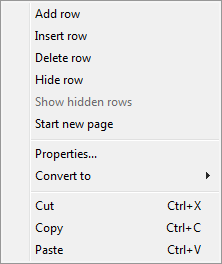
Close the dialog. The editor of the table indicate the boundaries of the gap, with the help of it, you can change the row height.
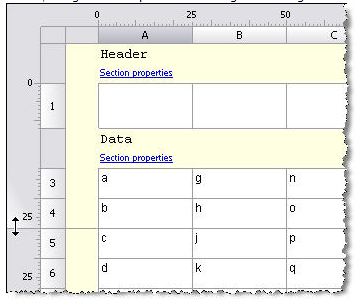
On the drawing table with a gap will be as follows:
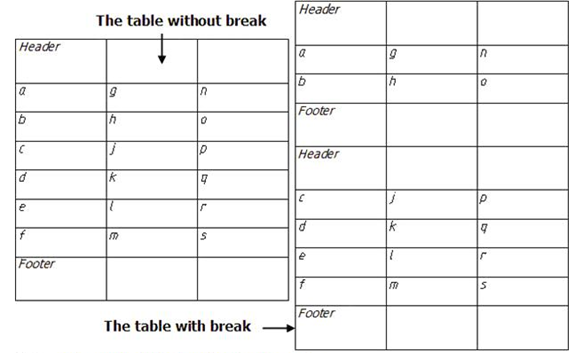
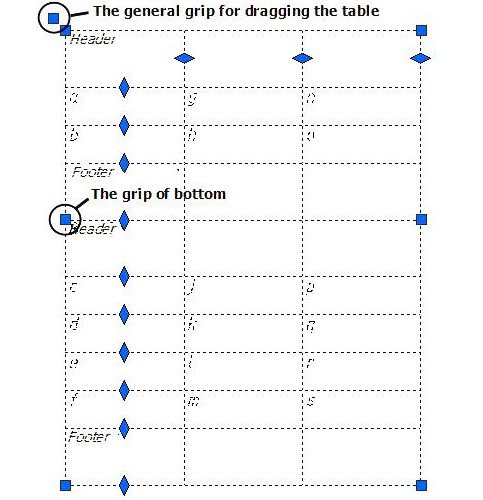
Side of the split table can be moved in the drawing independently, double-clicking on any part of the full table editor opens.
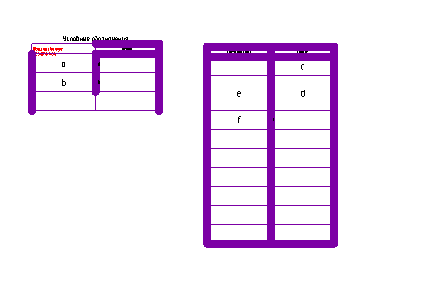
2. By row count enter the desired number of rows in a fragment. Headers do not count.
By table height enter the total height of a fragment, in millimeters, using the current scal.
Dividing the table into parts allows each part tobe moved independently:
The "Conversion options" dialog is a filter that influences the set of transmitted data. Appears when converting a report to data and when exporting a table to Excel.

Converting a report to data
Delete hidden rows and columns - affects the conversion of hidden strings. If enabled, hidden rows are not passed to the data.
|
Table |
Turned on |
Turned off |
|
line 4 is hidden |
no hidden lines |
line 3 is hidden |
|
|
|
|
|
Note: |
The converted hidden lines remain hidden. |
Save report template - affects the conversion of report template strings to data. If enabled, strings are transferred.
|
Table |
Turned on |
Turned off |
|
|
|
|
Export to Excel
Delete hidden rows and columns - the option does not affect the result, since hidden rows are not exported.
Save report template - affects the export of report template strings. If enabled, strings are transferred.
|
Table |
Turned on |
Turned off |
|
|
|
|
|
Important! |
This function is available only in vertical applications based nanoCAD |
Tables BuildIndustry support the use of additional variables defined in a special dialog (form).
Procedure for creating a set of user-defined variables and their use in the table below:
1. In full table editor from the menu Edit invoke the command Form Editor.
2. Create a form with controls and bind each control to a field (variable). More information about the forms, see Form Editor .
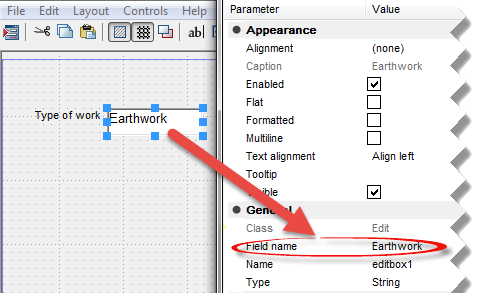
3. Close the form editor and save the form.
4. To set the variable, call the command form.

5. Open your form. Enter the desired values. Click OK.

6. Linking table cells with custom variables by using formulas.
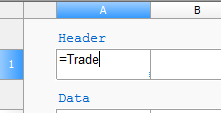
Cell value will be associated with the variable.

Variables can also be used in complex formulations.
Reports are necessary in order to organize the data of objects in the drawing.
Recommended report structure:
· Header of first page;
· Header of following page;
· Header of last page;
· Report title;
· Report template;
· Report;
· Report summary;
· Footer of first page;
· Footer of following page;
· Footer of last page;
To create a report in the table editor, call the command from "Main menu - Section - Insert Report section". The command will create a subsection "Report template".
Additional subsections are added using the "Report template" menu: "Report title", "Report Summary".
Header and footer sections are added from "Main menu - Section".
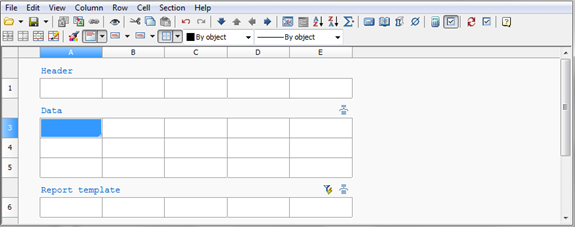
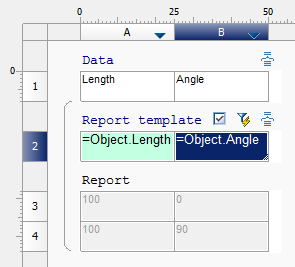
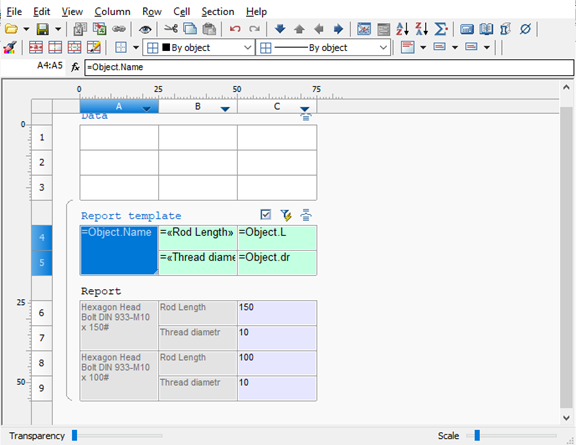
The report template defines the content and appearance of the report; it can consist of one or several lines. A separate copy of the report lines is created for each object. Formulas in the report are calculated using the properties of the selection objects.
The following commands are available in the "Report template" menu (click on the subsection name):
· "Object filter..." - opens the "Quick Selection" dialog for forming a selection of drawing objects. The command is duplicated by the  "Select source objects" button on the right in the "Report template" section.
· "Merging and Grouping..." - opens the "Row grouping and merging" dialog in which the parameters of grouping and merging table cells are configured. The command is duplicated by the  "Group and merge" button on the right in the "Report template" section.
· "Freeze report" - the switch controls the report refresh mode. If the checkbox is selected, the update is performed manually, and the "Update report" command becomes available.
· "Update report" - refreshes the values of report objects, the command is available in manual refresh mode.
· "Report header" - adds a "Report Title" subsection to the beginning of the report, displayed at the beginning of each part of the table.
· "Append Data section" - adds a data section below the report. If the section already exists, an additional line is appended.
· "Append Report section" - adds a new report below the current one.
· "Remove Report" - deletes the report with all associated subsections.
· "Rebuild" - completely rebuilds the report based on the report template. Data entered manually in the "Report" section will be overwritten.
· "Convert to Data section" - the command converts sections of the report to data. Blank lines are not converted. Calling the command opens the "Conversion options" dialog.
· "Report footer" - Adds the "Report Summary" subsection to the end of the report, displayed after each part of the table.
All related subsections of the report are visually combined with brackets.
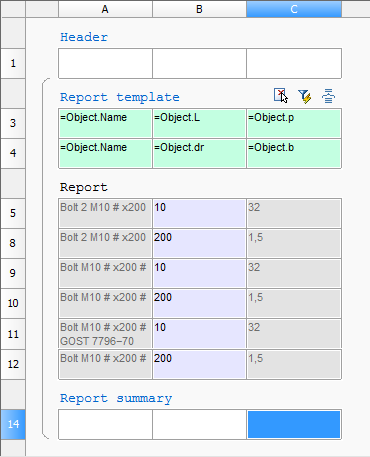
|
Important! |
The report template has absolute priority over custom changes. After the refresh, the report colored by the user will become the same as the specified report template. Automatic report lines corresponding to the collected objects will be automatically formatted strictly according to the report template. |
The "Report" displays the values of the template variables.
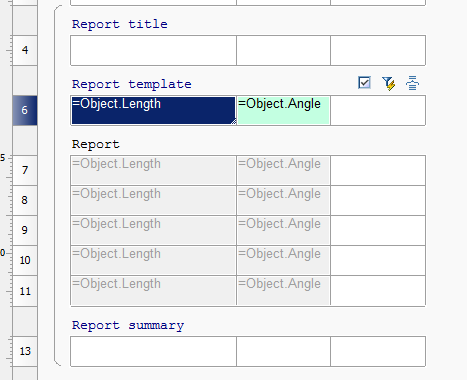
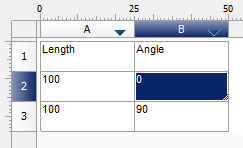
The report contains cells (with a lilac background) containing object data, marked with a special color. Selecting cells highlights the corresponding objects in the drawing.
When editing such cells, the changes will be applied to the very object to which they refer. For instance:
1. Take a Bolt GOST 7795-70 with a length of 50 mm and place a leader on it.

2. Create table, report template and tie to bolt (parametric object).
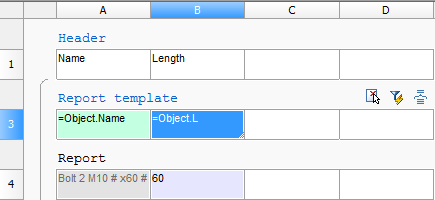
3. Add parameters: Object.Name and Object.L.
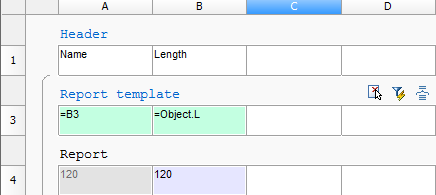
4. Enter the new length, for example 120. Close the table editor.
5. The length of the bolt in the drawing has changed.

The following commands are available in the "Report Title" menu (click on the subsection name):
· "Remove section" - deletes the "Report Title" section.
The following commands are available in the "Report Summary" menu (click on the subsection name):
· "Remove section" - deletes the "Report Summary" section.
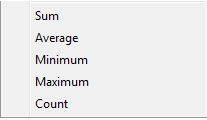
In the context menu of the "Report Summary" cells, there are the following additional commands: "Sum", "Average", "Minimum", "Maximum", "Count".
The commands insert into the selected cell corresponding to the name of the expression. The action is applied to a fragment of a column within one section.
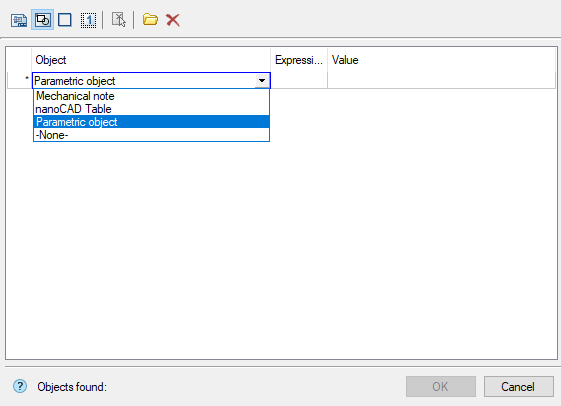
1. Call up the "Quick Selection" dialog box. Use the "Filter Objects..." command of the "Report Template" menu or the  "Select Source Objects" button on the right in the "Report Template" section.
2. Use the "Quick Selection" dialog to filter the objects and click the "OK" button. The selected objects will be associated with the report.
3. Select a cell in the "Report Template" section. In the context menu of the cell, the parameters of the related objects will be available for insertion.
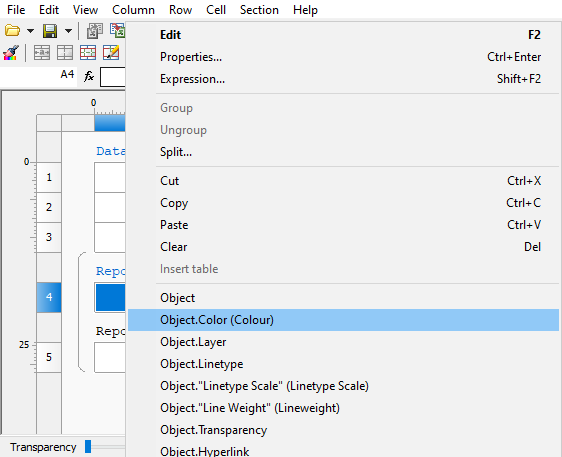
5. Select an option from the context menu. The "Report" subsection will be automatically created. The number of lines in the "Report" subsection corresponds to the product of the number of related objects and the number of template lines.
The report template can consist of several lines. To add rows in the context menu of the "Report Template" row, use the "Add Row" or "Insert Row" commands.
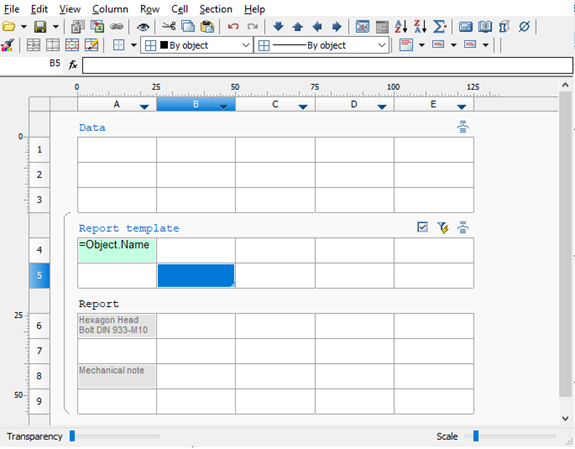
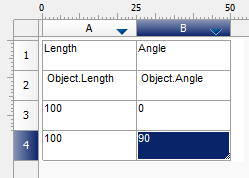
Rows in a report template can be combined. Changes will be displayed in the "Report" section. Let's consider a join using the example table below:
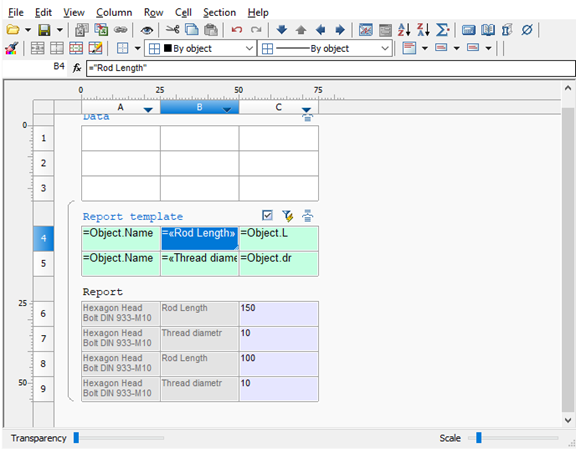
· Select cell A1:A2 and select the "Group" command from the context menu. The selected cells will be grouped.
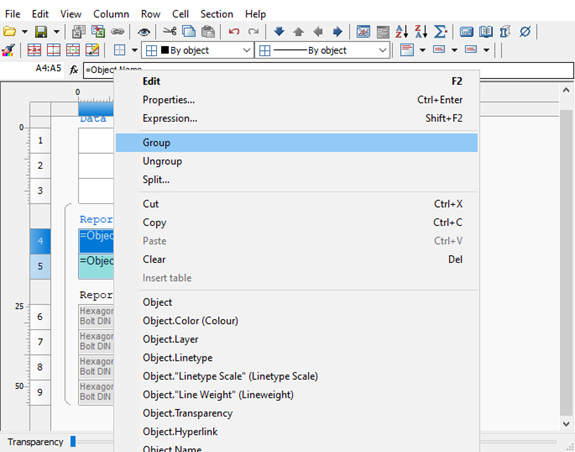
· In the "Report template" menu (click on the subsection name), select the "Rebuild" command. The table will look like this:
6. Fill in all the required cells of the "Report Template".
7. The sample is formed. Close the table editor. Changing the parameters of objects in the drawing will change the values in the report.
Button  Grouping and merging. Report template.
In the Grouping and merging dialog you can specify settings for grouping and merging table cells. Grouping and merging are only applied to cells in the report template.
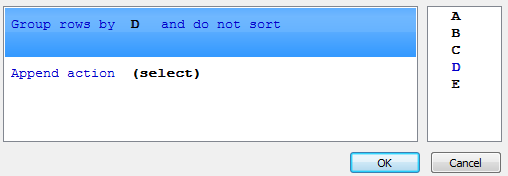
Study the example for how to merge cells.
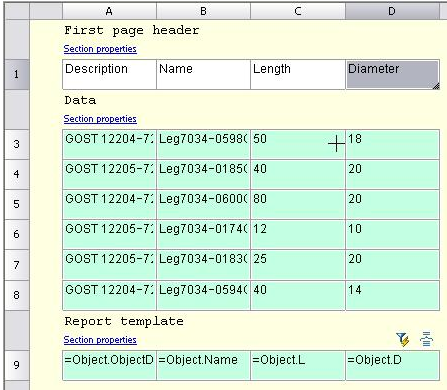
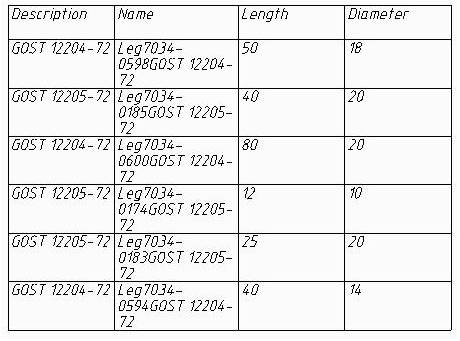
1. In the Grouping and merging dialog box select Append rule and select Merge.
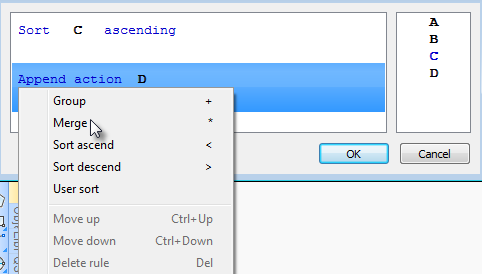
2. Select the column name for the cells you want to merge. Selection is made by double clicking on the column name or by dragging it into the Select field.
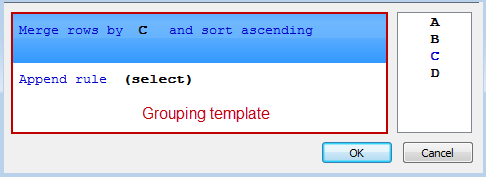
|
Note: |
To select another column, you must drag it into the column list and then select it.You can select several columns then place them in the required order. |
The columns are processed according to the rules of the grouping remplate.
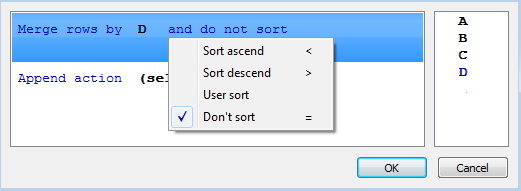
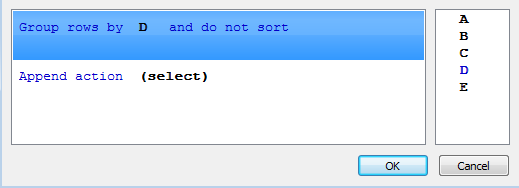
3. If you want to sort, select and don't sortand sorting, and select sort type.
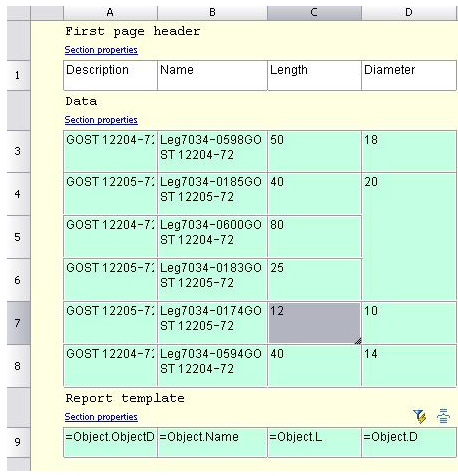
4. Click OK to check the result in the table editor. Cells having identical values in the D column will be merged.

|
|
|
|
|
|
1. In the dialog boxgroupings and click Add Rule select Group.
2. Select the name of the column whose cells you want to group. Choice is either by double-clicking on the column name, or by dragging it into the Select .
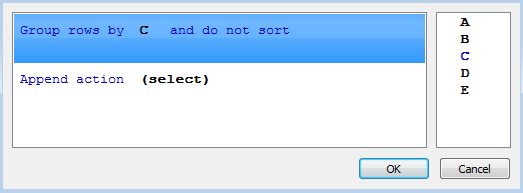
3. If you want to sort, click on the link and sorting, and select the type of sort.
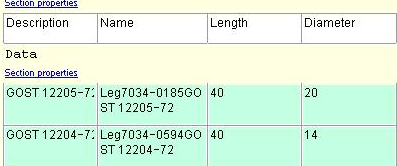
4. Click OK to view the results in the table editor. Table rows that contain the same values ??in column C, will be grouped.
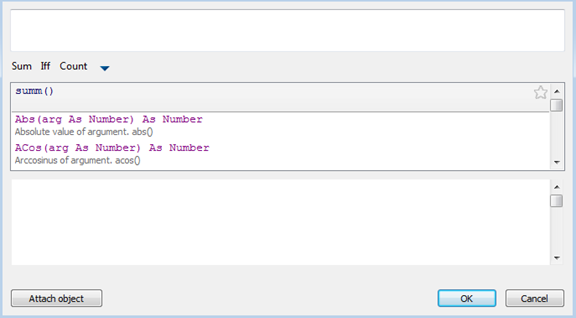
The Formula Editor (Expression Builder) allows you to set parameters, arithmetic expressions, and object property references for a selected table cell.
The formula editor is invoked:
· By clicking on the "fx" button in the formula bar;
· By pressing Shift + F2;
· Right-click upward;
· From the context menu command "Expression ..".
The dialog box consists of the "Expression Input Field", "Formula Templates", "List of Registered Functions", "Quick View Fields" and the "Attach object" button.
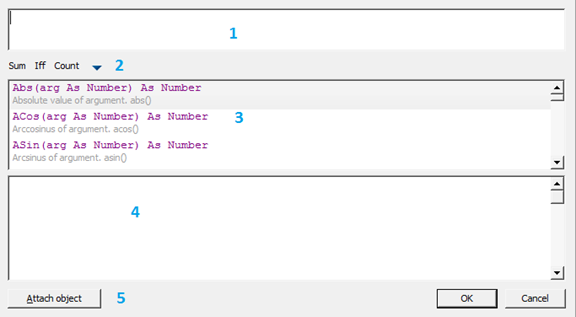
The "Attach Object" button allows you to attach to objects.
At the top of the dialog there is an expression input field, with which you can manually enter any arithmetic expressions, as well as use reserved variables and object properties.
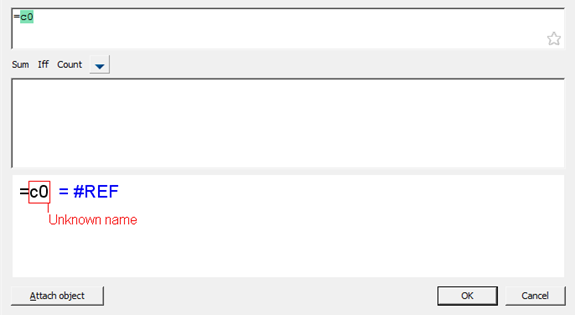
When entering manually, a list of functions and variables containing the word being entered appears in the list of reserved functions; syntax is also checked. If the formula is incorrect, an error warning or hint will appear in the Quick View.
In the quick view field, by clicking the mouse on an expression, the text in the input field related to this expression is selected.
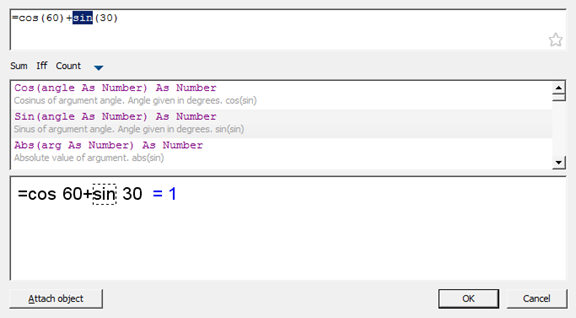
When you click on the  button in the "Expression input field", the entered expression is saved on the formula templates panel for quick recall. Pressing the button again removes the expression from the formula template.
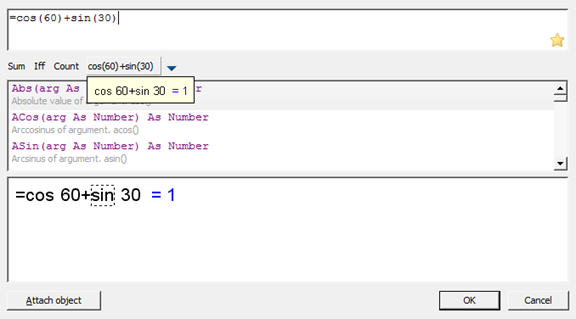
The "Reserved Functions List" contains recently used expressions that are highlighted in yellow. When you click on the  button, expressions are saved in the Formula Templates panel for quick recall. Expressions that are in the Formula Template Bar in the Reserved Functions list will be marked with an asterisk. Pressing the
  button again removes the expression from the formula template.
When you hover the cursor over the button of the saved template, a tooltip will appear with the contents of this template.

In order to insert an expression from the "Formula template", place the cursor in the required position, press the button with the template.
To delete an expression template, click the triangle button and uncheck the required template in the list that appears.
In the formula, you can use any cell values of the properties of another object. If using automatic recalculation of the table, the formula object is automatically recalculated. Each cell can attach one or more objects. Objects are named Object1, Object2, and Object3, … sequentially numbered in the table. If the object is not used in a formula, it will detach from the table at the next calculation, and the object references are renumbered.
Binding properties for drawing objects to a single cell then use the expression or the keys Shift+F2. Available in the context menu of the selected cell.
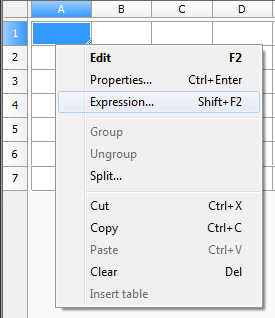
After selecting the command window opens the Expression Builder.
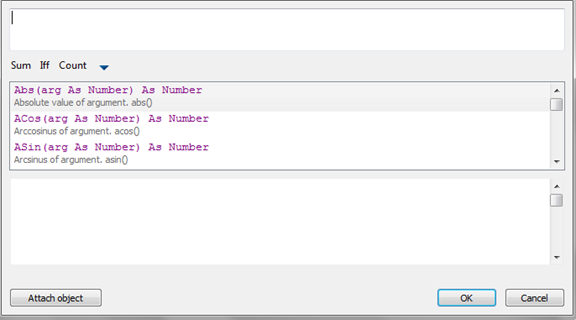
Click Attach it.
Select the object whose data you want to send to the table (eg, Bolt M52). Now the list of expressions appears in the properties of the selected object. Double-clicking on the property (select Object.Name), adds it to the text in a cell. Click OK.
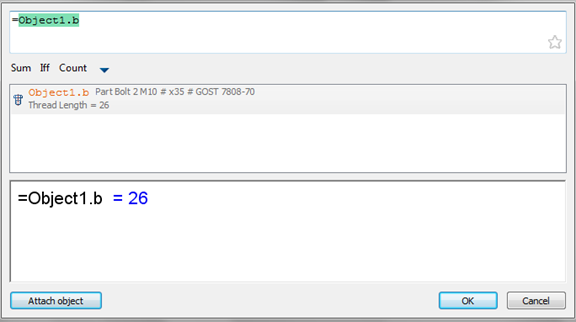
After connection of the facility to the cell the cell color changes (it says that the formula in the cell) and it will display the calculated result, in this case the name of the object:

Functions in the Formula Editor
Mathematical operations:
|
+ |
Addition |
|
- |
Subtraction |
|
* |
Multiplication |
|
/ |
Division |
|
^ |
Involution |
|
sqrt() |
Rootsquaring |
Logical comparison and selection:
|
== |
equally |
|
> |
more |
|
< |
less |
|
! |
not |
|
| |
or |
|
!= |
not equal |
|
>= |
not less |
|
<= |
no more |
|
|| |
or |
|
&& |
and |
math:
Cos, Sin, Tg - trigonometric functions, the argument given in degrees.
Acos, Asin, Atg - inverse trigonometric functions, the result is given in degrees.
Abs - absolute value of (module).
Int - rounding to whole number.
Summ - returns the sum of the values of the variables in a grouped cells.
|
Note: |
When you type a function should pay attention to the opening and closing brackets. |
For example:
Summ(Row) - returns the sum of the numbers of grouped rows..
Summ(Standartnaya_detal.L) - returns the sum of the values ??of the L parameter object "standard part" in the grouped rows.
data conversion:
Str - Data conversion to a string type.
Num - conversion of data into a numeric type.
Frm - convert a numeric value to a string formatted according to the settings of a table column.
For example:
Frm(0.001230) returns a string 0,0012, if the column containing the cell is set to zero suppression and accuracy of 0,0000
selection and comparison:
FmtText - Addition formatted strings.
FmtSub - the creation of a subscript.
FmtSuper - create superscript.
FmtDigit - transfer number in hard copy.
FmtRaw - text without formatting.
DmtDiv - creation of fractions.
If/Iff - The logical choice. Recording Format:
if (Logich_Uslovie; Esli_Istina; Esli_Lozh)
where:
Logich_Uslovie - logical condition using logical comparisons (see above);
Esli_istina - the return value when the logical condition;
Esli_Lozh - return value at default logical condition.
For example:
if(object == Marker_universalny; Marker_universalny.position; "Undefined") . If an object type, which is connected with the cell column has Marker_universalny value, the function returns the position value of the referenced object. Another type of object it returns a string Undefined .
Exist - Checks whether there is a constant: =IF(EXIST(Object.Name);Object.Name;0)
Min/Max - returns the minimum / maximum value listed in parentheses
For example:
Min(maskimalnoe_znachenie; MinValue ) - nourishes MinValue;
Max(maskimalnoe_znachenie; MinValue) - returns maskimalnoe_znachenie.
Count - returns the number of objects (for grouped rows in the table).
For example:
Count() - returns the number of objects associated with cells grouped rows.
Avg - Calculates the arithmetic mean of the arguments. Takes an arbitrary number of arguments understand ranges. Empty arguments are ignored.
Off - returns the value of the cell, given the relative index. The index is written in the format:
Off(string; column)
For example:
Off(-1;2) - returns the value of cell in the table on one line above (-1) and two columns to the right (2) of the current
Cell - the cell returns the value specified absolute index.
Merge (Cells,Expression) - brings together a range of Cells, if Expression is not equal to 0. Returns the value of Expression.
For example:
=merge(A5:C5; "Title") – integrates cell A5 to C5, in the summary displays the text "Title".
SetHeight() – reference line height. In brackets the height value.
Val() - computes the value of the argument.
For example:
=val("A"+"1") - calculates the "A1", and then uses it as another expression (obtained by the value in cell A1). If the argument - not a string, then he comes back, ie =val(10+2) - the same thing =10+2.
=val("summ(A"+Str(off(0;-1))+":D"+Str(off(0;-1))+")") - the amount of cells from rows A to D, the number which is introduced into the cell to the left of the current one. In most cases you can do without val. The classic example, when without it - no way: in a custom form, enter the cell address, then to take the value out of it. Create a variable Addr, associate it with an input field on a form and in the table do so: = val (Addr) function allows recursion: = val (val ("A" + "1")) - to take the value of the cell whose address is recorded in cell A1. Nesting depth is limited to 64.
Geometry(Object) - works as Implement object. Height embedded object shrinks to the line height. Object is taken from the report, or attached to the cell.
SUMM(Section(-1)) - Sum of cells in the current column of the section next to the current.
COUNT(Section(A3)) - The number of rows in the section containing the cell A3.
Pi - pi.
Row - for each cell in the column it returns the number of rows (rows are numbered starting with 1, excluding the header lines).
Col - for all cells in a column returns the column number of the table (column "A" is number 1).
Object - returns the type of the object, which is associated with the cell line.
Object1, Object2, … - objects attached to the cell.
Title - the name of the table.
RowCount - total number of rows.
ColCount - the total number of columns.
The "Split the table by pages" tool is similar to the  "Division by page" editor tool, but the result is not a split single table, but several separate tables.
1. Open the table for editing.
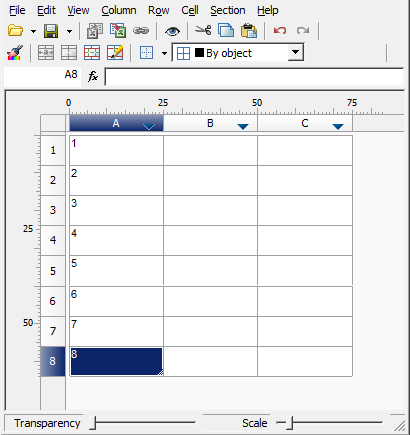
2. In the places where the break will be, set the break with the command "Start new page".
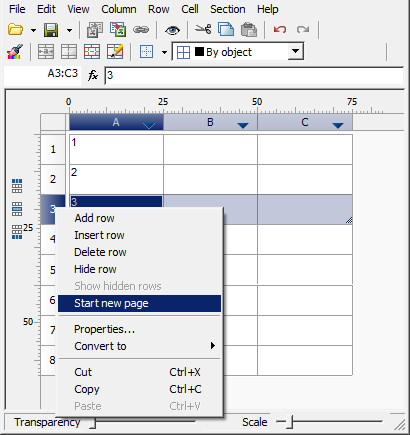
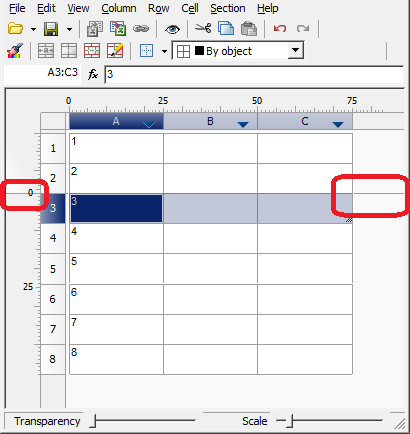
3. Close the editor.
4. Select a table.
5. From the context menu, select the "Split table by pages" command.
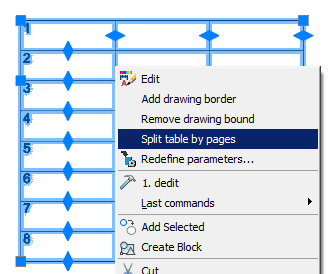
6. The table will be split into separate tables. The separation will occur at the places of the established breaks.
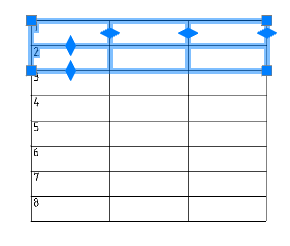
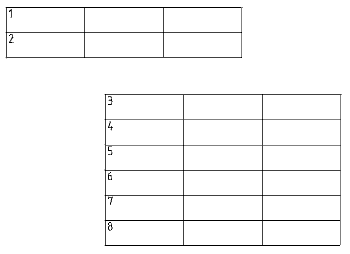
|
Note: |
If the command is applied to a report, the following destructive actions are performed: 1. The report is converted into static tables. 2. All connections with objects are broken. 3. All formulas are removed, and the cells begin to display the previously formed text. 4. Rows with report titles are hidden so that the display of the table in the drawing is not changed. |
 Main menu: Format -
  Dimension Styles....
 Main menu: Dimensions -
  Dimension Styles....
 Ribbon: Home - Annotation -
  Dimension Style Manager.
 Toolbar: Settings -
  Dimension Style Manager.
 Command line: DIMSTYLE.
The software defaults to a government industry standard dimension style.
Dimension styles allow you to control the appearance of dimensions and quickly format them.
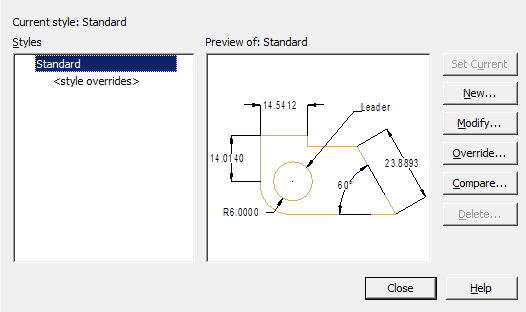
The inscription "Current style: ..." - information about the current dimension style, which is used when applying dimensions.
"Styles" list - a list of all dimension styles in the document.
The "Preview of: ..." window is a graphical representation of the style selected in the "Styles" list.
Buttons:
· Set current – sets the selected dimension style current.
· New... – opens a dialogue "Creating style".
· Modify... – change the parameters of the style selected in the list. Opens dialog "Modify dimension style".
· Override... – change the parameters of the current dimension style. Opens dialog "Modify dimension style".
· Compare... - compare two dimension styles, or view a list of all the properties of a style. The comparison results can be copied to the clipboard. Opens dialog "Comparing Dimension Styles".
· Delete... – deletes the selected dimension style.
 Command line: MCSETGOST, SETGOST.
This command is necessary to create (restore) the standard dimensional style of the environment nanoCAD Mechanica.
Dimension style settings are stored within drawing files. If the file was not created in nanoCAD Mechanica, then it may not have the required dimension style for correct work in the nanoCAD Mechanica environment.
Button "New..." in the dialog box "Dimension style manager".
The new style is based on the existing style.
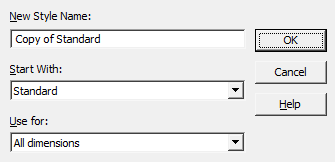
Field "New Style Name" – style name.
List "Start With" – the style on the basis of which the new one will be created.
List "Use for" – a dimension sub-style is selected from the list (applicable only to certain types of dimensions).
Button "OK" – opens a dialogue "Modify dimension style".
In the "Modify dimension style" dialog, properties for a new style are set and parameters of an existing one are edited.
This dialog is called when you click the "Modify..." or "Override..." buttons from the "Dimension Style Manager", as well as from the "Creating style" window.
The name of the edited style is reflected in the title of the dialog.
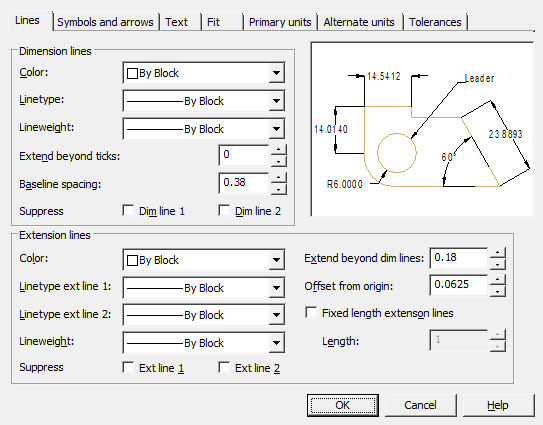
Dialog "Modify dimension style" contains tabs:
· Lines
· Symbols and arrows
· Text
· Fit
· Primary units
· Alternate units
· Tolerances
The model image on each tab shows a preliminary result of the property changes.
Sets the format and properties of dimension lines, extension lines, arrows, and center marks.
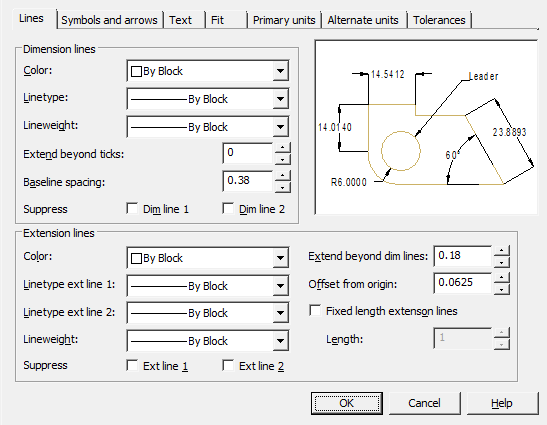
Simension lines
Color – setting the color of dimension lines.
Linetype – setting the dimension line type.
Lineweight – setting weights for dimension lines.
Extend deyond ticks – when using serifs as dimension arrows, setting the distance the dimension line should extend beyond the extension lines.
Baseline spacing - setting the distance between dimension lines in dimensions from a common base.
Suppress – sets the suppression of the display of dimension lines if they go beyond the extension lines.
· Dim line 1 – suppress the first dimension line.
· Dim line 2 – suppress the second dimension line.
Extension lines
Color - setting the color of the extension lines.
Linetype ext line 1 – setting the type of the first extension line.
Linetype ext line 2 – setting the type of the second extension line.
Lineweight – setting weights for extension lines.
Suppress – set to suppress extension lines:
· Ext line 1 – suppress the first extension line.
· Ext line 2 – suppress the second extension line.
Extend beyond dim lines – setting the distance that extension lines should protrude beyond the dimension line.
Offset from origin – sets the distance by which extension lines deviate from object points.
Fixed length extenson lines - sets the full length of the extension lines from the dimension line to the origin of the dimension.
Sets the format and position of arrows, center marks, arc length symbols, and radius dimension polylines.
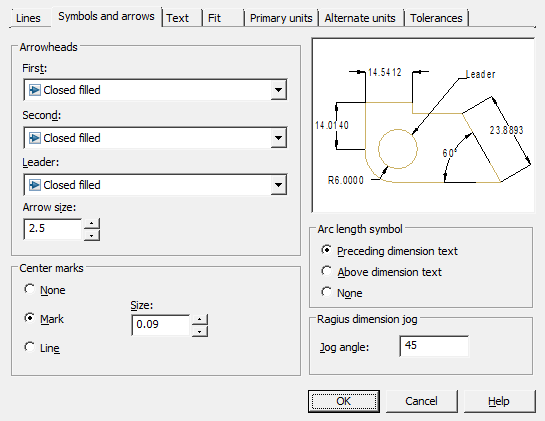
Arrowheads
Controls the appearance of dimension arrows.
First – selection of the arrow type for the first dimension line. When you change the type of the first arrow, the type of the second is automatically changed.
Second – selection of the arrow type for the second dimension line.
Leader – setting the arrow type for the leader.
Arrow size – displaying the existing one and setting a new size for the arrows.
Center marks
Controls the placement of center marks and centerlines when placing a diameter or radius.
None - do not create center mark and centerlines.
Mark - create a center mark.
Line - create centerlines.
Size - displays an existing one and sets a new size for the center mark or centerline.
Arc length symbol
Controls the display of the arc symbol in the arc length dimension.
Preceding dimension text - inserts arc length characters before dimension text.
Above dimension text - inserts arc length characters above dimension text.
None - prohibiting the display of arc length symbols.
Radius dimension jog
Controls the display of broken lines (zigzags) of radius dimensions, in cases where the center is located outside the page.
Jog angle - sets the angle of the perpendicular line connecting the extension and dimension lines of the radius dimension.
Setting the format, placement and alignment of dimension texts.
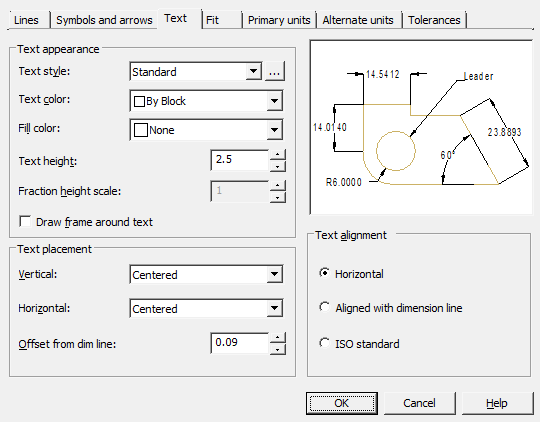
Text appearance
Text style – selects the current dimension text style from the list.
Text color – setting the color of the dimension text.
Fill color – setting the background color of the text in dimensions.
Text height - sets the current height of the dimension text. If the text style specifies a fixed height (that is, the style's height value is not 0), then the height entered here is ignored.
Fraction height scale – setting the scale of fractional values relative to the rest of the text. This option is available if the "Unit format" is set to "Fractional" on the "Primary units" tab. The height of fractional texts is determined by multiplying the height of the regular text by a given factor.
Draw frame around text – sets the display of dimension text in a frame.
Text placement
Vertical – select the option to align the dimension text vertically relative to the dimension line:
· Centered - centered dimension text between extension lines.
· Above - positioning the dimension text above the dimension line. The distance from the dimension line to the bottom border of the text is equal to the value specified in the "Offset from dim line" option.
· Outdise - positioning the dimension text next to the dimension line on the side farthest from the first fit point.
· JIS - placement of dimension text in accordance with the requirements of Japanese industrial standards JIS (Japanese Industrial Standards).
· Below - the location of the dimension text below the dimension line. The distance from the dimension line to the top border of the text is equal to the value specified in the "Offset from dim line" option.
Horizontal – select an option to position the dimension text horizontally along the dimension line relative to the extension lines:
· Centered - centered dimension text between extension lines along the dimension line.
· At Ext Line 1 - the location of the text to the left of the first extension line. The distance from the extension line to the text is equal to the sum of twice the dimension arrow ("Symbols and arrows" tab) and the text gap (the "Offset from dim line" option).
· At Ext Line 2 - the distance from the extension line to the text is equal to the sum of twice the dimension arrow ("Symbols and arrows" tab) and the text gap (the "Offset from dim line" option).
· Over Ext Line 1 - positioning text above or along the first extension line.
· Over Ext Line 2 - positioning text above or along the second extension line.
Offset from dim line – setting the size of the current text gap (the width of the empty space around the text located at the break in the dimension line). This value is also used as the minimum length of the broken dimension line fragments.
The text is located between the extension lines only if the lengths of these fragments are not less than the size of the text gap. If text is above or below the dimension line, it will only fit between the extension lines if there is enough space for the dimension arrows and dimension text to be spaced apart by the text gap.
Text alignment
Sets the orientation of the dimension text between and outside dimension lines.
Horizontal – place text horizontally.
Aligned with dimension line – place text along the dimension line.
ISO standart - place along the dimension line if the text is inside the extension lines, or horizontally if the text is outside.
Controls the position of dimension text, arrows, leaders, and dimension lines.
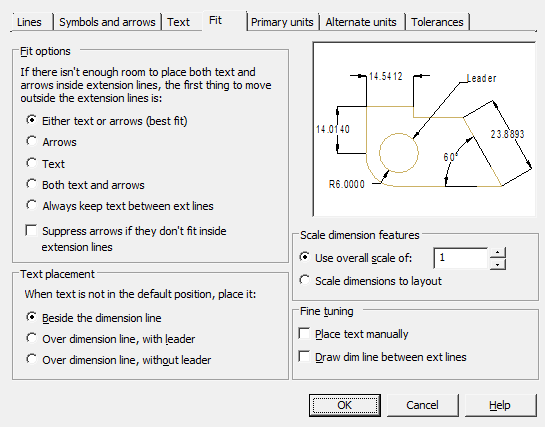
Fit options
Set the layout of text and arrows if there is not enough space between the extension lines to place them together:
Either text or arrows (best fit) - move either the text or arrows outside the dimension lines, whichever is the best location.
Arrows - move outside the extension lines, first arrows, then text.
Text - move outside the extension lines, first the text, then the arrows.
Both text and arrows - if there is not enough space, then both text and arrows are located outside the extension lines.
Always keep text between ext lines – always place text between extension lines.
Suppress arrows if they don't inside extension lines - if there is not enough space for arrows between the extension lines, they are not displayed.
Text placement
Selecting an action when the dimension text is moved from the default position (specified by the dimension style):
Beside the dimension line – the dimension line moves with the text.
Over dimension line, with leader – dimension lines do not move, but a leader is drawn that connects them and the text. The leader is not drawn if the text is too close to the dimension line.
Over dimension line, without leader – no connections are made between the text and the dimension line.
Scale dimension feature
Use overall scale of – setting the scale factor for all dimension style parameters that specify dimensions, distances and indents, including the height of the text and the size of the arrows.
Scale dimensions to layout - sets a scale factor based on the ratio of units in the current model space viewport and paper space.
Fine tuning
Place text manually – places the dimension at the point specified when prompted for Dimension line position. All horizontal placement modes are ignored.
Draw dim line between ext lines – draw dimension line between extension lines, even if dimension arrows are positioned outside of them.
Sets the format and precision of base units, and dimension text prefixes and suffixes.
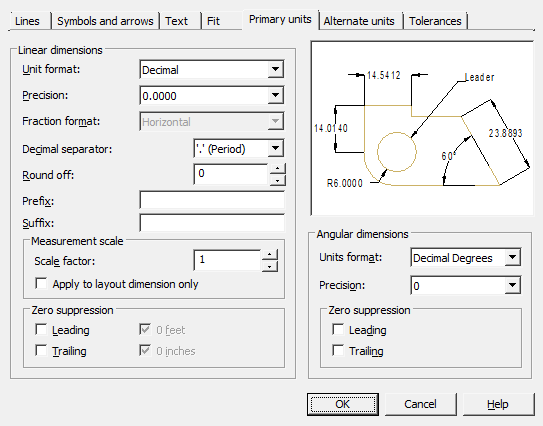
Linear dimensions
Unit format - controls the display and format of tolerances in dimension text.
Precision – setting the number of decimal places in the dimension text.
Fraction format – setting format for fractional texts.
Decimal separator – selection of separator type for sizes expressed in decimal units.
Round off – setting rounding rules for all types of dimensions, except for angular dimensions. Example: for a given accuracy of 0.25, all measured distances are rounded to the nearest multiple of 0.25. When you enter a value of 1.0, all measured distances are rounded to the nearest whole value. The number of digits in fractional parts of distances depends on the precision specified in the "Precision" field.
Prefix – defining the dimension text prefix. You can enter special characters or use control codes to display special characters. For example, the control code "%% c" matches the diameter character. An explicit prefix takes precedence over default prefixes such as those used for diameter and radius.
Suffix – definition of a dimension text suffix. You can enter special characters or use control codes to display special characters. For example, typing the suffix mm will add it to the dimension text. The suffix entered here takes precedence over the default suffixes.
Measurement scale
Scale factor – setting the scale factor for linear dimensions. It is recommended not to change the default value of 1.00. The factor has no effect on angular dimensions, rounding accuracy, positive and negative tolerances.
Apply to layout dimension only – applies a scale factor only to dimensions plotted in layout viewports. It is recommended to disable the setting.
|
Important! |
Changing the value of the scale of the dimensions of a style in a customization changes the value in the dimensions of the same style that are already assigned. This bug is unrecoverable for technical reasons. |
Zero suppression - Controls the suppression of leading and trailing zeros, as well as feet and inches zero.
· Leading – suppress leading zeros in all decimal sizes. Example: 0.3000 is written as .3000.
· Trailing – suppress trailing zeros in all decimal sizes. Example: 11.5000 is represented as 11.5 and 30.0000 is represented as 30.
Angular dimensions
Sets the current corner format for angular dimensions.
Units format – selection of units of measure for angular dimensions.
Precision – setting the number of decimal places in angular dimensions.
Zero suppression - control of suppression of leading and trailing zeros.
· Leading – suppress leading zeros in all decimal sizes. Example: 0.3000 is written as .3000.
· Trailing – suppress trailing zeros in all decimal sizes. Example: 11.5000 is represented as 11.5 and 30.0000 is represented as 30.
Setting the format and precision for alternative dimension units.
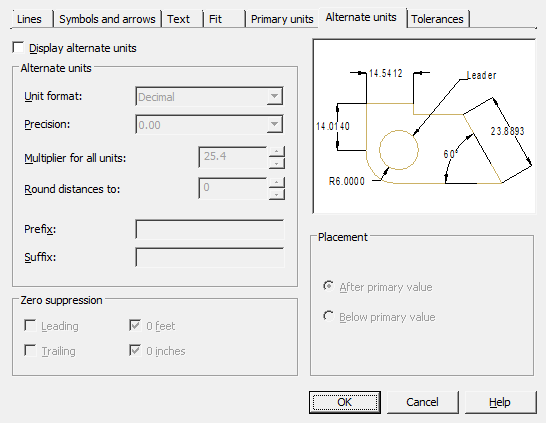
Display alternate units – inclusion of the possibility of using alternative dimensional units.
Alternate units
Unit format - setting the format of alternative units.
Precision – setting the number of decimal places after the decimal point.
Multiplier for all units - setting the conversion factor from basic units to alternative ones. Example: To convert inches to millimeters, enter 25.4. The value has no effect on angular dimensions and does not apply to rounding precision or positive and negative tolerances.
Round distances to – sets the rounding rule for all types of dimensions, except for angular dimensions. Example: when setting the accuracy to 0.25, all measured distances are rounded to the nearest multiple of 0.25. When you enter a value of 1.0, all measured distances are rounded to the nearest whole value. The number of digits in fractional parts of distances depends on the precision specified in the "Precision" field.
Prefix – defining the prefix of the alternate dimension text. You can enter special characters or use control codes to display special characters. For example, the control code "%% c" matches the diameter character. An explicit prefix takes precedence over default prefixes such as those used for diameter and radius.
Suffix – defining the suffix of the alternate dimension text. You can enter special characters or use control codes to display special characters. For example, entering the suffix mm will add it to the text. The suffix entered here takes precedence over the default suffixes.
Zero suppression
Controls the suppression of leading and trailing zeros and feet and inches zero.
Leading – suppress leading zeros in all decimal sizes. Example: 0.3000 is written as .3000.
Trailing – suppress trailing zeros in all decimal sizes. Example: 11.5000 is represented as 11.5 and 30.0000 is represented as 30.
Placement
Sets the position of alternate units in dimension text.
After primary value – display the value in alternate units immediately following the value in base units.
Below primary value - display the value in alternate units below the value in base units.
Controls the display and format of tolerances in dimension text.
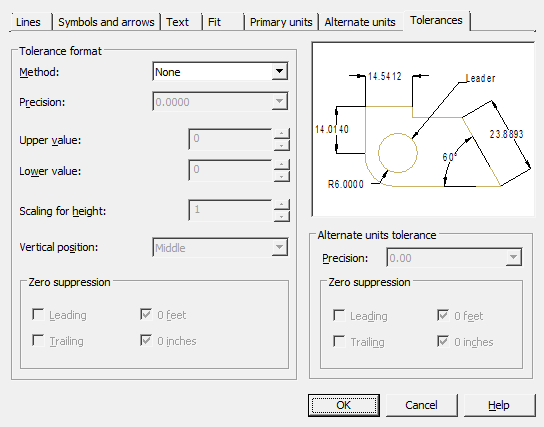
Tolerance format
Method – choice of method for determining tolerances.
|
None- disable display of tolerances. |
|
|
Symmetrical – application of two limit deviations, with which the dimension text is displayed with the same upper and lower limit deviations. The tolerance is separated from the dimension by the "±" symbol. The value is entered in the "Upper value" field. |
|
|
Deviation – application of two limiting deviations. Dimension text is displayed with different upper and lower tolerance limits. When applying a dimension, a plus sign is put in front of the upper limit deviation and a minus sign in front of the lower one. |
|
|
Limits – displays dimension text as limit dimensions. The maximum size limit is above the minimum size limit. The largest limit is obtained by adding the upper limit deviation to the nominal size; the smallest - by subtracting the lower limit deviation from the nominal size. |
|
|
Basic – displays the dimension text as a nominal boxed dimension. |
|
Precission - setting the number of decimal places after the decimal point.
Upper value - setting the value of the upper limit deviation. When the "Symmetrical" method is turned on, both deviations are assigned this value.
Lower value - setting the value of the lower limit deviation.
Scaling for height - setting the current text height for deviations.
Vertical position - alignment of deviation texts:
· Bottom - alignment of deviation and nominal size on the bottom. 
· Middle - aligning deviation and nominal size to the middle of the dimension text. 
· Top - alignment of deviation and nominal size at the top. 
Zero suppression - control of suppression of leading and trailing zeros.
· Leading – suppress leading zeros in all decimal sizes. Example: 0.3000 is written as .3000.
· Trailing – suppress trailing zeros in all decimal sizes. Example: 11.5000 is represented as 11.5 and 30.0000 is represented as 30.
Alternate units tolerance
Alternative unit tolerance formatting.
Precision - setting the number of decimal places after the decimal point.
Zero suppression - control of suppression of leading and trailing zeros.
· Leading – suppress leading zeros in all decimal sizes. Example: 0.3000 is written as .3000.
· Trailing – suppress trailing zeros in all decimal sizes. Example: 11.5000 is represented as 11.5 and 30.0000 is represented as 30.
The dialog for comparing two dimension styles or viewing a list of all style properties is invoked by the "Compare..." button in the "Dimension Style Manager" dialog.
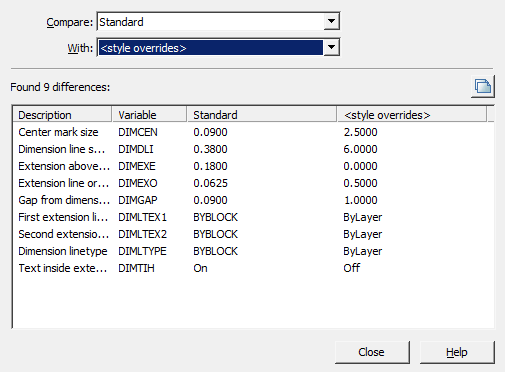
"Compare:" field - selects the first dimension style to compare.
"With:" field - selects the second dimension style for comparison.
"Difference table" - the table contains data on non-matching properties.
Table columns:
· Description - parameter name.
· Variable - parameter system name.
· Variable value columns - parameter values in compared styles.
Button  "Copy to clipboard" - allows you to copy comparison results to the clipboard.
 Main menu: Dimensions -
  Auto.
Auto.
 Ribbon: Annotate - Dimensions -
  Auto.
Auto.
 Ribbon: Mechanical - Symbols -
  Dimensions.
 Toolbar: Dimensions -
  Dimensions.
 Command line: MCMDIM, MDIM.
When inserting dimensions, context menu commands are available to switch the dimension view:
· Auto
· Aligned
· Vertical
· Radius
· Diameter
· Arc
· Ordinate
· Angle
· Chain
· Base
· Properties (Opens the size edit dialog)
· Group
|
Note: |
If you hold down the CTRL key while placing linear dimensions at the time you select the dimension line, you can skew the dimension extension lines. If you hold down the SHIFT key while placing linear or angular dimensions while selecting the position of the dimension line, you can move the dimension text along the dimension line. |
To apply the dimension you need:
1. Select a segment;
2. Place the dimension number.
Dimensions can change to horizontal, vertical, or parallel, depending on the position of the drop point.
Dimensioning by selecting characteristic (anchor) points
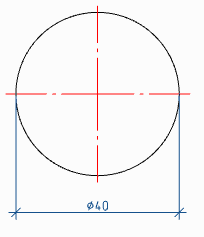
To apply dimensions, you must:
1. Select the first node;
2. Select the second node;
3. Place the dimension number.
When selecting anchor points of the circle, the diameter sign is automatically set.
Dimensioning between two parallel lines
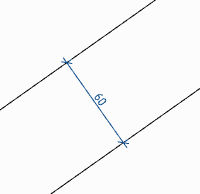
To apply the dimensions shown above, you must:
1. Select the first segment;
2. Select the second segment;
3. Place the dimension number.
Dimensioning through a point perpendicular to the selected line
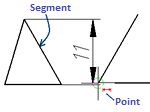
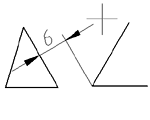
To apply the dimensions shown above, you must:
1. Specify the segment, perpendicular to which the dimension will be applied;
2. Without interrupting the commands, point to the end point of the line segment (a circle of small diameter should appear around the point);
3. Place the dimension number.
Undo an erroneously inserted dimension without exiting the command
Dimensioning is performed in a cyclic mode, i.e. when applying one dimension, the team does not stop its work, but suggests setting the next dimension or choosing a different type of dimension. In some cases, the previous dimension may not be set correctly. To remove an erroneous dimension, there is the "Undo" context menu command. You can also call the command with the "Ctrl + Z" hotkeys. The command is available when setting the dimension after specifying the dimension number.
Auxiliary autodimension markers appear when you hover over a drawing object and show what type of dimension will be built in this case:
·  Indicates that the diametral dimension will be drawn.
·  Shows what a linear dimension will be drawn (horizontal, vertical or parallel).
·  Shows that the angular dimension will be drawn.
·  Shows that the chain of dimensions will be built.
·  Shows that the slanted dimension will be drawn.
·  Indicates that the radial dimension will be drawn.
 Main menu: Dimensions -
  Aligned.
 Ribbon: Annotate - Dimensions -
  Aligned.
 Toolbar: Dimensions -
  Aligned.
 Context menu: aLigned - when calling any dimension.
 Command line: MCMDIMALI, MDIMALI.
 Context menu: Horizontal - when calling any dimension.
 Command line: MCMDIMHOR, MDIMHOR.
 Context menu: Vertical - when calling any dimension.
 Command line: MCMDIMVER, MDIMVER.
Parallel, horizontal, vertical dimensions
To apply dimensions, you must:
1. Choose dimension;
2. Select the type of binding:
· "nEarest snap gets object" - dimensions the entire selected object;
· "nEarest snap gets point" (default) - sets dimension nodes at a selected location on an object.
3. Specify the end nodes of the dimension based on the selected snap type:
· "nEarest snap gets object" - specify an object, the end nodes of the dimension will be the end points of the object;
· "nEarest snap gets point" - specify the start and end nodes on the selected object.
4. Place the dimension number. The dimension will be built.
Construction markers appear when you select a certain linear dimension:
·  Parallel dimension is selected.
·  Horizontal dimension is selected.
·  Vertical dimension is selected.
 Main menu: Dimensions -
  Linear.
 Ribbon: Annotate - Dimensions -
  Linear.
 Toolbar: Dimensions -
  Linear.
 Command line: DIMLINEAR.
To apply dimensions, you must:
1. Call the  "Linear" command;
2. Specify the first node;
3. Indicate the second node;
4. Place the dimension number. Linear dimension will be created.
 Main menu: Dimensions -
  Radius.
 Ribbon: Annotate - Dimensions -
  Radius.
 Ribbon: Mechanical - Symbols -
  Radius.
 Toolbar: Dimensions -
  Radius .
 Context menu: Radial - when calling any dimension.
 Command line: MCMDIMRAD, MDIMRAD.
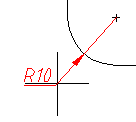
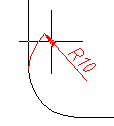

To apply a radial dimension, you must:
1. Select the "Radius" dimension;
2. Select an arc (circle), the dimension will snap to the arc;
3. Specify the insertion point.
 Main menu: Dimensions -
  Diameter.
 Ribbon: Annotate - Dimensions -
  Diameter.
 Ribbon: Mechanical - Symbols -
  Diameter.
 Toolbar: Dimensions -
  Diameter.
 Context menu: Diametral - when calling any dimension.
 Command line: MCMDIMDIA, MDIMDIA.
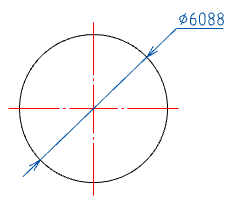
To apply the dimension of the circle, you must:
1. Select the dimension "Diameter";
2. Select the circle, the dimension snaps to the circle;
3. Pick an insertion point.
 Main menu: Dimensions -
  Large arc radius.
 Ribbon: Annotate - Dimensions -
  Large arc radius.
 Ribbon: Mechanical - Symbols -
  Large arc radius.
 Toolbar: Dimensions -
  Large arc radius.
 Context menu: big RAdius - when calling any dimension.
 Command line: MCDIMHRAD, DIMHRAD.
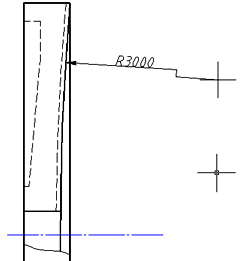
To dimension a large arc radius, you need to:
1. Select the "Large arc radius" dimension;
2. Select an arc (circle), the dimension will snap to the arc;
3. Specify the insertion point of the arrow;
4. Specify the insertion point of the value on the arrow.
 Main menu: Dimensions -
  Arc.
Arc.
 Ribbon: Annotate - Dimensions -
  Arc length.
 Ribbon: Mechanical - Symbols -
  Arc length dimension.
 Toolbar: Dimensions -
  Arc length.
 Context menu: arC - when calling any dimension.
 Command line: MCMDIMARC, MDIMARC.
Arc dimension
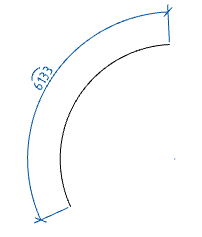
To apply the dimension you need:
1. Select the arc dimension;
2. Select an arc (the arc dimension will snap to the arc);
3. Specify the insertion point.
Circle dimension
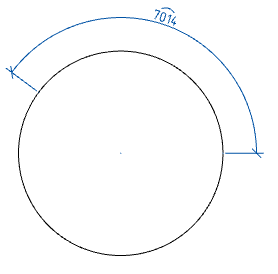
To apply the dimension you need:
1. Select the arc dimension;
2. Specify the starting point on the circle;
3. Specify the end point on the circle;
4. Specify the insertion point.
 Main menu: Dimensions -
  Ordinate dimension.
 Ribbon: Annotate - Dimensions -
  Ordinate.
 Ribbon: Mechanical - Symbols -
  Ordinate dimension.
 Toolbar: Dimensions -
  Ordinate dimension.
 Context menu: Ordinate - when calling any dimension.
 Command line: MCMDIMORD, MDIMORD.
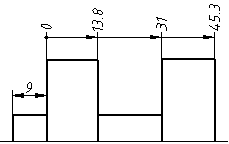
1. Call the "Ordinate dimension" command.
2. Pick the location of the first dimension of the ordinate chain.
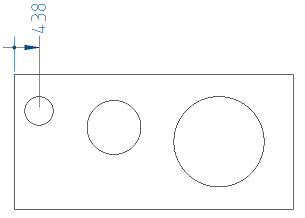
3. Select the first dimension you set. All subsequent dimensions will be snapped to it. If for some reason dimensioning has been completed (after the first dimension has been added), select the ordinate dimension (or autosize) again and specify the dimensioned.
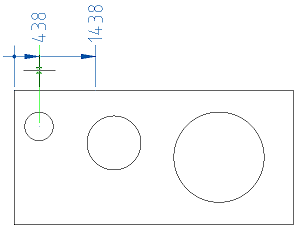
4. Sequentially specify the coordinates of the remaining dimensions.
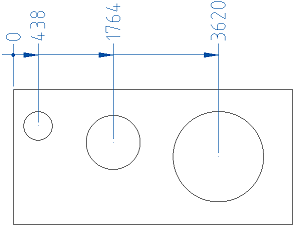
5. Press the "Esc" key to end the command.
 Main menu: Dimensions -
  Fill angle.
 Ribbon: Annotate - Dimensions -
 Angular.
 Ribbon: Mechanical - Symbols -
  Angle dimension.
 Toolbar: Dimensions -
  Angle dimension.
 Toolbar: MCS Dimensions -
  Angle dimension.
 Context menu: aNguLar - when calling any dimension.
 Command line: MCMDIMANG, MDIMANG.
Create an angular dimension by specifying two line segments
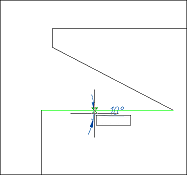
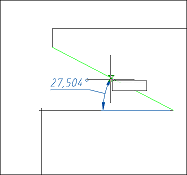
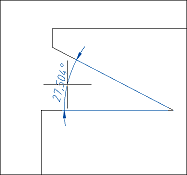
To apply an angular dimension, you must:
1. Select an angular dimension;
2. Select the first segment;
3. Select the second segment;
4. Pick an insertion point.
Angular dimension of hole centers
To apply the angular dimension with the indication of the centers, you must:
1. Select an angular dimension;
2. Specify the center of the axial circle (on which the holes lie);
3. Pick the center of the first hole;
4. Pick the center of the second hole;
5. Pick an insertion point.
 Main menu: Dimensions -
  Dimensions Chain.
 Ribbon: Annotate - Dimensions -
  Continue dimension.
 Ribbon: Mechanical - Symbols -
  Continue dimension.
 Toolbar: Dimensions -
  Dimensions Chain.
 Command line: MCCHAINCONT, CHAINCONT.
A chain of dimensions is a sequence of dimensions counted from the end of the previous dimension (the beginning of each new dimension coincides with the end of the previous one).
Dimension chains can be linear, ordinate, or angular. Before building the base dimensions, at least one linear, ordinate or angular dimension must be applied to the object.
Ordinate chain of dimensions
|
Note: |
Constructing an ordinate chain of dimensions is similar to constructing ordinate dimensions. |
1. Call the command;
2. Select the set ordinate dimension (the dimension from which the ordinate sizes will begin to form);
3. Construct the ordinate dimensions in sequence;
4. Press the "Enter" key to complete the construction.
Linear dimension chain
1. Call the command;
2. Select the set linear dimension (the dimension from which the chain of dimensions will begin to form);
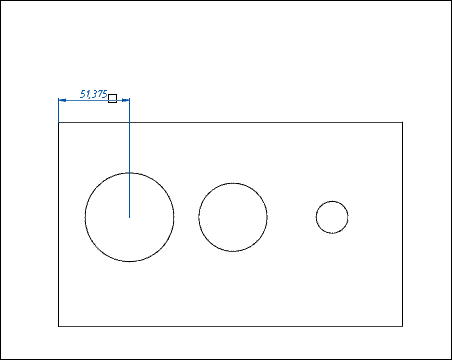
3. Specify the required number of anchor points;
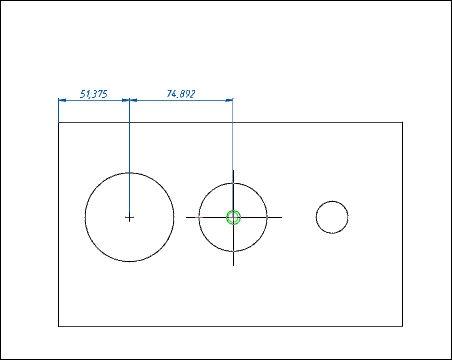
4. Press the "Enter" key to complete the construction.
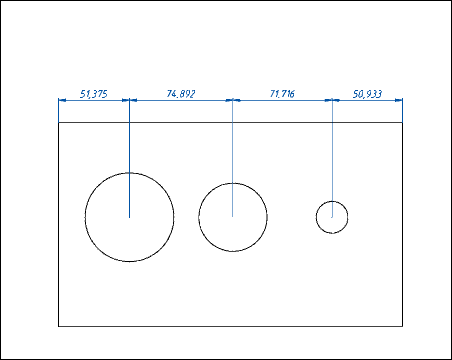
Angle chain dimensions
1. Call the command;
2. Select the preset angular dimension (the dimension from which the chain of dimensions will begin to form);
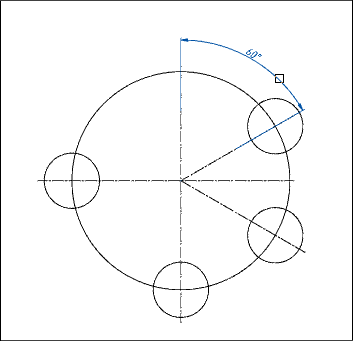
3. Specify the required number of anchor points;
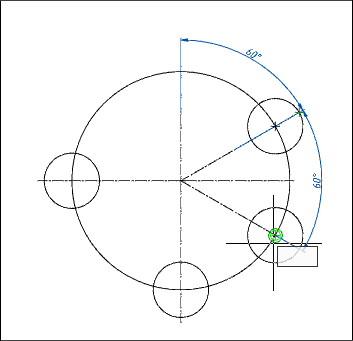
4. Press the "Enter" key to complete the construction.
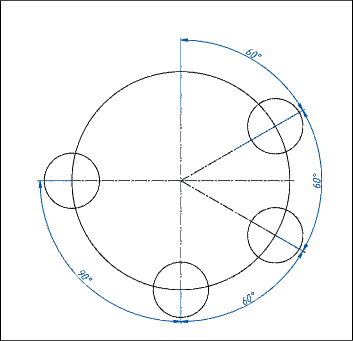
 Main menu: Dimensions -
  Base dimension.
 Ribbon: Annotate -Dimensions -
  Baseline dimension.
 Ribbon: Mechanical - Symbols -
  Baseline dimension.
 Toolbar: Dimensions -
  Base dimension.
 Context menu: Base - when calling any dimension.
 Command line: MCCHAINBASE, CHAINBASE.
Base dimensions are a sequence of dimensions measured from one base point.
Base dimensions can be linear, ordinate, or angular. Before building the base dimensions, at least one linear, ordinate or angular dimension must be applied to the object.
Ordinate chain of dimensions
|
Note: |
The construction of an ordinate chain of dimensions is similar to construction ordinate dimension. |
1. Call the command;
2. Select the set ordinate dimension (the dimension from which the ordinate sizes will begin to form);
3. Construct the ordinate dimensions in sequence;
4. Press the "Enter" key to complete the construction.
Linear base dimensions
1. Call the command;
2. Select the set dimension as the base (the dimension from which the base sizes will begin to form);

3. Specify the required number of anchor points.
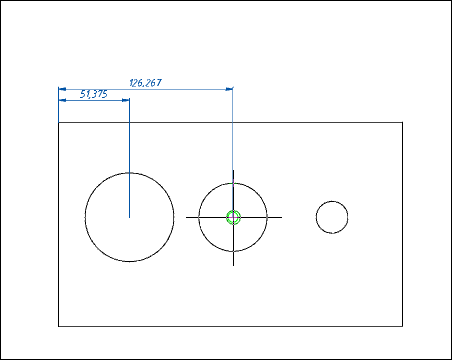
4. Press the "Enter" key to complete the construction.
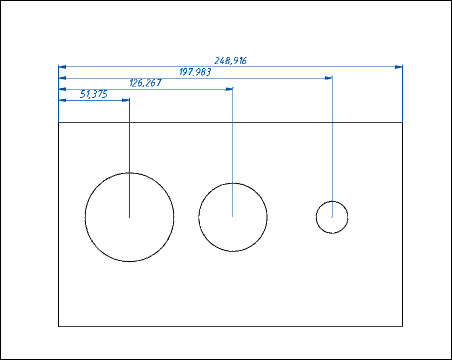
|
Note: |
Each new dimension is set at a specified distance from the previous one. The value of the offset of the dimensions is set by the "Step" parameter in the base dimensions in the "Lines" tab of the "Modify dimension style" dialog. |
Corner base dimensions
1. Call the command;
2. Select the preset angular dimension (the dimension from which the base dimensions will begin to form);
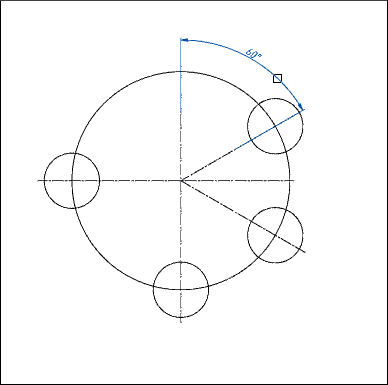
3. Specify the required number of anchor points;
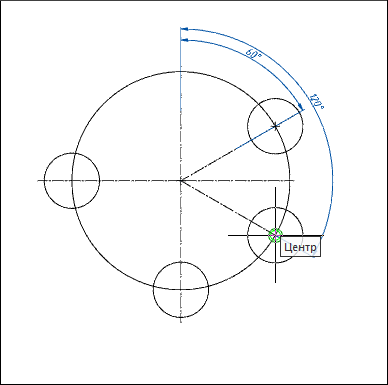
4. Press the "Enter" key to complete the construction.
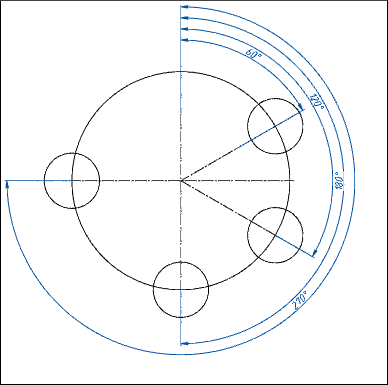
 Main menu: Dimensions -
  Group dimension.
 Ribbon: Annotate - Dimensions -
  Group dimension.
 Ribbon: Mechanical - Symbols -
  Group dimension.
 Toolbar: Dimensions -
  Group dimension.
 Context menu: Grouped - when calling any dimension.
 Command line: MCDIMGROUP, DIMGROUP.
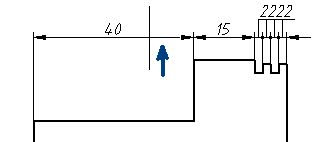
1. Call the command;
2. Select all the objects that will participate in creating the group dimension. To complete the selection press the "Enter" key;
3. Specify the location of the chain of dimensions.
If the setting "Arrows in chains" is set to "Point", then when dimensioning a chain of small numerical dimensions, intersecting arrows are automatically replaced by dots.
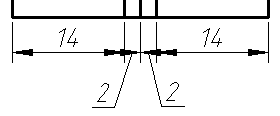
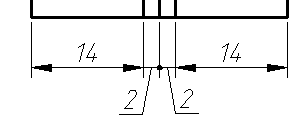
 Main menu: Dimensions -
  Offset dimension.
 Ribbon: Mechanical - Symbols -
  Offset dimension.
 Toolbar: MCS Dimensions -
  Offset dimension.
 Command line: MCDIMOFFSET, DIMOFFSET.
The command allows you to build a size similar to the contour of the selected object. Similarity size is indicated by an arc above the value.
1. Call the command  "Offset dimension".
2. Select the method for specifying the object: "sElection" or "frEe". The "sElection" method is used in paper space when you need to dimension an object in an inactive viewport. In all other cases, the "frEe" method is used.
3. Specify the object from which the dimension will be built. The selected object can be specified: line, arc, spline, polyline, circle or ellipse.
4. Specify the first insertion point (starting point of origin of the dimension) or press the "Space" (or RMB) to automatically add endpoints to the entire length of the object (does not work for closed objects).
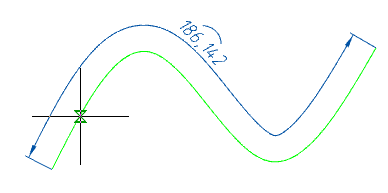
5. Specify the second insertion point (end point of origin of the dimension), if you have not pressed the "Space" (or RMB) key.
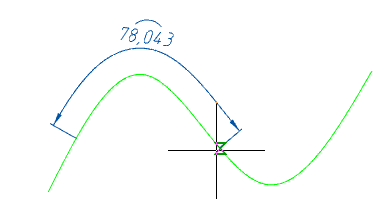
6. Place the dimension leader in the drawing.
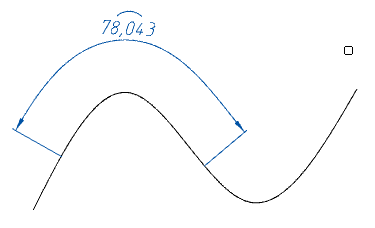
7. Offset dimension will be built. The command will continue to work in a cyclic mode. Press the "Esc" key to exit cyclic mode.
1. Dimension value placement grip.
2. Extension line position grips.
3. Dimension endpoint grips.
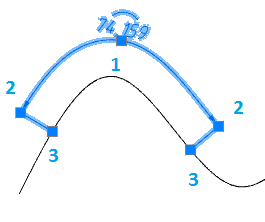
 LMB double click on the dimension.
 Context menu: Properties - when calling any dimension.
 Context menu: Edit - at the selected dimension.
 Command line: MCFEDIT, FEDIT.
The dialog box looks like this:
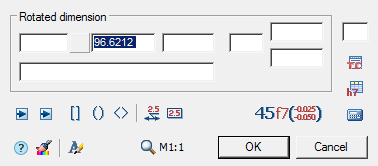
The window is divided into an area of text input fields with the name of the dimension type and a set of dimension design commands.
Additional auxiliary commands are available in the context menu of the dialog box text fields:
· History - the list contains the values previously entered in this field;
· Recent - the list contains frequently used values when filling in this type of field;
· Insert division- allows you to insert a division;
· Pick from drawing - allows you to copy values from drawing objects;
· Symbols - allows you to insert symbols from a list or from a symbol table;
· etc.
The presence of this or that command in the context menu depends on the purpose of the field.
The button in front of the dimension value input field allows you to add special characters to the dimension text.

Buttons  "First arrow" and
  "Second arrow" allow you to select the type of arrows. When you click on them, a list with images of arrow options appears.

Button  "Test on leader" - toggles the display mode of the text on the leader.
Button  "Text in rectangle"- toggles the display mode of dimension text in a rectangle.
Button  "Dimension value display scale"- provides a list of display scales for the size value. Default 1:1.
Button  "Calculate value" - calls the calculator to calculate the value.
Button  "Text style" - calls the text settings dialog box.
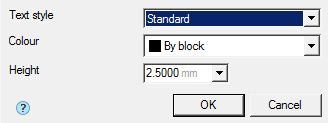
Button  "Match properties"- allows you to copy properties from an existing dimension in the drawing.
Buttons selection of brackets

 - allow you to set the dimension value in brackets.
Button "Method of recording tolerances" - provides a list of options for displaying tolerances.
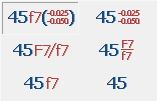
Button  "Fit table" - provides the ability to customize tolerance.
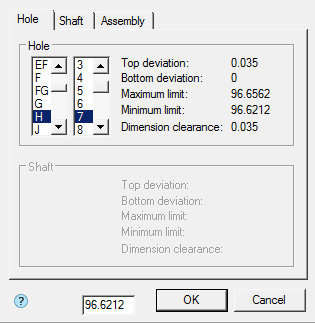
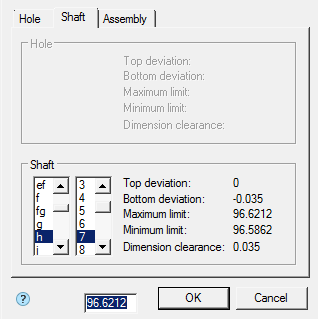
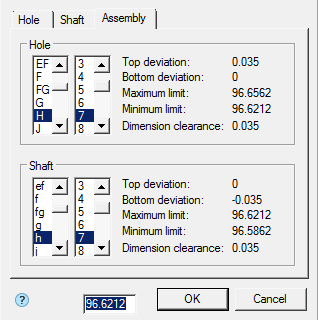
Button  "Technical conditions". Connects technical conditions and dimension.
Break and Restore dimension line
 Main menu: Dimensions -
  Break dimension.
 Main menu: Mechanical - Utilities - Breaks -
  Break dimension line.
 Ribbon: Annotate - Dimensions -
 Break dimension line.
 Ribbon: Mechanical - Utilities -
  Break dimension line.
 Toolbar: Dimensions -
  Break dimension line.
 Toolbar: MCS Breaks -
  Break dimension line.
 Command line: MCDIMBREAK, DIMBREAK.
To create a dimension line break, you must:
· Call the command;
· Select the dimension. If the size was selected before calling the command, you do not need to select it again;
· Select two points by specifying a section of the dimension line to create a break;
· The break will be made.
|
|
|
First point selection |
|
|
|
Second point selection |
|
|
|
Result |
 Main menu: Dimensions -
  Restore dimension.
 Main menu: Mechanical - Utilities - Breaks -
  Unbreak dimension line.
 Ribbon: Unnotate - Dimensions -
  Unbreak dimension line.
 Ribbon: Mechanical - Utilities -
  Unbreak dimension line.
 Toolbar: Dimensions -
  Unbreak dimension line.
 Toolbar: MCS Breaks -
  Unbreak dimension line.
 Command line: MCDIMUNBREAK, DIMUNBREAK.
To restore the dimension line, you must:
· Call the command;
· Select the dimension. If the size was selected before calling the command, you do not need to select it again;;
· The restoration will be done.
 Main menu: .
 Ribbon: .
 Command line: MCDIMOBLIQUE, DIMOBLIQUE.
The command allows you to skew the dimension.
1. Call the command  "Oblique Dimension".
2. Select the required dimensions. Press the "Enter" key to complete the selection.
3. Enter the angle of inclination and press the "Enter" key.
4. The selected dimensions will change the angle of inclination.
 Toolbar: "MCS Dimensions" -
  Arrange dimensions.
 Command line: MCDIMARRANGE.
To arrange, you need:
1. Call the command;
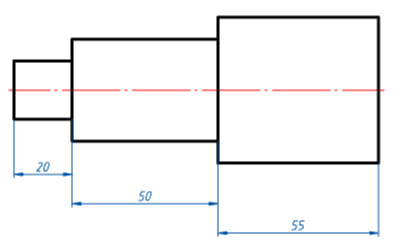
2. Indicate the dimensions to be aligned;
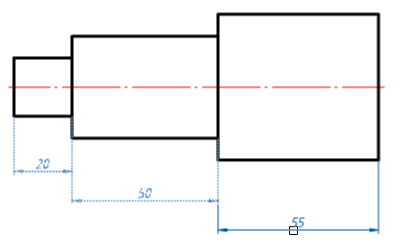
3. Confirm the selection with the "Enter" key;
4. Pick a new location for the dimension group.
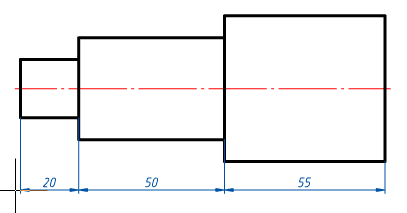
 Toolbar: MCS Dimensions -
  Fit list.
 Command line: MCFITLIST.
The command is designed to create an automatically updated table by dimensions in the drawing.
1. Call the command;
2. Indicate the position of the table of maximum deviations in the drawing;
3. The table will be automatically filled in. The table is updated automatically when you delete, add or edit dimensions.
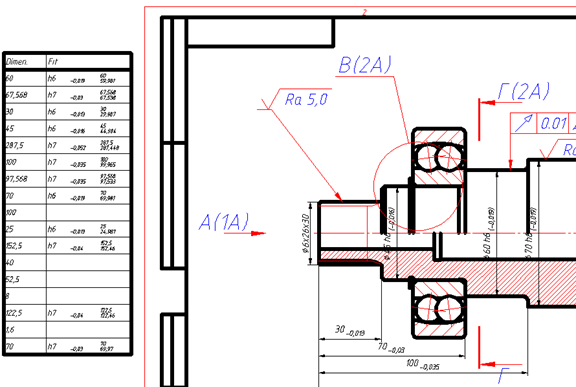
By double clicking, you can edit the tolerance table. For example, specify an alphanumeric designation for a size tolerance.
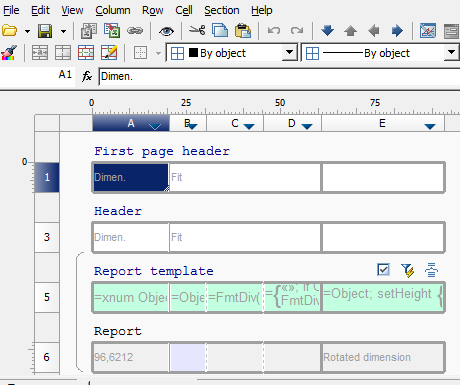
Designation of surface texture
 Main menu: Mechanical - Symbols - Surface Texture -
  Surface texture.
 Ribbon: Mechanical - Symbols -
  Surface texture.
 Toolbar:
  Surface texture (toolbar "MCS Symbols").
 Command line: MCSURF.
This command sets the sign of surface texture.
1. Call command;
2. Pick a point on the object. When specifying the location of the specified segment is highlighted;
3. Specify the size and position of the callout. The sign is positioned normal to the surface. To place a character without a callout, press the spacebar;
4. Indicate the position of the roughness mark on the shelf. The editing dialog "Surface texture";
5. In the "Surface texture" dialog, specify the necessary parameters and click the "OK" button;
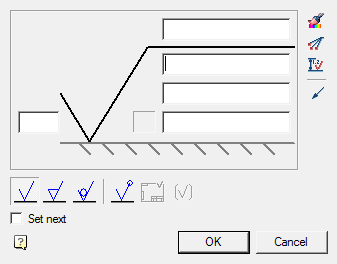
Fields (4 field) - Allows you to enter surface texture values and text above and below the shelf.
In the input field through the context menu, you can select the roughness of the series:
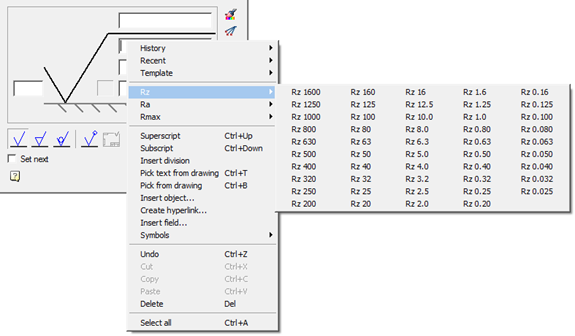
Button "Surface lay and orientation" - allows you to choose the surface texture orientation.
Button  "Match properties" - allows you to copy design properties from another surface texture.
Button  "Add extension line" - allows you to add an additional extension line.
Button  "Dimension dependent" - allows you to select a size for setting dependencies. The amount of roughness can be set automatically depending on the quality of the specified size. To do this, click on the "Dimension dependent" icon in the "Surface texture" dialog box and select the size with the quality mark.
Button  "Arrow type" - allows you to set the appearance of the callout arrow.
Processing switch - controls the display of the processing method:  Any manufacturing process permitted,
  Material should be removed,
  Material should not be removed.
Character switch "By contour" - controls the display of the symbol "By contour".
Character switch "Surface texture not specified" - controls the display of the symbol "Surface texture not specified".
Character switch "Braked sign" - controls the display of the symbol "Braked sign".
Switch "Set next" - Active when building a roughness symbol. When turned on, the switch goes into the mode of continuous construction of roughness symbols with values equal to the first.
Designation surface texture without callouts
1. Grip flip;
2. Grip turn;
3. Grip movement.
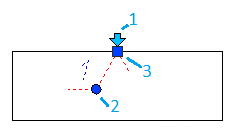
Designation surface texture with callouts
1. Grip add callout line;
2. Grip of moving the position of surface texture marking along the shelf;
3. Shelf reflection grip;
4. Arrow type grip;
5. Grip move callouts;
6. Grip moving shelves.
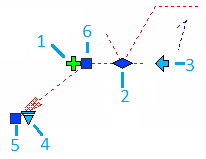
Designation of surface texture (old)
 Main menu: Mechanical - Symbols - Surface Texture-
  Surface texture (old).
 Ribbon: Mechanical - Symbols -
  Surface texture (old).
 Toolbar:
  Surface texture (old) (toolbar "MCS Symbols").
 Command line: MCSURFOLD.
The command sets the sign of the surface texture of previous versions.
1. Call command;
2. Pick a point on the object. When specifying a location, the specified segment is highlighted;
3. Specify the size and position of the callout. The sign is positioned normal to the surface. To place a character without a callout, press the "Space";
4. Specify the position of the surface texture sign on the shelf. The "Surface texture" edit dialog opens;
5. In the dialog "Surface texture" specify the necessary parameters and click "OK";
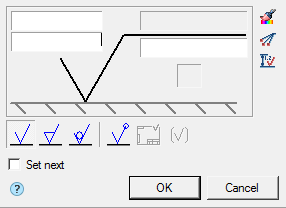
Fields (4 fields) - allows you to enter roughness values and text above and below the shelf.
In the input field through the context menu, you can select the surface texture from the row:
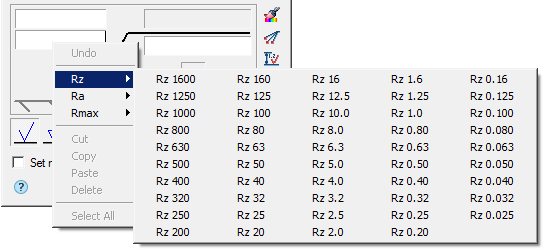
Button "Surface lay and orientation" - allows you to choose the surface texture orientation.
Button  "Match properties" - allows you to copy design properties from another surface texture.
Button  "Add extension line" - allows you to add an additional extension line.
Button  "Dimension dependent" - allows you to select a size for setting dependencies. The amount of roughness can be set automatically depending on the quality of the specified size. To do this, click on the "Dimension dependent" icon in the "Surface texture" dialog box and select the size with the quality mark.
Processing switch - controls the display of the processing method:  Any manufacturing process permitted,
  Material should be removed,
  Material should not be removed.
Character switch "By contour" - controls the display of the symbol "By contour".
Character switch "Surface texture not specified" - controls the display of the symbol "Surface texture not specified".
Character switch "Braked sign" - controls the display of the symbol "Braked sign".
Switch "Set next" - Active when building a roughness symbol. When turned on, the switch goes into the mode of continuous construction of roughness symbols with values equal to the first.
Designation surface texture without extension line
1. Grip flip;
2. Grip turn;
3. Grip moving.

Designation surface texture with extension line
1. Grip add extension line;
2. Grip of moving the position of surface texture marking along the shelf;
3. Shelf reflection grip;
4. Arrow type grip;
5. Grip relocation extension line;
6. Grip moving shelves.

Convert old surface texture symbol
 Main menu: Mechanical - Symbols - Surface Texture -
  Convert old surface texture symbol.
 Ribbon: Mechanical - Symbols -
  Convert old surface texture symbol.
 Toolbar:
  Convert old surface texture symbol (toolbar "MCS Symbols").
 Command line: MCSURCONV.
The command converts the old character surface texture to a new one.
1. Call command;
2. Specify all the required old surface texture characters for the transformation. To complete the selection, press the "Enter" key;
3. The command converts old surface texture symbols to new ones.
 Main menu: Mechanical - Symbols -
  Feature control frame.
 Ribbon: Mechanical - Symbols -
  Feature control frame.
 Toolbar:
  Feature control frame (toolbar "MCS Symbols").
 Command line: MCTOL.
The tolerance can be set depending on the quality of the specified size.
1. Call command.
2. Pick a point on the object. When you select a base surface, the graphic element is highlighted in green.

3. Point to the next point to pin the line of the mark. The sign line is drawn along the normal to the specified surface.
The sign line may extend from the corner of the frame or from the middle of its side. To control the display of these elements, you must call the context menu and select "Sides" or "Angles".
|
Sides |
Angles |
|
|
|
When you select the "Base" line in the context menu, a triangle symbol is drawn on the leader.
When you select the "Tolerance" line in the context menu, an arrow is drawn on the callout.
|
Base |
Tolerance |
|
|
|
4. Next, place a tolerance mark in the place you need. To do this, using the mouse cursor, specify new points in the drawing. To undo the last action, use the "Back" command from the context menu. To finish, press the "Enter" key, a dialog box will appear "Form&plane position tolerance".
5. In the "Form&plane position tolerance" dialog box, enter the required parameters and click the "OK" button.
6. The tolerance of the form and plane will be built.
The editing dialog consists of a toolbar and a workspace.

Workspace
The working area of the dialog box is a list of 4 lines, allowing add header and form 3 rows of values in the tolerance.
Lines are divided into 4 columns:
· Type of tolerance column
The field of this column allows you to add a type of tolerance. In each field, you can enter 2 types of tolerance by selecting the left or right button of the field.

When you click on the buttons, a form for selecting the type of tolerance appears.
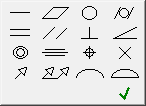
· Column of tolerance deviation
The tolerance deviation value is entered in the fields of this column. The tolerance deviation value can be taken from the "Standard values" when the context menu is opened in the input field.
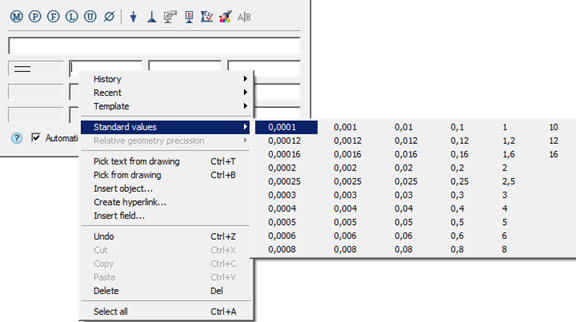
· Base designation column
In the fields of this column, the notation for bases is entered.
· Column notes
Notes are entered in the fields in this column.
Dialog Toolbar
 Dependent tolerance - the command inserts the designation "Dependent tolerance" in the columns "tolerance deviation values" and "bases designation".
 Extended tolerance range - the command inserts the symbol "Extended tolerance range" in the column "tolerance deviation values".
 Extended tolerance range - the command inserts the symbol "Non-rigid part" in the column "tolerance deviation values".
 Extended tolerance range - the command inserts the symbol "Least material requirement" in the column "tolerance deviation values".
 Extended tolerance range - the command inserts the symbol "Unequally-disposed modifier" in the column "tolerance deviation values".
 Diameter - the command inserts the designation "Diameter" in the column "tolerance deviation values".
 Set additional leader - the command allows you to set an additional leader for an editable tolerance.
 Set additional base - the command allows you to set an additional base for an editable tolerance.
To install additional callouts, you must:
1. Call command;
2. Select object;
3. Bring the callout line to the tolerance mark.
 Specify base - the command allows you to specify the base, to do this, call the command and point to the previously placed base symbol on the drawing. The letter designation of the base will be automatically applied in the current input field. When linking the base designation in the drawing, the cursor must be in the base designation input field.
 Insert base denotation - allows you to insert a base symbol when it is missing in the drawing.
 Linked to dimensions - the command serves to fill the deviation value depending on the quality of the specified size.
To fill the value of the deviation is necessary:
1. Select the type of deviation.
2. Call command "Linked to dimensions".
3. Indicate the size with the assigned quality. A link will be created, otherwise, if the qualification is not affixed, a corresponding message will be displayed.
4. From the context menu of the deviation value input field, select "Relative geometry precission".
"Relative geometry precission" has 3 degrees: Normal, Increased and High.
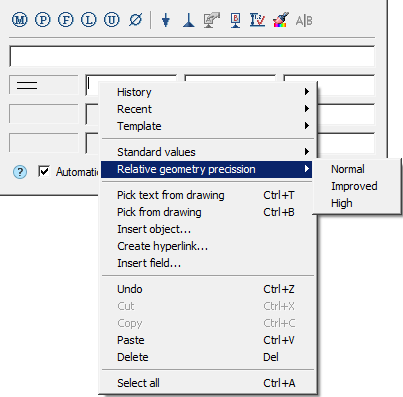
|
Note: |
If a mark for the shape deviation mark has been applied to the size with the specified quality, the context menu bar of the tolerance value "Relative geometry precission" will be active. The relationship with the size is NOT associative: the tolerance field established relative to the size will NOT change along with the size value. Moreover, all information about the connection is lost after closing the edit edit form admission dialog. Thus, if it is necessary to select the value for admission again, the connection will have to be imposed again. |
 Match properties - this command allows you to copy values from the tolerance already entered.
 Insert separator - the command inserts a separator into the database designation field.
Switch Automatic sorting - manages automatic database sorting. When you turn on the designation of bases are put alphabetically, taking into account the previously used letter designations of species, sections, sections.
|
Note: |
Deleting symbols of basic surfaces or drawing additional designations of types, sections, sections will lead to automatic re-sorting of all associated text symbols, including references to them in the technical requirements. |
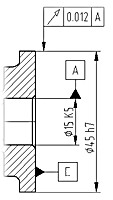
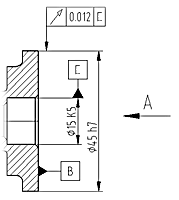
Put down two designations of the basic elements: "A", "B". Added view "A" to drawing. The designation of bases was adjusted automatically.
1. Grip moving arrows.
2. Arrow type grip.
3. Grip move the nodes of the arrow (maybe several).
4. Grip joining the sign. Allows you to change the point of attachment of the leader line to the sign both in the corners and along the sides.
5. Sign move grip.
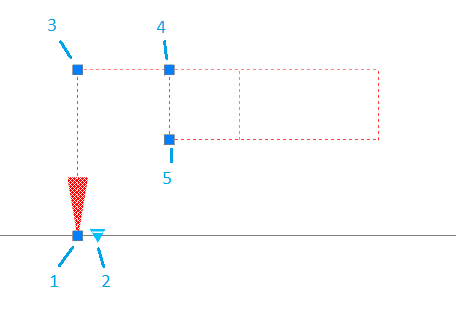
 Main menu: Mechanical - Symbols -
  Datum identifier.
 Ribbon: Mechanical - Symbols -
  Datum identifier.
 Toolbar:
  Datum identifier (toolbar "MCS Symbols").
 Command line: MCDATID.
1. Call command;
2. Pick a location point. When you select a base surface, the graphic element is highlighted in green;
3. Indicate the position of the mark. The designation of the base will automatically select a free letter.
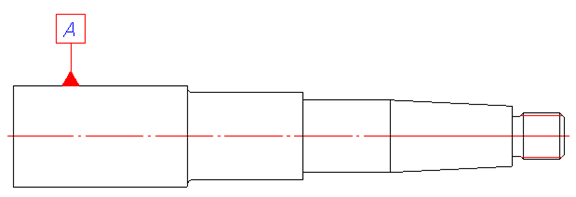

Field "Identifier" - input letter field notation.
Switch "Automatic sorting" - manages auto sort identifier. If the switch is on, the letter is taken automatically from the free and the "Identifier" field is inactive.
Switch "Attach" - allows you to attach the base to the object. To attach the base to the object, you must enable the "Attach" switch, select the anchor object and set the new position of the base character.
1. Grip Rotate - allows you to rotate the sign left or right 90 degrees.
2. Grip direction of the callout or handle move the base. If the attachment base, the knob moves the entire base relative to the attached object. If the base is detached, then the knob controls the direction of the leader line.
3. Grip disconnection - when using this handle, the base is disconnected from the object.
4. Grip select the type of arrow - allows you to select the type of arrow from the drop-down list.
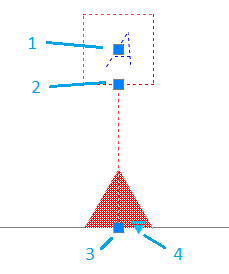
 Main menu: Mechanical - Symbols - Views, Sections -
  View.
View.
 Ribbon: Mechanical - Symbols -
  View.
View.
 Toolbar:
  View (toolbar "MCS Symbols").
 Command line: MCVIEW.
1. Call command;
2. Specify the insertion point of view;
3. Specify the direction of the view arrow. A dialog box appears "View";
4. In the dialog "View" enter your settings. Press button "OK";

5. Place the view symbol in the drawing.
|
Note: |
When you transfer the designation by means of nanoCAD, the integrity of the data in terms of specifying the mutual location and specifying the zones of the drawing can be violated. In this case, you must run the "Update" command. |
Editing is done by double-clicking the LMB on any element of the symbol. This opens a dialog box "Views, cuts, sections", where you can change the required parameters.
 Main menu: Mechanical - Symbols - Views, Sections -
  Sections.
 Ribbon: Mechanical - Symbols -
  Sections.
 Toolbar:
  Sections (toolbar "MCS Symbols").
 Command line: MCSECT.
1. Call command;
2. Select the path type: Arc or Segment. Each type has its own order of construction;
· Type Segment. Allows you to create a section as a polyline;
· Specify the first point of the section;
· Specify the subsequent cut points. To finish entering points, press "Enter";
· Type Arc. Creates an arcuate cut;
· Select the desired arc construction method: Arc (3 points), Arc (2 points and bend), Arc (2 points and center);
· Draw an arc in accordance with the selection.
3. Select the direction of the cut arrows. A dialog box appears "Section";
4. In the dialog box, enter the required parameters. Press the button "OK";

5. Insert the section symbol in the drawing.
|
Note: |
When you transfer the designation by means of nanoCAD, the integrity of the data in terms of specifying the mutual location and specifying the zones of the drawing can be violated. In this case, you must run the "Update" command. |
Editing is done by double-clicking the LMB on any element of the symbol. This opens the "Views, cuts, sections" dialog box, where you can change the required parameters.
 Main menu: Mechanical - Symbols - Views, Sections -
  Scale fragment view.
 Ribbon: Mechanical - Symbols -
  Scale fragment view.
 Toolbar:
  Scale fragment view (toolbar "MCS Symbols").
 Command line: MCEVIEW.
1. Call command;
2. Specify the center of the circle (rectangle);
3. Select the type of contour: Circle or Rectangle;
4. Specify the size of the circle (rectangle);
5. Specify the position of the symbol shelf. A dialog box appears "Views, cuts, sections";
6. In the dialog box, fill in the required fields. Press "OK";

7. Specify the insertion point of the symbol.
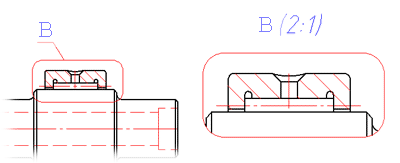
Placing an enlarged view of the selection
|
Note: |
When you transfer the designation by means of nanoCAD, the integrity of the data in terms of specifying the mutual location and specifying the zones of the drawing can be violated. In this case, you must run the "Update" command. |
Editing is done by double-clicking the LMB on any element of the symbol. This opens the "Views, cuts, sections" dialog box, where you can change the required parameters.
 Main menu: Mechanical - Symbols - Views, Sections-
  View and section label.
 Ribbon: Mechanical - Symbols -
  View and section label.
 Toolbar:
  View and section label (toolbar "MCS Symbols").
 Command line: MCVSDESC.
|
Important! |
You cannot insert a view (section) symbol separately from the element itself in automatic sorting mode. |
1. Call command;
2. Specify the insertion point of the symbol. A dialog box appears "Views, cuts, sections";
2. In the dialog box, fill in the required fields. Press the button "OK";

Editing is done by double-clicking the LMB on any element of the symbol. This opens the "Views, cuts, sections" dialog box, where you can change the required parameters.
 Main menu: Mechanical - Symbols - Views, Sections -
  Sort views and sections....
 Ribbon: Mechanical - Symbols -
  Sort views and sections....
 Toolbar:
  Sort views and sections... (toolbar "MCS Symbols").
 Command line: MCSORT.
|
Important! |
For the command to work, all symbols in the drawing must be bound to objects. |
This command is used if views, sections, and sections were built without auto-sorting.
1. Call command.
2. Will be sorting types, cuts and sections (especially designated species, then the cuts-section).
Dialog for editing views, cuts, sections
One of the features of nanoCAD Mechanica 23 in the application of symbols of types, sections, sections is to support the functions of design control. We have implemented alphabetical arrangement of the letter designation, automatic generation of the zone designation and the sheet in the drawing.
The view, section, section, and detail symbol command allows you to dynamically link a symbol to information in technical requirements.

Letter and index input fields - allows you to enter letters and indexes of views, cuts, and sections.
When auto sort is enabled, fields are not editable.
With auto sort enabled, it is possible to see previously used letters. To do this, place the cursor in the input field of the letter and click RMB, a dialog box with a list of the presented letters will appear.
List "Scale" - allows you to assign a scale.
Switch "Turned" and "Unfolded" - allow to insert to the symbol characters are rotated and deployed.
Field "Zone" - allows you to specify a reference to a zone.
Field "Sheet" - allows you to specify a reference to the sheet number.
You can configure the type of the sheet number reference designation record in the setup "Sheet template".
Group switch designation type - switches the symbol type from "Cut" to "Section" and back.
Switch "Automatic sorting" - controls the automatic designation of views, sections, and sections.
If the switch "Automatic sorting" is enabled, first of all the views are indicated, then the sections.
To comply with the automatic sorting rule, you must specify whether the specified symbol belongs to a particular type of symbol.
In the global settings of the system, the user can enable the function of automatic placement of zones in the drawing - in this case, when you move the designation to another place in the drawing or change the format of the frame, the designation of zones in all sheets will be automatically changed.
Switch "Add zone automatically" - automatic zone detection.
Switch "Automatically add sheet number" - automatic detection of the sheet.
Switch "Insert designation" - controls the ability to insert a text symbol for a view, cut, section .
 Main menu: Mechanical - Symbols - Permanent connection -
  Welding....
 Toolbar: "Symbols" -
  Welding....
 Command line: MCISOWELD.
Setting notes refer to welding.
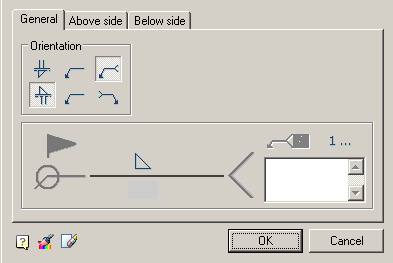
The dialog box consists of three tabs:
General
On the tab, the graphical display and fill in the drawing note.
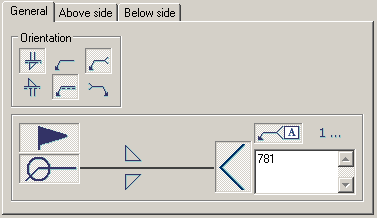
For convenient entry process, you can use Process list.
Process list poddrerzhivaet multiple selection processes.
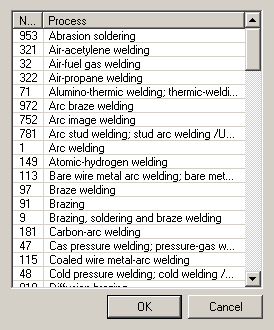
Above side
Tab necessary to fill in the values above the side
The type of weld and its parameters.
Below side
Tab necessary to fill in the values below the side
The type of weld and its parameters.
 Main menu: Mechanical - Symbols - Permanent connection -
  Simple welding.
 Toolbar: "Symbols" -
  Simple welding.
 Command line: MCWLEG.
This command is used to render the weld leg between two intersecting segments.
1. Enter the first rib.
2. Enter the second rib.
3. Press "Enter" or right mouse button to exit the cyclic command.
 Main menu: Mechanical - Symbols - Permanent Connection-
  Weld seam.
 Toolbar: "Symbols" -
  Weld seam.
 Command line: MCWELD.
1. In the dialog box "Weld seam" press the button corresponding to the desired type of weld. Click OK.
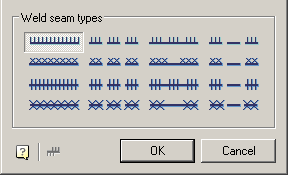
2. Specify the first point of the circuit (or P - polyline, C - circle M - magnet).
3. Specify the next point of the contour (or L - line A - arc, C - close, U - rollback, M - a method for constructing the arc).
4. Press Enter or right mouse button to exit the cyclic command.
In the dialog box are available 16 types of welds. Each type of weld corresponds to the button with his picture. To select the desired type of seam, press the button and confirm with the OK button.
Construction of the circuit is made by the following methods:
L - via line: construction of straight segments of the weld points introduced;
A - by arc: construction of the weld arc segments in three points;
C - close: automatic generation of the last segment, closing the main line of the weld;
U - recoil: undo the last segment of the weld;
M - a method for constructing the arc: T - tangentially, S - by three points.
Button  Side hatch allows you to select the direction of the hatch.
Change the direction of the hatch, you can select the "handle" the reflection side hatch:
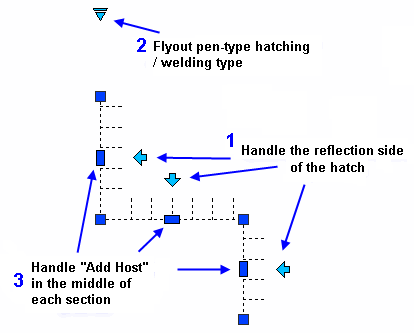
 Main menu: Mechanical - Symbols - Permanent connection -
  Fixed joint.
 Ribbon: Mechanical - Symbols -
  Fixed joint.
 Toolbar: "MCSSymbols" -
  Fixed joint .
 Command line: MCFIX.
1. Call the command  "Fixed joint".
2. Indicate the place of the fixed joint.
3. Pick a break point.
4. Specify the end point of the leader or press the "Enter" key, then the end point of the leader will be the break point. The "Joints" editing dialog will open.
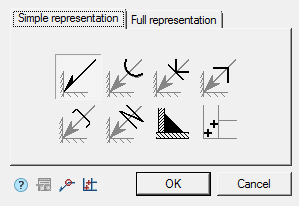
5. Set the type of joint in the "Joints" editing dialog and confirm the setting with the "OK" button.
6. The Fixed joint will be built.
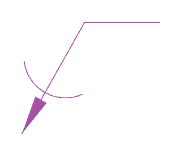
|
Important! |
When you select the fixed joint "Soldired Joint Leg" or "Weld point", you cannot call the dialog from the object for editing. |

The editing dialog contains additional commands and two tabs: "Simple representation" and "Full representation".
·  Technical conditions - the command associates a designation with a item of technical conditions.
·  Place spot welds - the command is intended for insertion of weld point elevations in the drawing.
·  Along closed contour - the command is intended to add the symbol "Joint along closed contour" to the connection designation.
· The "Simple representation" tab allows you to select the type of fixed joint.
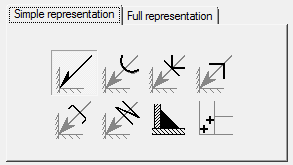
The following designations for fixed joints are available:
|
Seam denotation |
Soldering |
Pasting together |
Clamps, type 1 |
|
|
|
|
|
|
Clamps, type 2 |
Lacing |
Soldired Joint Leg |
Weld point |
|
|
|
|
|
Depending on the selected type, the "Full representation" tab will be available.
· The "Full representation" tab allows you to customize the fixed joint symbol.
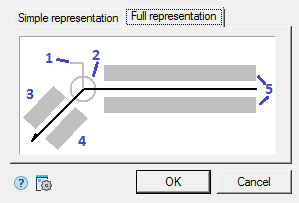
Input fields and graphic elements are edited on the tab. To edit input fields and turn on / off graphic elements, click LMB on them. When editing input fields, dialogs for editing fields appear, containing an input field and additional commands.
1. Graphic element "Field joint".

2. Graphic element "Joint along closed contour".

3. Number designation input field.

The editing dialog contains:
· Value input field.
· Command  Technical conditions - associates value with a technical conditions item.
· Command  "Sum" - the number of welded seams with the same number is counted. Deleting or changing a seam number designation is automatically displayed in the full designation for that joint number.
· Command  "Copy properties" - allows you to copy properties from an existing dimension in the drawing.
· Command  "OK" - closes the dialog, saving changes.
· Command  "Cancel" - closes the dialog without saving changes.
4. Input field for the designation of the control complex or the seam control category.

The editing dialog contains:
· Value input field.
· Command  "Copy properties" - allows you to copy properties from an existing dimension in the drawing.
· Command  "OK" - closes the dialog, saving changes.
· Command  "Cancel" - closes the dialog without saving changes.
5. Input fields for the symbol.

The editing dialog contains:
· Value input field.
· Buttons for quick insertion of special symbols for fixed joint:
 - Soldered leg;
 - Remove weld reinforcement;
 - Treat seam overflows and unevenness with graded junction to parent metal;
 - Discrete double unfaced seam;
 - Discrete double faced seam;
 - Opened contour seam.
· Command  "Copy properties" - allows you to copy properties from an existing dimension in the drawing.
· Command  "OK" - closes the dialog, saving changes.
· Command  "Cancel" - closes the dialog without saving changes.
Seam denotation:
· Text above self of leader
· Text under self of leader
· Text above leader
· Text under leader
· Enable calculate joints
· Count of joints
· Field joint
· Joint along closed contour
Soldering, Lacing, Clamps type 1, Clamps type 1, Pasting together:
· Joint along closed contour
· TR item number
Seam denotation:
1. Move grips - Move the endpoints of the parts of the weld symbol.
2. "Mirror arrow side" grip - changes the side of the arrow.
3. "Weld seam properties" grip - opens a list of available graphic elements. In the list, you can enable or disable the display.
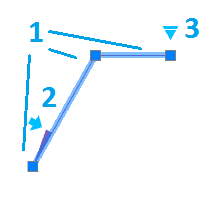
Soldering, Lacing, Clamps type 1, Clamps type 1, Pasting together:
1. Move grips - Move the endpoints of the parts of the weld symbol.
2. Joint type selection grip - opens a drop-down list for selecting a joint type.
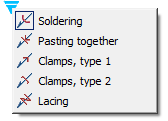
3. "Weld seam properties" grip - opens a list of available graphic elements. In the list, you can enable or disable the display.
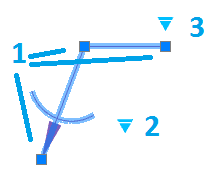
Soldered Joint Leg:
1. Move grip - allows you to move the leg.
2. Grips "Change leg size" - allow you to change the size of the leg.
Weld point:
1. Move grip - Allows you to move the weld point in the drawing.

 Main menu: Mechanical - Symbols - Permanent connection -
  Simplified weld joint.
 Toolbar: "Symbols" -
  Simplified weld joint.
 Command line: MCWJ.
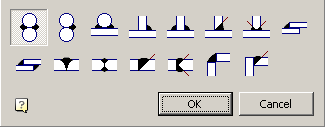
|
Important! |
As the rods and plates can be used primitives nanoCAD: circle and polyline (a special case polylines: rectangles, and polygons). To use the unit as a plate or an object from the database, you must use when choosing an instrument Magnet plate for constructing the circuit plate. Primitives must be tangent to each other. |
Type: two rods overlap joints.
To add an overlap joint:
1. Call the command.
2. Select the drawing first rod .
3. Select the second rod.
4. To select the direction of one-way seam weld placement.
 Two-way joint.
 One-way joint.
 Two-way joint.
Type: T-connection between two rods..
To add a T-joints:
1. Call the command.
2. Select the drawing first plate .
3. Select the second plate.
4. To select the direction of one-way seam weld placement.
 Two-way joint.
 One-way joint.
 Two-way joint.
 Two-way joint.
Type: two plates overlap joints.
To add an overlap joint:
1. Call the command.
2. Select the drawing first plate.
3. Select the second plate.
4. To select the direction of one-way seam weld placement.
 Corner seam-sided.
 Corner sided seam.
Type: Butt joint of two plates.
To add a butt joint:
1. Call the command.
2. Select the drawing first plate .
3. Select the second plate.
4. To select the direction of one-way seam weld placement.
 One-way butt weld.
 Sided butt weld.
 One-way butt weld.
 Sided butt weld.
Type: Angular connection of two plates.
To add a butt joint:
1. Call the command.
2. Select the drawing first plate.
3. Select the second plate.
4. To select the direction of one-way seam weld placement.
 Corner seam-sided.
 Corner seam-sided.
 Main menu: Mechanical - Symbols - Permanent connection-
  Edge preparation.
 Toolbar: "Symbols" -
  Edge preparation.
 Command line: MCEDGEPREPARATION.
Provides cutting edge parts in the drawing.
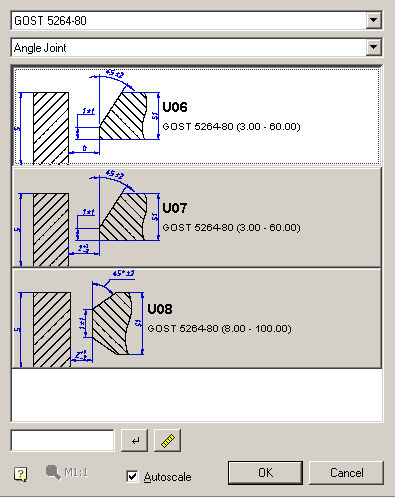
Elements of the dialogue:
1)The list of standard cutting edges for welding;

2) List of types of connection plates welded: Butt, T-bar, angle;

3) List of connection options;
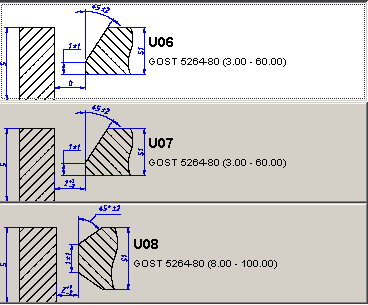
4) Filter the list by the thickness of the plates;

When you enter a numeric value thickness dialogue filters only those types of cutting edges, matching the thickness of the part. The filter is made by pressing the  "Apply filter", or by pressing Enter. The value of the thickness in the filter can be measured by the meter to be launched on the
  "Measure".
5) Zoom menu created design elements

Menu is disabled if Auto is enabled check box. In this case, the scale created by the size and design elements set to the current scale decoration.
If you turn off Auto box, it will be possible to create a drawing cutting edges in arbitrary scale is selected in this dialog.
For the cutting edges must be vyponit following:
1. Select the type of connection: butt, T-bar or angle;
2. If necessary, filter preparation method edges, depending on their thickness. This can be done directly by entering the minimum thickness of the edges, or by measuring the drawing;
3. Determine the scope of dimension lines;
4. Double-click method of preparing the edges;
5. Specify the edge of the weld joint. Depending on the method of preparation is required to select the left and right edges alternately.
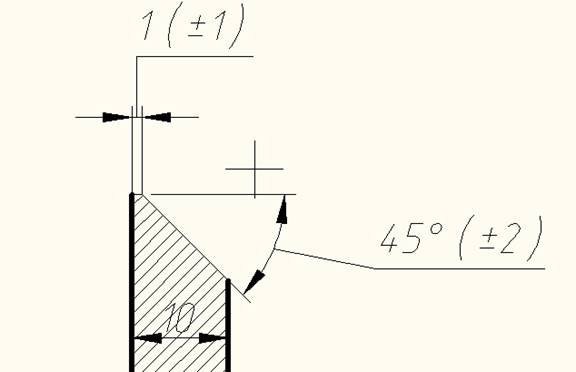
When you create a cutting edge bevel one team will cycle to offer select sites for the creation of such ramps.
When you create a cutting edge bevel two team provides consistently indicate bevel for one, and then to other parts of the joint.
|
Important! |
The plates can be used as primitives nanoCAD, as well as objects nanoCAD Mechanica. |
 Main menu: Mechanical - Symbols -
  Marking symbol.
 Ribbon: Mechanical - Symbols -
  Marking symbol.
 Toolbar:
  Marking symbol (toolbar "MCS Symbols").
 Command line: MCMARK.
1. Call command  "Marking symbol".
2. Specify the place of marking.
3. If necessary, select the arrow type in the context menu: Arrow or Point.
4. If necessary, select the type of designation in the context menu.: Mark or Brand.
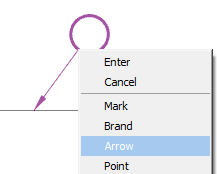
5. Indicate the position of the mark. Open dialog "Marking and branding".
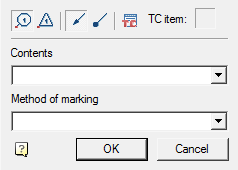
6. Adjust the settings and click "OK."
7. A marking or branding mark will be created.
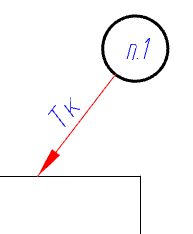

The "Marking and branding" dialog contains:
· Graphic switch sign type:  Marking or
  Branding.
· Graphic switch arrow type: Arrow or
  Point.
· Button  Technical conditions. Allows you to add technical conditions. The last item added will automatically bind to the marking.
The number of the selected item is displayed in the field next to the technical conditions button.
|
Note: |
The item number in the technical conditions will match the number in the designation in the drawing, even after changing the order of the items in the editor. |
· Drop-down list "Contents". Allows you to specify the content type of the mark marking or branding.
· Drop-down list "Method of marking". Allows you to specify the method of applying the mark marking or branding.
· Type - Type of mark: Marking or Branding.
· Arrow type - Arrow type: Arrow or Point.
· Content
· Method of marking
· Text position - The position of the text content and method of applying to the extension line. The value changes from 0 to 1. The report starts from the place of marking.
· TR item number.
· Coeff. of compression of TR item text.
1. Grip type designation: Marking or Branding.
2. Grip position of the mark.
3. Grip position text on the extension line.
4. Grip select the type of arrow.
5. Grip position of the arrow.
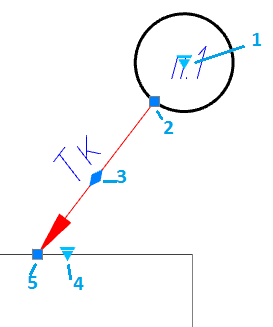
 Main menu: Draw - Notes -
  Mechanical note.
 Main menu: Mechanical - Symbols - Notes -
  Mechanical note.
 Ribbon: Annotate - Leaders -
  Mechanical note.
 Ribbon: Mechanical - Symbols -
  Mechanical note.
 Toolbar: Notes -
  Mechanical note.
 Command line: MCNOTE, NOTE.

1. Call the command.
2. If the option "Show dialog before inserting objects" is active, the "Mechanical note" dialog opens. In the "Mechanical note" dialog box, enter text and define the note options. Click "OK".
3. Pick a point on the object (position of the leader arrow).
4. Place a note leader in the drawing.
5. If the "Show dialog before inserting objects" option is disabled, the "Mechanical note" dialog will open.In the "Mechanical note" dialog box, enter text and define the note options. Click "OK".
6. Note will be biuld.
·  Add string - command adds an extra input field;
·  Remove string - command deletes the input field where the cursor is located;
·  Simple note - command toggles the display of the note;
·  Multiline note - command toggles the display of the note;
·  Multi-line text - the switch controls the display of multi-line text on the shelf;
·  Frame - text under the shelf is framed;
· Type arrows:
·  None,
None,
·  Arrow,
·  Point,
·  Open arrow,
·  Half-arrow,
· Align text horizontally;
·  By left edge
·  By center
·  By right edge
·  Insert special symbol - the command allows you to insert a special character into the input field;
·  Match properties - command copies appearance parameters from another object;
·  Add extension line - the command allows you to add an additional note line;
·  Technical conditions;
· Designations:
·  Surface,
·  Dimension,
·  Others;
·  Dulling dimension.
The context menu opens in the input field. View Context menu entry fields.
By default, "Mechanical note" contains one text box for the label above the leader flange.
Using the  "Simple note" and
  "Multiline note" menu commands, you edit the presence of additional shelves.
Use the  "Add string" and
  "Remove string" menu commands to edit the number of leader ledges. When using a simple note, these commands control the presence of text under the shelf.
|
Note: |
Hotkeys are available for the |
The  "Multi-line text" option allows you to display multiline text on the shelf. When this parameter is enabled, the transition to another line is performed by the "Ctrl + Enter" key combination.

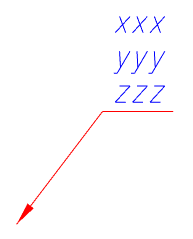
Arrow type selection context menu
When you call the context menu on the note arrow (without selecting the note), a dialog box for selecting the arrow type will appear.
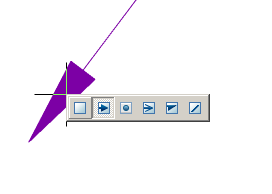
|
Note: |
The submenu (in our example - the letter A) is activated in cases of using the auto sort mode when applying letters to the drawing. |

 Surface - reference surface designation (When automatic lettering sorting is enabled).
 Dimension -dimension designation.
 Others - designation of other elements, such as holes.
 Dulling dimension - special note to indicate blunt edges.
 Main menu: Draw - Notes -
  Construction note.
 Ribbon: Annotate - Leaders -
  Construction note.
 Command line: MCNOTEP, NOTEP.
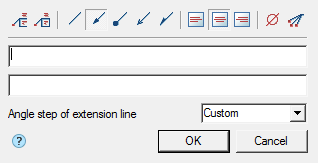
1. Call the command  "Construction note".
2. If "Show dialog before inserting the object" is active, the "Construction Note" dialog opens. In the "Construction Note" dialog box, enter text and define the leader options. Click the "OK" button.
3. Pick a point on the object (select the object) to which the leader arrow will point. To select an object, use the "Select" context menu command; to freely specify a point in the drawing, use the "Free" context menu command.
4. Place the leader shelf in the drawing.
|
Note: |
If the parameter "Angle step of extension line" is arbitrary, it is possible to place the leader ledge orthogonally in the ORTO mode (F8). When you turn on the ORTO mode via the "SHIFT" key, Object Snap (F3) must be turned on. |
5. If the "Show dialog before inserting the object" option is disabled, the "Construction Note" dialog will open. In the "Construction Note" dialog box, enter text and define the leader options. Click the "OK" button.
6. The note is built.
·  Multi-line text - the switch controls the display of multi-line text on the shelf;
·  Frame - text under the shelf is framed;
· Type arrows:
·  None,
None,
·  Arrow,
·  Point,
·  Open arrow,
·  Half-arrow,
· Align text horizontally:
·  By left edge,
·  By center,
·  By right edge;
·  Insert special symbol - the command allows you to insert a special character into the input field;
·  Add extension line - the command allows you to add an additional note line;
The context menu opens in the input field. View Context menu entry fields.
The default positional leader contains two input lines and a list for specifying the pitch of the bevel angle.
The first line is for the label above the leader shelf, the second is under the leader shelf.
In the "Angle step of extension line" list box, the slope angle of the leader lines is selected:
· Custom - a leader line is placed arbitrarily (default);
· step 15° - the leader line is put down with a step multiple 15°;
· step 30° - the leader line is put down with a step multiple 30°;
· step 45° - the leader line is put down with a step multiple 45°;
· step 90° - the leader line is put down with a step multiple 90°.
Arrow type selection context menu
When you call the context menu on the note arrow (without selecting the note), a dialog box for selecting the arrow type will appear.

 Main menu: Draw - Notes -
  Comb leader note.
 Main menu: Mechanical - Symbols - Notes -
  Comb leader note.
 Ribbon: Annotate - Leaders -
  Comb leader note.
 Ribbon: Mechanical - Symbols -
  Comb leader note.
 Toolbar: Notes -
  Comb leader note.
 Command line: MCNOTEC, NOTEC.
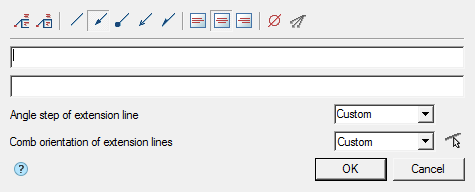
1. Call the command.
2. If the option "Show dialog before inserting objects" is active, the "Comb leader note" dialog opens. In the "Comb leader note" dialog box, enter text and define the note options. Click "OK".
3. Insert the required number of leader lines. When you specify the location of the leader line, the specified line segment is highlighted. Press the "Enter" key to complete the paste.
4. Specify the slope of the leader lines. Commands for switching the ridge direction are available in the context menu: H - horizontal, V - vertical, P - parallel (parallel to the selected line).
5. Place a note leader in the drawing.
6. If the "Show dialog before inserting objects" option is disabled, the "Comb leader note" dialog will open.In the "Comb leader note" dialog box, enter text and define the note options. Click "OK".
7. Note will be build.
·  Multi-line text - the switch controls the display of multi-line text on the shelf;
·  Frame - text under the shelf is framed;
· Type arrows:
·  None,
None,
·  Arrow,
·  Point,
·  Open arrow,
·  Half-arrow,
· Align text horizontally;
·  By left edge
·  By center
·  By right edge
·  Insert special symbol - the command allows you to insert a special character into the input field;
·  Add extension line - the command allows you to add an additional note line;
The context menu opens in the input field. View Context menu entry fields.
Comb leader note by default contains: two lines of input, a list for specifying the pitch of the angle of inclination and the orientation of the ridge.
The first line is for the label above the leader shelf, the second is under the leader shelf.
In the "Angle step of extension line" list box, the slope angle of the leader lines is selected:
· Custom - a leader line is placed arbitrarily (default);
· step 15° - the leader line is put down with a step multiple 15°;
· step 30° - the leader line is put down with a step multiple 30°;
· step 45° - the leader line is put down with a step multiple 45°;
· step 90° - the leader line is put down with a step multiple 90°.
In the "Comb orientation of extension lines" list box, you can select the ridge orientation of the leader lines:
· Custom;
· Horizontal;
· Vertical.
The list is equipped with an additional button  "Select line", which allows you to select the direction of the ridge of the leader lines parallel to any line segment in the drawing.
The  "Multi-line text" option allows you to display multiline text on the shelf. When this parameter is enabled, the transition to another line is performed by the "Ctrl + Enter" key combination.
Arrow type selection context menu
When you call the context menu on the note arrow (without selecting the note), a dialog box for selecting the arrow type will appear.

1. Text alignment toggle grip.
2. Leader lines grip.
3. Arrow type switch-grip.
4. Ridge line rotation grip.
5. Shelf rotation grip.
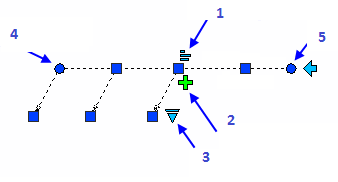
 Main menu: Draw - Notes -
  Chain note.
 Ribbon: Annotate - Leaders -
  Chain note.
 Command line: MCNOTEH, NOTEH.
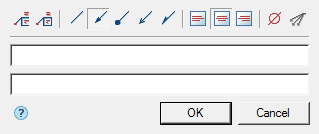
A chain note has several coaxial (collinear) series-connected pointers.
If the first node of the note is placed on a line segment, then the note will be located perpendicular to this segment.
1. Call the command.
2. If the option "Show dialog before inserting objects" is active, the "Chain note" dialog opens. In the "Chain note" dialog box, enter text and define the note options. Click "OK".
3. Specify note nodes, at least two. To complete the selection of nodes, press "Enter".
4. Specify the position of the leader where the text will go.
5. If the "Show dialog before inserting objects" option is disabled, the "Chain note" dialog will open.In the "Chain note" dialog box, enter text and define the note options. Click "OK".
6. Note will be build.
·  Multi-line text - the switch controls the display of multi-line text on the shelf;
·  Frame - text under the shelf is framed;
· Type arrows:
·  None,
None,
·  Arrow,
·  Point,
·  Open arrow,
·  Half-arrow,
· Align text horizontally;
·  By left edge
·  By center
·  By right edge
·  Insert special symbol - the command allows you to insert a special character into the input field;
·  Add extension line - the command allows you to add an additional note line;
The context menu opens in the input field. View Context menu entry fields.
Chain note contains two lines of input by default.
The first line is for the label above the leader shelf, the second is under the leader shelf.
Input fields are expandable. Switching to another line of the input field is performed by the "Ctrl + Enter" key combination.
Arrow type selection context menu
When you call the context menu on the note arrow (without selecting the note), a dialog box for selecting the arrow type will appear.

 Main menu: Draw - Notes -
  Section note.
 Ribbon: Annotate - Leaders -
  Section note.
 Command line: MCNOTES, NOTES.
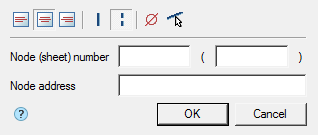
1. Call the command.
2. If the option "Show dialog before inserting objects" is active, the "Section note" dialog opens. In the "Section note" dialog box, enter text and define the note options. Click "OK".
3. Select the insert mode "Free" or "Selection":
· "Selection" - you need to specify the first and second lines to place the note, the cursor is in the form of a square,
· "Free" - no lines are required, can be placed anywhere by 2 points, the cursor is in the form of a cross.
To switch from the "Selection" mode to the "Free" mode, press the RMB and select the "Enter" command in the context menu. To switch from the "Free" mode to the "Selection" mode, press the RMB. Also, switching modes is carried out with the "Space" key.
4. Pick the first point (select the first line) in the drawing.
5. Pick the second point (select the second line) in the drawing.
6. Specify the position of the leader.
7. If the "Show dialog before inserting objects" option is disabled, the "Section note" dialog will open.In the "Section note" dialog box, enter text and define the note options. Click "OK".
8. Section note will be build.
· Align text horizontally;
·  By left edge
·  By center
·  By right edge
· Lines;
·  Single-stroked line
·  Double-stroked line
·  Insert special symbol - the command allows you to insert a special character into the input field;
·  Select line - the command allows you to relocate the location of the leader line by specifying a line in the drawing;
The context menu opens in the input field. View Context menu entry fields.
Section note contains two lines of input by default.
The first line of input consists of two fields for specifying the "Node (sheet) number".
Second line of input for specifying the "Node address".
Arrow type selection context menu
When you call the context menu on the note arrow (without selecting the note), a dialog box for selecting the arrow type will appear.

 Main menu: Draw - Notes -
  Node note.
 Ribbon: Annotate - Leaders -
  Node note.
 Command line: MCNOTEK, NOTEK.
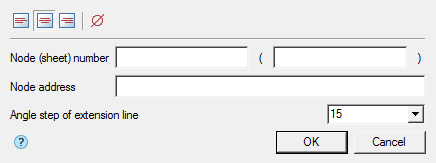
1. Call the command.
2. If the option "Show dialog before inserting objects" is active, the "Node note" dialog opens. In the "Node note" dialog box, enter text and define the leader options. Click "OK".
3. Pick the center of the leader oval (circle).
4. Specify the size of the leader oval (circle).
5. Show the position of the shelf or enter in advance in the command line the step of the angle of inclination of the leader line.
6. If the "Show dialog before inserting objects" option is disabled, the "Node note" dialog will open.In the "Node note" dialog box, enter text and define the leader options. Click "OK".
7. Node note will be build.
· Align text horizontally;
·  By left edge
·  By center
·  By right edge
·  Insert special symbol - the command allows you to insert a special character into the input field;
The context menu opens in the input field. View Context menu entry fields.
Node note by default contains: two input lines and a drop-down list for specifying the pitch of the slope.
The first line of input consists of two fields for specifying the "Node (sheet) number".
Second line of input for specifying the "Node address".
In the drop-down list "Angle step of extension line", the slope angle of the leader lines is selected:
· Custom - a leader line is placed arbitrarily (default);
· step 15° - the leader line is put down with a step multiple 15°;
· step 30° - the leader line is put down with a step multiple 30°;
· step 45° - the leader line is put down with a step multiple 45°;
· step 90° - the leader line is put down with a step multiple 90°.
Arrow type selection context menu
When you call the context menu on the note arrow (without selecting the note), a dialog box for selecting the arrow type will appear.

Note for multilayered constructions
 Main menu: Draw - Notes -
  Note for multilayered constructions.
 Ribbon: Annotate - Leaders -
  Note for multilayered constructions.
 Command line: MCNOTEM, NOTEM.
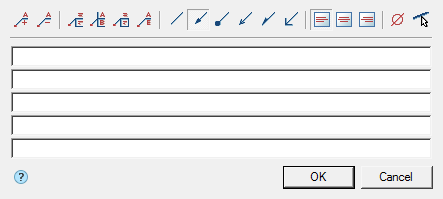
1. Call the command.
2. If the option "Show dialog before inserting objects" is active, the "Note for multilayered constructions" dialog opens. In the "Note for multilayered constructions" dialog box, enter text and define the leader options. Click "OK".
3. Pick a point on an object (drawing).
4. Specify the position of the shelf.
5. If the "Show dialog before inserting objects" option is disabled, the "Note for multilayered constructions" dialog will open. In the "Note for multilayered constructions" dialog box, enter text and define the leader options. Click OK.
6. The note will be built.
·  Add string - command adds an extra input field;
·  Remove string - command deletes the input field where the cursor is located;
·  First line - the command adds a border (vertical line before the line) for the first line;
·  Multi-line text - the switch controls the display of multi-line text on the shelf;
·  Frame - text under the shelf is framed;
· Type arrows:
·  None,
None,
·  Arrow
Arrow
·  Point,
·  Open arrow,
·  Half-arrow,
·  Right angle;
· Align text horizontally;
·  By left edge
·  By center
·  By right edge
·  Insert special symbol - the command allows you to insert a special character into the input field;
·  Select line - the command allows you to relocate the location of the leader line by specifying a line in the drawing;
The context menu opens in the input field. View Context menu entry fields.
By default, "Note for multilayered constructions" contains 5 input fields.
The number of fields is edited using the menu commands "Add string" and "Remove string".
With the help of the "First line" menu command, the presence of a border on the first line is edited.
Using the "Multi-line text" menu command, you edit the presence of shelves in multiline notes.
Arrow type selection context menu
When you call the context menu on the note arrow (without selecting the note), a dialog box for selecting the arrow type will appear.

 Main menu: Draw - Notes -
  Linear Aligned note.
 Ribbon: Annotate - Leaders -
  Linear Aligned note.
 Command line: MCLINM, LINM.
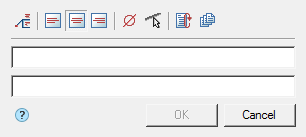
1. Call the command. A dialogue will open "Linear aligned note"
2. In the "Linear aligned note" dialog box, enter text and define the leader options. Click the "OK" button.
3. Specify the subassembly line on which the line subassembly will be located.
4. Specify text position.
5. "Linear aligned note" will be build.
·  Multi-line text - the switch controls the display of multi-line text on the shelf;
· Align text horizontally;
·  By left edge
·  By center
·  By right edge
·  Insert special symbol - the command allows you to insert a special character into the input field;
·  Select line - the command allows you to relocate the location of the leader line by specifying a line in the drawing;
·  Auto repeat - when the switch is on, the "Linear aligned note" command, upon completion of the previous command, is restarted;
·  Multiple insert - when the switch is on, the insert is looped. To exit the cycle, press the "Enter" key.
The context menu opens in the input field. View Context menu entry fields.
By default "Linear aligned note" contains 2 input fields.
The first field for the label is above the linear structure, the second - under the linear structure.
The  Multi-line text parameter allows you to display multi-line text on the shelf. When this parameter is enabled, the transition to another line is performed by the "Ctrl + Enter" key combination.
Arrow type selection context menu
When you call the context menu on the note arrow (without selecting the note), a dialog box for selecting the arrow type will appear.

There are 3 commands for editing leaders:
 Main menu: Mechanical - Symbols - Notes -
  Append leader.
 Ribbon: Mechanical - Symbols -
  Append leader.
 Toolbar:
  Append leader ( "Notes").
 Command line: MCPLADD.
1. Call the team.
2. Pick a point on the object (point of arrow position).
3. Indicate the required number of intermediate points that form a break in the leader line.
4. Point to the desired leader inserted in the drawing to complete the command.
 Main menu: Mechanical - Symbols - Notes -
  Detach leader.
 Ribbon: Mechanical - Symbols -
  Detach leader.
 Toolbar:
  Detach leader ( "Notes").
 Command line: MCPLDEL.
1. Call the team.
2. In the drawing, select the leader line you want to delete.
 Main menu: Mechanical - Symbols - Notes -
  Edit leader.
 Ribbon: Mechanical - Symbols -
  Edit leader.
 Toolbar:
  Edit leader ( "Notes").
 Command line: MCPLREC.
1. Call the team.
2. Highlight on the drawing a leader line that should be chained.
3. Pick a point on the desired leader in order to fix the new position of the leader line.
nanoCAD Mechanica 23 allows you to use "Fields (Fields) drawing".
1. In the context menu of the callout input field, select the "Insert field..." command. The "Field" dialog will open.
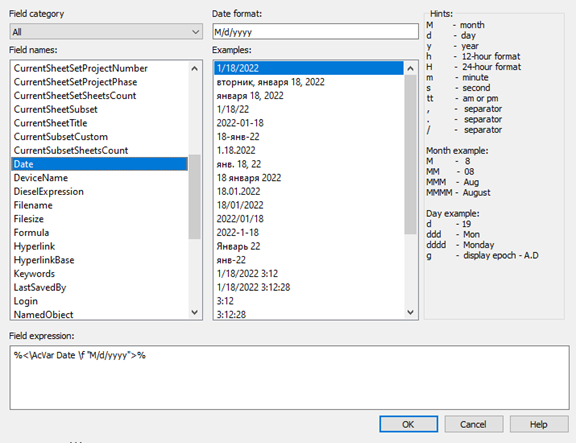
2. In the dialog box, link to the desired field and click the "OK" button.
3. The link will be created. When you click on a field link, the scope will move to the linked object.
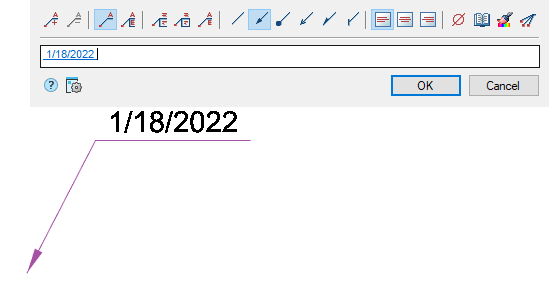
|
Note: |
To update data in adaptive callouts, use the command "Regenerate". |
If necessary, save the callouts for later use, you need to create a balloon, defining it related parameters.

Further, by selecting it, specify the context menu - "Save object as template".
In the "Template wizard" press button "Create template".
In the dialog box "Create element" specify the storage folder in the base elements, Name and Note (if necessary). Press "OK". Again we return to the dialog box "Template wizard".
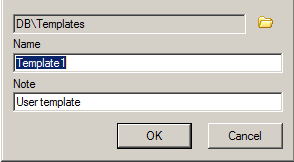
Press button "Update template" and close "Template wizard".
Update the tree base elements, the template will be created by the note.
Subsequently, this note can be inserted into a drawing for new objects. Adaptive communication with new objects and their settings will be saved.
 Main menu: Mechanical - Symbols -
  Gradient symbol.
 Ribbon: Mechanical - Symbols -
  Gradient symbol.
 Toolbar: Symbols -
  Gradient symbol.
 Command line: MCGRAD.
1. Call the command.
2. Using the "Properties" context menu command, open the "Gradient symbol" dialog box. Make the gradient symbol settings and confirm the changes with the "OK" button.
3. Select the line in the drawing for which you want to set the gradient symbol.
4. Place the gradient symbol on the selected line or leader flange.
5. The gradient symbol is drawn and associated associatively with the specified line.
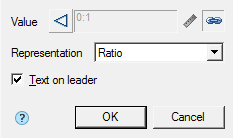
The editing dialog contains:
· Selection button type of designation: Gradient without designation, Left gradient and Left taper.

· Input field for gradient symbol value. The input field is active if the associativity mode is disabled. If necessary, turn off the associative connection mode by turning off the  "Associative" switch (when setting, the associativity mode is turned on automatically).
·  "Pick from driwing" button. When the associativity mode is off, the button is active and allows you to measure the gradient symbol value in the drawing.
· Switch  "Associative". Controls the display of the gradient symbol value. If the switch is on, the value is taken from the associated line, if it is off, it is entered manually.
· Drop-down list "Representation". Allows you to select how the slope units are represented:
· As is
· Ratio
· Decimal
· Percent
· Permille
· Degree
· "Text on leader" checkbox. Toggles whether the gradient symbol is on a shelf or on a line.
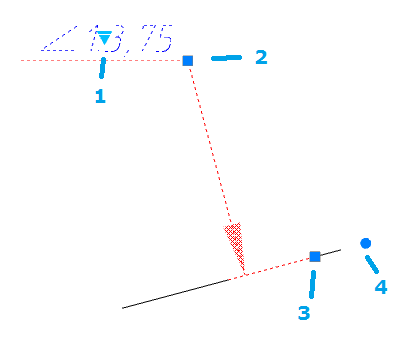
1. Grip for selecting the slope symbol representation.
2. Shelf movement grip.
3. Base move grip. When you move, the associativity with the line is lost and an additional fourth grip appears.
4. Grip for changing the angle of inclination of the base.
 Main menu: Mechanical - Symbols -
  Position.
 Toolbar:
  Position (toolbar "MCS Symbols").
 Command line: MCPOS.
1. Specify the insertion point to the first marker position or call the context menu command "P-properties."
2. In the dialog box Tagging enter text.
3. Select an arrow. Click OK.
4. Insert the desired number of drawing markers. Subsequent node number is automatically incremented from the previous.
This command draws the drawing reference numerals used in the drawings.
Insert position by specifying the datum marker
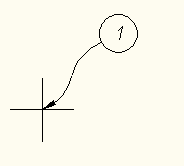
Next, mark the position statement of the position:
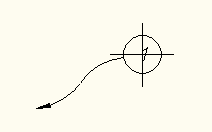
Inserted into a single command cycle positions are automatically numbered
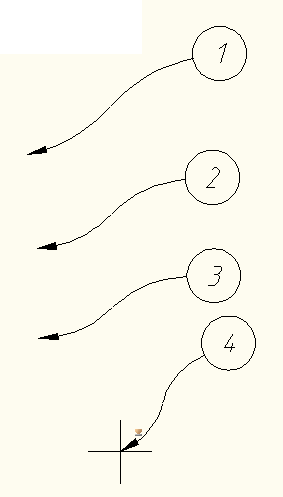
To specify additional options position must call dialog "Position", where you can specify the text position display option arrows (switches below the text input field).
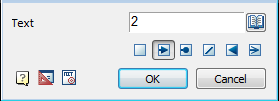
 Main menu: Mechanical - Symbols -
  Hole group.
 Ribbon: Mechanical - Symbols -
  Hole group.
 Toolbar: "MCSSymbols") -
  Hole group.
 Command line: MCFILL.
Universal command for drawing holes. With its help, you can draw a new hole with centerlines, or by specifying a group of holes to assign them general properties with filling of a sector.
1. Draw holes from circles.
2. Call the command  "Hole group".
3. Select the required circles. Press the "Enter" key to complete the selection. The "Holes" dialog will open.
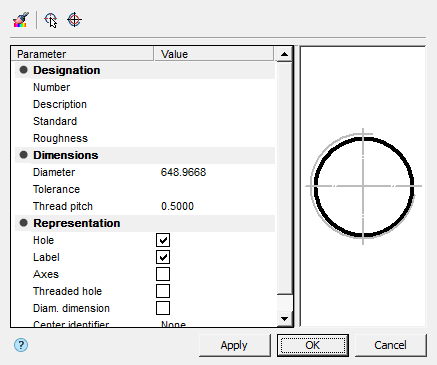
4. Adjust the hole settings and click "OK". The parameters will be applied to the holes. The holes will be created.

The "Holes" editing dialog is opened by double-clicking. The dialog consists of: Toolbar, Parameter List, Graphics Window.

Toolbar
 Match properties - this command allows you to copy parameters from holes already installed in the drawing.
 Select holes - the command allows you to select additional holes from the drawing.
 Create holes - the command creates holes of the specified diameter. To dynamically set the radius on the screen, hold down the left mouse button and move the cursor.
Parameter List
Designation
· Number - specifies the number of the hole in the group.
· Description - specifies the hole table description field.
· Standard - sets the field to the standard of the hole table.
· Roughness - allows you to specify the roughness of the hole (displayed in the hole table).
Dimensions
· Diameter - hole diameter.
· Tolerance - the "..." button opens the "Tolerances" dialog, from which you can select a tolerance.
· Thread pitch - hole thread pitch.
Representation
· Hole - hole display switch.
· Label - label display switch.
· Axes - axis display switch.
· Threaded hole - thread display switch.
· Diam. dimension - diametrical dimension display switch.
· Center identifier - drop-down list for selecting the hole center designation.
|
Note: |
Also, the parameters of the "Representation" section can be configured through the graphics window. |
Graphics Window
The graphics window allows you to see the resulting hole representation and customize the representation by directly specifying elements.
|
Threaded hole |
Axes |
Fill first quarter |
|
|
|
|
|
Fill second quarter |
Fill third quarter |
Fill fourth quarter |
|
|
|
|
The parameters on the "Properties" functional panel are similar to the parameters from the list of parameters of the "Holes" dialog.
1. Hole position change grip.
2. Diameter change grips.
3. Grip for changing the position of the hole number.
4. Hole rotation grip.
5. View adjustment grip.
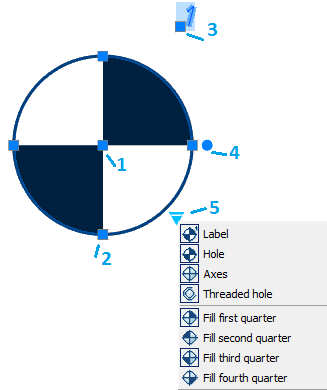
 Main menu: Mechanical - Symbols -
  Hole chart.
 Ribbon: Mechanical - Symbols -
  Hole chart.
 Toolbar:
  Hole chart (on toolbar "MCS Symbols").
 Command line: MCHOLECHART.
The command is designed to create automatically updated statements for a group of holes.
1. Call command  "Hole chart".
2. Specify the insertion point of the coordinate system.
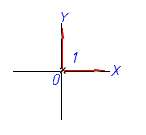
3. Set the angle of rotation of the coordinate system.
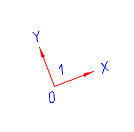
4. Specify the required holes and circles in the drawing, or create new ones using the "Create N" context menu command. To complete the selection (creation), press the "Enter" key. The "Hole chart" dialog opens.
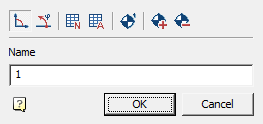
5. In the "Hole chart" dialog, specify the name and type (dekatrov or polar) of the coordinate system, add (or delete), if necessary, holes.
6. Insert into the drawing the necessary tables: List of coordinates, Table of holes, Table of values.
7. Click "OK." Tables will be built. Holes will be associated with tables and coordinate system.
|
Note: |
To see the holes in the drawing associated with this coordinate system, double-click on the anchor. |
The "Hole chart" dialog is called for editing by double-clicking on the coordinate system.

The "Hole chart" dialog contains:
· Graphic switch type coordinate system:  Cartesian or
  Polar.
· Hole table creation buttons:
·  List of coordinates - an automatically updated table is formed with the coordinates of each hole.
·  Hole table - a table is formed, grouped by hole diameter. Each group of identical holes is assigned a letter.
· Button  Number holes - the command automatically assigns consecutive numbers or letters to the holes (according to the setting for Hole Designation).
· Button  Add holes - this command allows you to add holes to the report.
· Button  Remove holes - this command allows you to remove holes from the report.
· Field "Name" - the name of the coordinate system. It is added to the hole designation as a prefix.
The handles of the report tables are similar to the handles of ordinary tables.
Coordinate system:
1. Axle Strength Handles.
2. Handles parallel transfer axes.
3. Handle move the designation of the coordinate system.
4. Handle rotation coordinate system.
5. Handle transfer coordinate system.
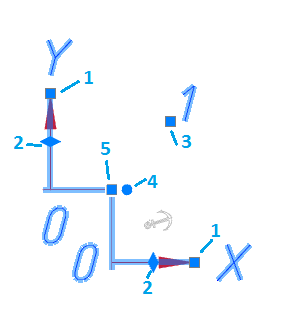
 Main menu: Mechanical - Drawing title/ Borders -
  Technical conditions.
 Ribbon: Mechanical - Title blocks -
  Technical conditions.
 Toolbar:
  Technical conditions (on toolbar "Drawing title/ Borders").
 Command line: MCTT.
A distinctive feature of nanoCAD Mechanica 23 is the possibility of linking the designation of textual information on the drawing with the text in the technical requirements.
When writing paragraphs of technical requirements (hereinafter TC), you can make reference within the proposal of the paragraph of technical requirements to any position or affixed view.
The textual information is the tolerances and dimensions, drawing zones, designations of types, cuts, sections, marking signs, marking of welded joints, position.
A change in the value of the textual information (for example, a part position number) will result in an automatic change in the TC text. If this position has been deleted, a warning will appear about the need to check a particular item of requirements.
The relationship between the TC and the designation works in the opposite direction. Changing the order of the points of the requirements (their numbering) is automatically reflected in the designation on the drawing (for example, a marking mark, the designation of which contains the item number from the technical requirements).
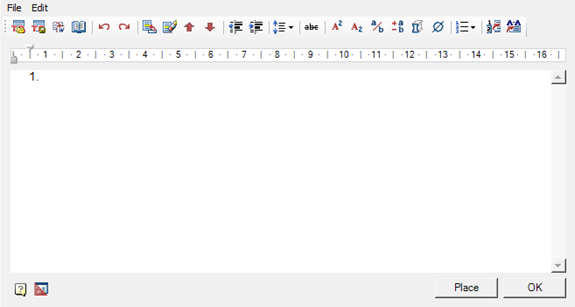
· File
· Clear - clear TC.
· Open file - the command opens the TC from a previously saved file.
· Save file - command saves TC to * .rtf file.
· Close without save - the command closes the TC editing dialog box without saving.
· Edit
· Undo - command cancels last action.
· Redo - the command repeats the previously canceled action.
· Insert title - command inserts a title in front of TC items.
· Delete title - command removes TC title.
·  Open file - the command opens the TC from a previously saved file.
·  Save file - command saves TC to * .rtf file.
|
Important! |
The special characters used in the editor are lost when they are transferred to an external file. |
·  Fill in MSWord - the command opens a new document in MSWord and inserts the text TC.
|
Important! |
The special characters used in the editor are lost when they are transferred to an external file. |
·  Notebook - command opens interface notebook.
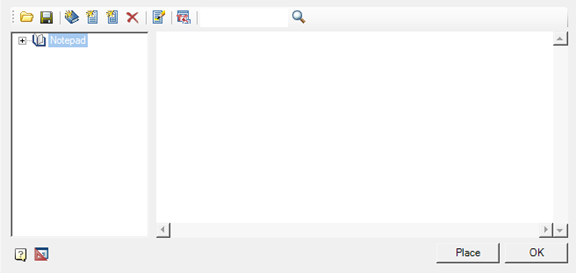
·  Undo - command cancels last action.
·  Redo - the command repeats the previously canceled action.
·  Add paragraph (CTRL+ENTER) - command adds a new TC item.
·  Delete paragraph (CTRL+DEL) - command deletes TC item.
·  Replace paragraph up - the command moves the TC item at which the cursor is located, higher up in the list.
·  Replace paragraph down - the command moves the TC item at which the cursor is located, down the list.
·  Decrease Indent - the command reduces the indent of selected items.


·  Increase indent - command increases the indent of selected items.


·  Line Spacing - the command opens the list for setting the line spacing. Adjust line spacing of selected items.
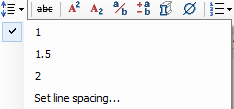
· 1 - set 1 leading (unit for measuring line spacing). Line spacing is added after the TC item.
· 1.5 - set 1.5 leading. Line spacing is added after the TC item.
· 2 - set 2 leading. Line spacing is added after the TC item.
· Set line spacing... - the command allows you to specify your own line spacing. Line spacing is added after the TC item.
·  Superscript - translates the selected text into superscript.

·  Subscript - translates the selected portion of the text into a subscript.
·  Insert fraction - the command calls the "Fraction" dialog box in which the numerator and denominator are specified. The fraction is inserted into the text TC.
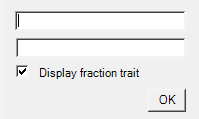
·  Insert tolerance - provides the ability to insert a tolerance. When called, the "Tolerances" dialog box opens.
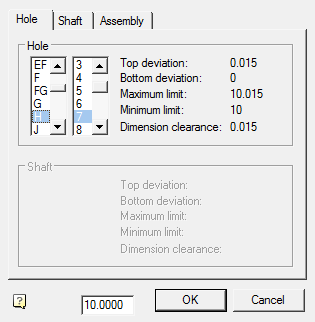
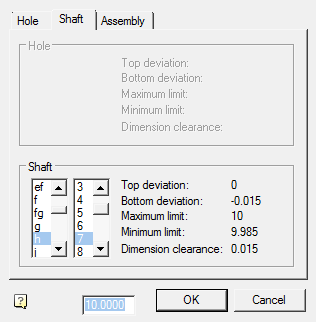
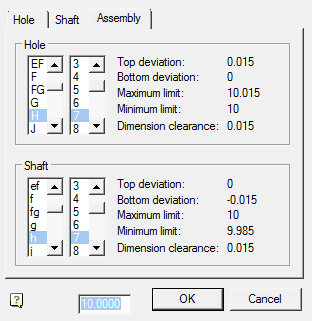
·  Insert material - provides the ability to insert material. When called, opens the "Material" dialog.

·  Insert spec symbol - allows you to insert special characters in the text TC.
·  Numeration - the command allows you to select the design option for TC items.

|
Note: |
To create a hierarchical list it is necessary to press the "Tab" key on an empty item. A new child level has been created. To return to the previous level, press the "Enter" key on an empty item. |
·  Insert position - the command associates text fragments in the TC with a graphical representation of the positions in the drawing.
To insert a link in the TC editor, place the cursor on the insertion point of the associated symbol and click on the "Insert position" button, select a position in the drawing.
Related information is displayed in blue in the TC editor. When you click on a link, the application will display the associated graphical representation.
·  Insert view/cuts - the command associates text fragments in TC with a graphical representation of views, sections and sections in the drawing.
To insert a link in the TC editor, place the cursor on the insertion point of the associated symbol and click on the "Insert view / cuts" button, select the view, section or section.
Related information is displayed in blue in the TC editor. When you click on a link, the application will display the associated graphical representation.
· Ruler. The ruler is used to position the lines relative to the entire TC document. Sliders are used to position the lines.

1. The bottom slider adjusts the indentation of all paragraph lines except the first line.
2. The top slider adjusts the indent of the first paragraph line.
3. The angle slider adjusts the text indent from the numbered list marker.
The context menu uses standard commands for text fields.
To set the TC text parameters (font height and slope, indent from the title block, etc.) open the dialog box "Settings".
 Main menu: Mechanical - Drawing title/ Borders -
  Technical parameters.
 Ribbon: Mechanical - Title blocks -
  Technical parameters.
 Toolbar:
  Technical parameters (on toolbar "Drawing title/ Borders").
 Command line: MCTD.
Working with the technical description editor is similar to working with the TC editor. The main difference is that the typed text can be placed anywhere in the drawing.
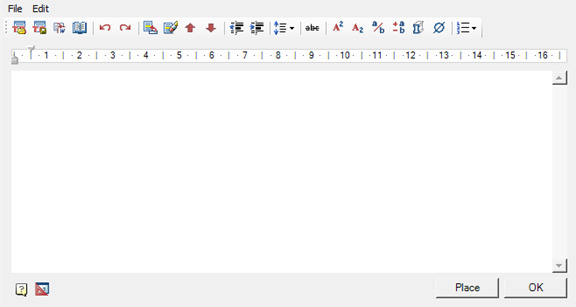
· File
· Clear - clear TP.
· Open file - the command opens the TP from a previously saved file.
· Save file - command saves TP to * .rtf file.
· Close without save - the command closes the TP editing dialog box without saving.
· Edit
· Undo - command cancels last action.
· Redo - the command repeats the previously canceled action.
· Insert title - command inserts a title in front of TP items.
· Delete title - command removes TP title.
·  Open file - the command opens the TP from a previously saved file.
·  Save file - command saves TP to * .rtf file.
|
Important! |
The special characters used in the editor are lost when they are transferred to an external file. |
·  Fill in MSWord - the command opens a new document in MSWord and inserts the text TP.
|
Important! |
The special characters used in the editor are lost when they are transferred to an external file. |
·  Notebook - command opens interface notebook.

·  Undo - command cancels last action.
·  Redo - the command repeats the previously canceled action.
·  Add paragraph (CTRL+ENTER) - command adds a new TP item.
·  Delete paragraph (CTRL+DEL) - command deletes TP item.
·  Replace paragraph up - the command moves the TP item at which the cursor is located, higher up in the list.
·  Replace paragraph down - the command moves the TP item at which the cursor is located, down the list.
·  Decrease Indent - the command reduces the indent of selected items.


·  Increase indent - command increases the indent of selected items.


·  Line Spacing - the command opens the list for setting the line spacing. Adjust line spacing of selected items.

· 1 - set 1 leading (unit for measuring line spacing). Line spacing is added after the TP item.
· 1.5 - set 1.5 leading. Line spacing is added after the TP item.
· 2 - set 2 leading. Line spacing is added after the TP item.
· Set line spacing... - the command allows you to specify your own line spacing. Line spacing is added after the TP item.
·  Superscript - translates the selected text into superscript.

·  Subscript - translates the selected portion of the text into a subscript.
·  Insert fraction - the command calls the "Fraction" dialog box in which the numerator and denominator are specified. The fraction is inserted into the text TP.

·  Insert tolerance - provides the ability to insert a tolerance. When called, the "Tolerances" dialog box opens.


·  Insert material - provides the ability to insert material. When called, opens the "Material" dialog.

·  Insert spec symbol - allows you to insert special characters in the text TP.
·  Numeration - the command allows you to select the design option for TP items.

|
Note: |
To create a hierarchical list it is necessary to press the "Tab" key on an empty item. A new child level has been created. To return to the previous level, press the "Enter" key on an empty item. |
· Ruler. The ruler is used to position the lines relative to the entire TP document. Sliders are used to position the lines.

1. The bottom slider adjusts the indentation of all lines of the paragraph except the first line.
2. The top slider adjusts the indentation of the first line of the paragraph.
The context menu uses standard commands for text fields.
To set the TP text parameters (font height and slope, indent from the title block, eTP.) open the dialog box "Settings".
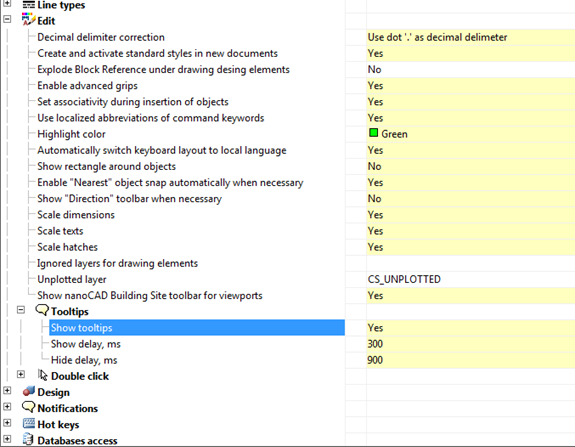
If it's set multiline text editing with tools nanoCAD Mechanica 23, then clicks on the test will be called dialogue editing.
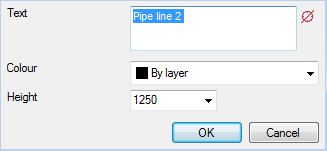
In this dialog may ask, besides the text, its color, and the Height, and add special symbols.


 De
De  Es
Es  Fr
Fr  Pt
Pt 


