-
-
-
-
-
-
-
-
-
-
-
-
-
-
-
-
-
-
-
-
-
-
-
-
-
-
-
-
-
Color Separation
-
-
-
-
-
-
-
-
-
-
-
-
-
-
-
-
-
-
-
-
-
-
-
-
-
-
-
Color Separation
 Ribbon: Raster – Processing >
  Color Separation
 Menu: Raster – Processing the raster >
  Color Separation…
 Command line: ColorSeparation
 This functionality is available only in the Raster module.
The operation allows you to separate points of a color image into disjoint sets – categories.
Each category is defined by a set of base colors. The purpose of such procedures is to highlight the colors by which the original image was made. Usually, objects of the same kind are indicated by one color, therefore, by dividing image points by color, you get the opportunity to select the necessary image objects into separate monochrome raster layers (images).
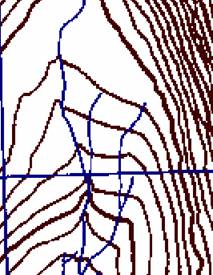
The example shows the creation of monochrome background layers, rivers and level lines using the procedure of separation by color.
1. Run the command.
2. Create a set of categories using the Add category button:
Use the eyedropper to indicate an object on the image, the points of which should fall into the category being created.
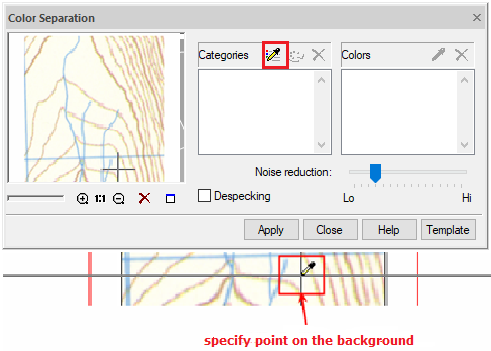
On the screen the Category Name and Color window will appear, in which you can assign a symbolic color and a category name.
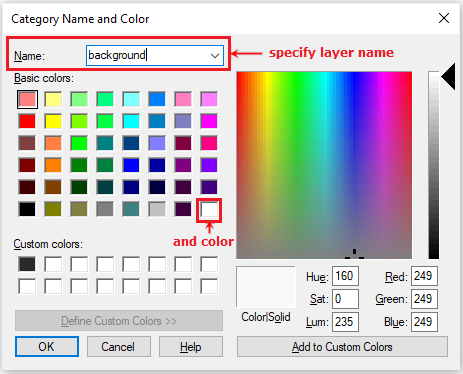
3. In the same way, use the eyedropper to indicate the level lines. Specify the layer name – Level lines and select the color – dark brown.
4. Add basis colors to the Level lines category. Click the eyedropper button in the Colors field and specify point on the image. The color of the specified point will be added to the list of the Colors field.
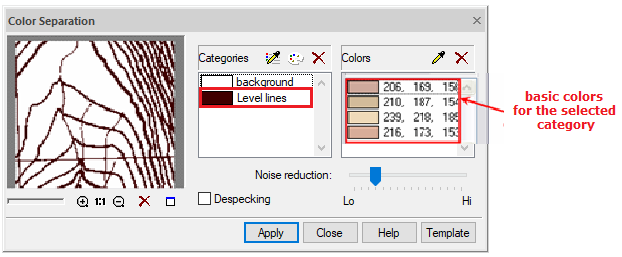
In case of an error when choosing a basic color, delete it. The error in the color selection is determined by the separation results, which are dynamically displayed in the preview window.
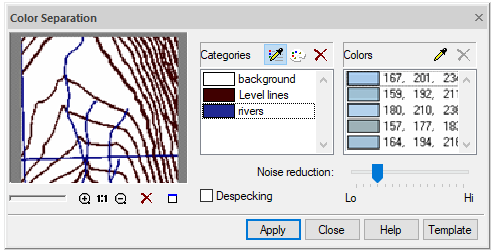
5. In the same way, create a category for rivers and set the basic colors.
6. To process a larger number of images of the same type, it is convenient to save the color separation parameters in a special file. Select the Template button and save the setting in the template. The saved setting can be later loaded to work with another image.
7. Having achieved an acceptable separation quality, click the Apply button.


 De
De  Es
Es  Fr
Fr  Pt
Pt 
