-
-
-
-
-
-
-
-
-
-
-
-
-
-
-
-
-
-
-
-
-
-
-
-
-
-
-
-
-
-
-
-
-
-
-
-
-
-
-
-
-
-
-
-
-
-
-
-
-
BCF
-
-
-
-
-
-
-
-
-
-
-
-
-
-
-
-
-
-
-
-
-
-
-
-
-
-
-
-
BCF
 Functional panel: BCF.
BIM Collaboration Format (BCF) — is a structured file format suitable for tracking issues with a building information model. BCF is primarily designed to define views of a building model and the associated information about collisions and errors associated with specific objects in the view. The BCF file format allows users to collaborate on project issues.
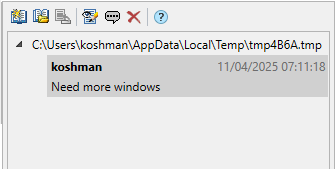
The BCF panel allows you to create a BCF project that includes a collection of topics. The BCF project is stored inside the document.

Toolbar
 Create BCF - creates a topic linked to a document. The number of topics per document is unlimited.
 Import BCF - imports a BCF file into a document.
 Export BCF - exports the selected topic from the document to a BCF file. When exporting, the BCF standard version is selected.
 View/Edit - opens a topic or comments to it for viewing and editing. The command is duplicated by double-clicking the left mouse button.
 Add comment - adds a comment to the topic.
 Delete - deletes the selected object in the tree along with its descendants.
Adding a topic

1. Click button  Create BCF. A new empty topic will be added. When creating and editing, the topic is placed in a temporary local file (*.tmp).
2. Create one or more viewpoints (scenes) if necessary. To do this:
-
Hover over the desired graphic in the workspace.
-
Click on the plus button
 .
. -
The viewpoint will be added and the image will be photographed. The viewpoint can be viewed or deleted.
| Note: | By clicking on the image, you can play the scene in model space, taking into account the selection and visibility of objects. |
| Important! | BCF viewpoints (scenes) are tied to the names of the sheets (spaces) they were created on, so changing the name of a sheet (space) may result in the viewpoint (scene) not being able to activate the corresponding sheet (space) when applied, in which case the model sheet (space) is activated and the viewpoint (scene) is applied on it. |
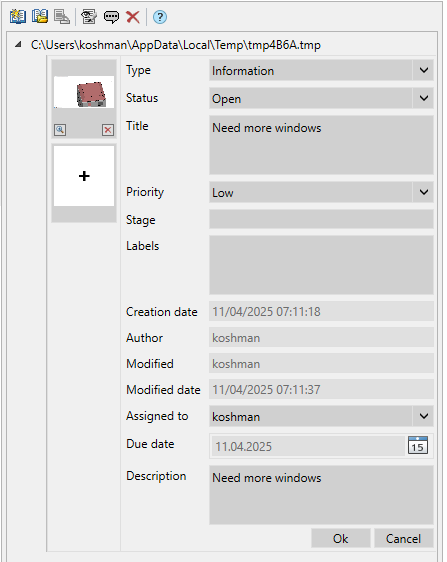
3. Fill in the subject fields:
- Type - type of topic: Information, Warning, Error, Request.
- Status - status of topic: Open, Closed, Reopened.
- Title -topic title.
- Priority - priority consideration: Normal, Medium, High.
- Stage - text description of the stage of work on the topic.
- Labels - auxiliary words (tags).
- Creation date - topic creation date, non-editable field.
- Author - topic author, non-editable field.
- Modified - last user who edited the topic, not an editable field.
- Modified date - last date the topic was modified, not an editable field.
- Assigned to - who is this topic intended for.
- Due date - deadline for submitting comments on the topic.
- Description - text description of the topic.
4. Click the "OK" button to save the theme.
5. Save the document.
Adding a comment

1. Select a topic.
2. Click the  "Add Comment". A new empty comment will be added.
3. Create a vantage point if necessary.
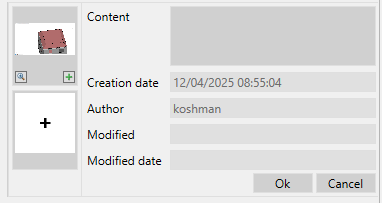
4. Fill in the comment fields:
- Content - text description of the comment.
- Creation date - date of comment creation, non-editable field.
- Author - comment author, non-editable field.
- Modified - last user, edit comment, non-editable field.
- Modified date - last date the comment was modified, not an editable field.
5. Click the "OK" button to save the comment.
6. Save the document.


 De
De  Es
Es  Fr
Fr  Pt
Pt 
