
 De
De  Es
Es  Fr
Fr  Pt
Pt 

-
-
-
-
-
-
-
-
-
-
-
-
-
Batch File Processing
-
-
-
-
-
-
-
-
-
-
-
-
-
-
-
-
-
-
-
-
-
-
-
-
-
-
-
-
-
-
-
-
-
-
-
-
-
-
-
-
-
-
Batch File Processing
 nanoCAD button – Utilities >
  Batch File Processing
Menu: File – Drawing Utilities >  Batch File Processing…
 Command line: BATCHPROCESS
The command is intended for applying the purge and audit commands to a batch of files.
It is available to apply commands for purging files (PURGE), auditing files (AUDIT), auditing geometry (AUDITGEOMETRY), removing proxy objects (RMPROXY).
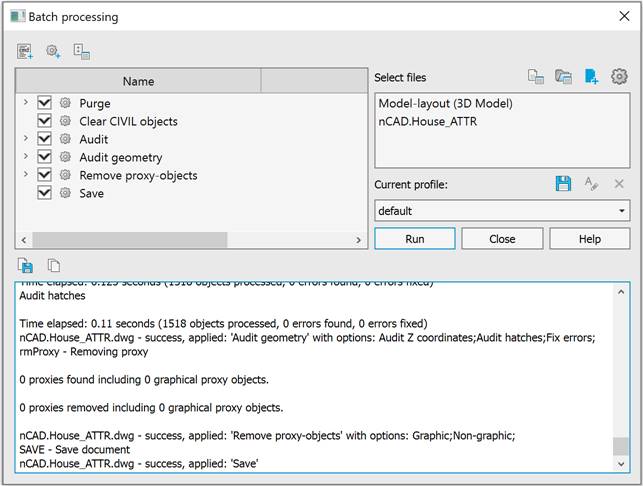
Upon running the command, the Batch processing dialog box opens.
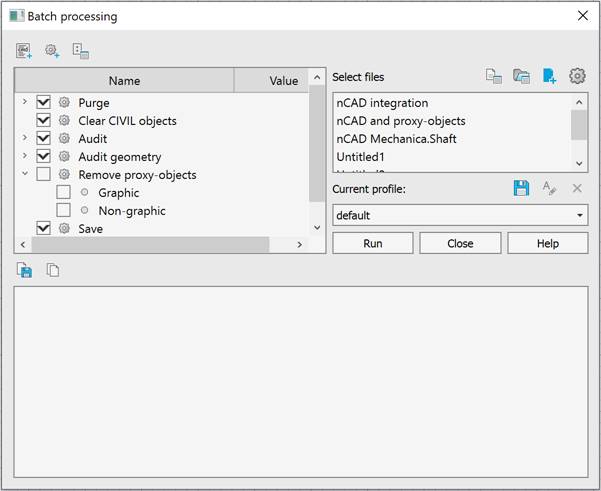
The right field displays a list of files selected for processing.
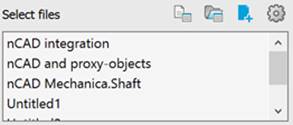
You can add files with *.dwg (drawing format) and *.dwt (template format) extensions: to the list
· one by one using the  Brouse file,
· as a whole folder using the  Brouse folder button.
· by the  Use current drawing button (adds the current document to the list).
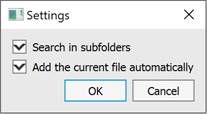
In the Settings  , you can specify the following parameters of the list (disabled by default):
|
Search in subfolders |
Enables/disables the mode of searching and adding files for processing in subfolders. |
|
Add the current file automatically |
Enables/disables the mode of automatically adding the current drawing to the list of files for processing. |
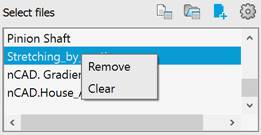
You can remove files from processing using the context menu: individual files (Remove) or all files at once (Clear):
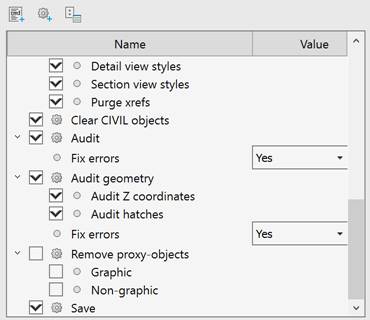
The left part of the Batch processing window contains a list of commands available for applying with a list of parameters. The flags mark the actions to be performed for each file from the list in the right part of the window.
You can create a new profile with a clean list of commands using the  New script button.
To add a new command manually, you can use the  Add command button.
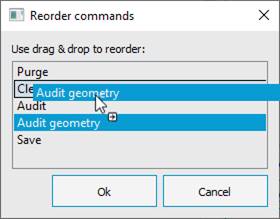
Commands are executed from top to bottom in the list, so changing the order of commands changes the operating principle of the utility. To change the order of commands, click the  button and in the window that opens change the commands order by drag and drop.
All possibilities of the Purge command are available in the Purge files option, including non-dialog command option -PURGE (Empty entries in the sort table,. Annotative scales, registered applications). In addition, batch processing implements the possibility to purge external reference files (the Purge xrefs checkbox).
For example, if there are problematic files with annotative scales, you need to purge all external references at once to get rid of these scales.
The Batch purge automatically opens xref files and cleans them up. And then updates all external references.
Purge is also performed on disabled, frozen and blocked layers.
Batch processing settings can be saved by the  Save profile button .
The profile is saved as a *.json file, allowing for subsequent use of this profile. By default, the file is saved in the folder C:\Users\User_name\AppData\Roaming\Nanosoft AS\nanoCAD x64 26.0\Batches.
After creating user profiles you can  Rename or
  Remove them.
The default profile report contains 6 stages of batch file processing:
1. Purging files (PURGE);
2. Clearing files from CIVIL objects (CLEARCIVIL);
3. Auditing files (AUDIT);
4. Auditing geometry (AUDITGEOMETRY);
5. Removing proxy objects (RMPROXY), enabled by default;
6. Saving the corrected file (SAVE).
The batch processing is started by clicking the Run button. The processing progress is displayed at the bottom of the window. You can stop batch processing by clicking the Stop button, which appears instead of the Run button.
After starting batch processing, changing the dialog parameters becomes unavailable, and records of found and corrected problems appear in the log field.
After the audit is completed, the final report can be copied to the clipboard  or saved to a separate
  file of *.log format.
To customize the list and order of batch processing commands:
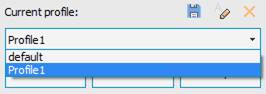
1. Create a separate new profile with an empty set of commands by clicking the New script button. A new profile with the default name Profile N is added to the Current profile: list, where N is the sequential number of the created profile, starting with 1.
Or create a new profile with a set of commands from the standard default profile by clicking the Save profile button.
2. If necessary, change the profile name by clicking the Rename profile button.
3. Add new commands to the profile by clicking the Add command button. In the Add command dialog box, specify the display and internal names of the command. The display name is specified by the user. The internal name is the name under which the command is registered in the application. You can find out the internal name in the Properties section of the Customize user interface (INTERFACE) dialog. After clicking OK button, the list will be replenished with a new command that will be applied to all files processed by this profile.
4. Change the order of command execution by clicking the  Reorder commands button and by dragging and dropping.
5. Add files for processing using the  Browse file,
  Browse folder or
  Use current drawing buttons.
6. Start the processing procedure using the Run button.
To update the file version:
1. In the Options dialog (OPTIONS), in the Save documents section, specify the required file format in the Save in a format list and set For all documents in the Apply selected format subsection.
2. Create a new profile with a set of commands from the standard default profile by clicking the Save profile button and make this profile a current one.
3. Using the context menu of commands, exclude all commands from the list except Save (right-click > Remove).
4. Add files using the Browse folder button.
5. Start the processing procedure using the Run button.