Basic knowledge
IDH_MCS_02
nanoCAD Mechanica 23 – it is an integrating software solution for platforms nanoCAD, designed to speed up and simplify the design of components, the development, design and editing of design documentation, project data management, focused on the domestic user, made on the basis of regulatory recommendations.
nanoCAD Mechanica 23 provides everything for engineering design objects: design projections of drawings on ISO using algorithms automated control, unique design technology systems of hydropneumatic elements, gear parts, engineering analysis with mapping the result of the calculation on the model, the calculation of dimensional chains, gearing, shafts, creating custom libraries of intellectual objects and more. Powerful multivariate design tool unites planners of flat and three-dimensional design, users nanoCAD.
The tools nanoCAD Mechanica 23 complement the familiar environment nanoCAD, without disabling or reassigning its commands, toolbars, and menu items.
Technology work nanoCAD Mechanica 23 is based on the use of object-dependent parts with assembly and parametric dependencies pre-installed on them.
|
Important! |
Save drawings only in the format * .dwg. When resaving to other formats (for example * .dxf), objects of nanoCAD Mechanica will be permanently converted into proxy graphics and cannot be edited. |
No section of the documentation may be changed, adapted or translated into other languages without the prior written permission of the firm "Nanosoft". It is not permitted to create derivative documents based on material from this publication.
The nanoCAD Mechanicasoftware complex described in this manual is distributed in accordance with the terms set forth in the License Agreement and cannot be used, transferred or sold under any conditions other than those expressly specified in this agreement.
Licenses:
WpfTookit (c) Xceed Software Inc
nanoCAD Mechanica23 platform support nanoCAD, as well as vertical solutions nanoCAD versions 2, 3, 4, 5, 6.
If the drawing is created nanoCAD Mechanica23, it opens on a computer that does not have any one of the modules of the complex, the special objects nanoCAD Mechanica23 converted into so-called proxy-objects. To preserve the ability to edit them using "handles", as well as view and change the objects in the dialog box "Properties" on a computer, you must install a freeware distribution nanoCAD Mechanica23 Enabler, located on the CD with a licensed copy nanoCAD Mechanica23.
When transferring files to a user or customer drawings that do not have nanoCAD Mechanica23and not having the ability or desire to use nanoCAD Mechanica23 Enabler, you need to convert all the objects nanoCAD Mechanica23 in the standard system primitives nanoCAD.
To do this, use a special command  "Break all objects" (the toolbar "Edit"). This command will automatically select all of the objects in the drawing, and divides them into primitives nanoCAD. For individual subdivision nanoCAD Mechanica23 - objects can use the standard command nanoCAD "EXPLODE".
In the dialog box nanoCAD Mechanica23 - Setting possible as a random location nanoCAD Mechanica23 - objects on any current layer and automatic fixing nanoCAD Mechanica23 - objects on said layer. In the second case, creating nanoCAD Mechanica23 - subject to pre-select the desired layer in the list and make it current is not required: the program will automatically execute it, regardless of the current layer.
nanoCAD Mechanica 23 integrated into nanoCAD as modules.
Default file opening setting
By double-clicking on the drawing file (or by using the "Open" command from the context menu), the nanoCAD platform is loaded without loading the .
In order for the module to load, you must:
1. Launch nanoCAD.
2. Open settings.
 Main menu: Tools -
  Options....
 Ribbon: Manage - Castomization -
  Options.
3. In the settings window, open the "Current profile" drop-down list.
4. Select "Mech". Along with the choice of profile, the mode of operation of the platform will also change. In the settings tree: Application preferences - Licensing - Modules - Platform mode.
5. Click the "OK" button.
6. Restart nanoCAD to change settings.
7. Setting completed. Files will now open with the nanoCAD Mechanica 23.
An object refers to an nanoCAD graphic item as well as an object created by the nanoCAD Mechanica 23.
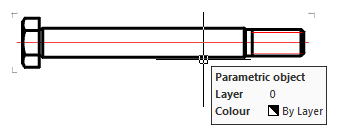
An object is considered allotted (indicated) if additional graphic information appears on the screen when the mouse cursor is moved to it:
· the object is highlighted in color;
· the "rectangle corners" of the object appeared;
· the object information tooltip appeared.
|
Note: |
The mouse keys are not pressed in this case - you just hover the cursor over the object. |
Scaling to the allotted object
· Move the mouse pointer over the nanoCAD Mechanica 23 object until "rectangle corners" appears, the object color changes, or an info tip appears;
· Hold down the SHIFT key and press RMB. It will auto scale to the center of the screen.
To scale to the selected object, the user coordinate system (UCS) must be set to * WORLD *.

An object is considered selected after it has been clicked with LMB:
· the image becomes dotted or highlighted;
· the insertion point is displayed;
· "grips" are displayed.
To set additional options for the current command, right-click context menus are widely used when invoking commands. The content of the context menu depends on whether the editable object is selected or allotted.

All tools nanoCAD Mechanica 23 located in the ribbon (in the main menu) tab "Mechanica" and "MechWizard".
Commands nanoCAD Mechanica 23 grouped by purpose and organized hierarchically. When you select a menu item marked with a black triangle, the corresponding drop-down menu is activated. This way you can access all the tools nanoCAD Mechanica 23.
Menu nanoCAD Mechanica 23 also serves for loading / unloading individual functional panels nanoCAD Mechanica 23, call dialogue "nanoCAD Mechanica 23 - Settings" and to access some common features nanoCAD Mechanica 23.
You can access the nanoCAD Mechanica 23 tools through the toolbars. Toolbars are divided by purpose. The user can place on the screen those panels that contain the most frequently used groups of tools.
There is also a universal toolbar "Mechanica Main" - instrumental two-level panel on which groups of tools are located for working with symbols and graphical constructions defined by standards nanoCAD Mechanica 23.

Tools are grouped by purpose (group of callouts, group of commands for setting level marks, etc.).
Click the LMB user to select the first in order tool of the group. If you click and hold the corresponding button on the panel with the mouse, a sub-panel opens, containing the rest of the tools in this group. Without releasing the LMB, you need to move the cursor to another command of this group, and then release the button. As a result, the selected command will be launched.
On the left side of the screen are added functional panels, such as:
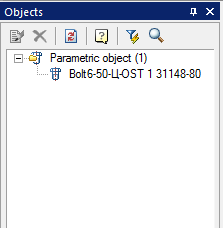
Objects - displays all objects nanoCAD Mechanica 23 created in the drawing. Directly from this palette you can perform a series of actions with objects: edit, delete, hide and search for them.
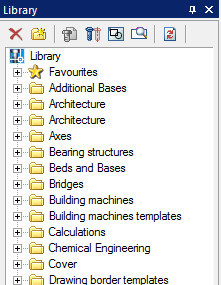
Library - contains a database of objects nanoCAD Mechanica 23 used for design.
IFC - works with IFC objects in the drawing.
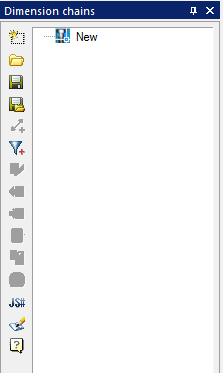
Dimension chains - calculates the size of the chain.
Background information is available to the user at any time. The help system has two access modes - general and contextual.
General mode provides access to the help content in the absence of a command being executed.
Contextual mode automatically provides access to reference information that corresponds to the command being executed.
Option 1. Making projections in model space
Suppose the principal species in the model space are performed one by one.
Additional types, sections are made with scale factors other than the main species.
When placing a border with a title stamp in model space given its scale relative to the principal species. Frame increases or decreases.
When dimensioning must take into account the scale factor drawing (the value of the dimension text, the value of the arrow, spacing, etc.) and numerical designations for each species.
Assume frame is increased with respect to the main sight 10 times. In this case the arrowheads, dimension text height and other text labels should be increased by 10 times. A nominal size of the text for the main species should be marked on a scale of 1:1.
When applied to the kinds of sizes, made in a different scale (in our example, 1:20), nominal size must be multiplied by a scaling factor.
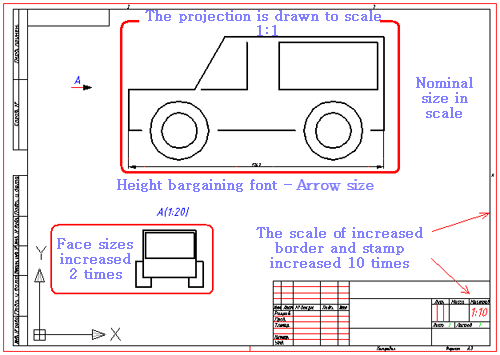
Example of projection drawing frame, increased 10 times
In this example, the sheet is printed at 1:10 in order to maintain a standard frame size, title block text and symbols. Such technology is not supportedConstruction Site 23.
Option 2. Making projections in model space
The frame is inserted into the space pattern in the scale of 1:1.
Main types, made a scale of one to one in the model space scale when placed on a frame with a title block.
The magnitude of arrowheads, dimension text height and other text refer to all types are specified in a scale of 1:1. When dimensioning must take into account only the scale factor of the form in which they are applied.
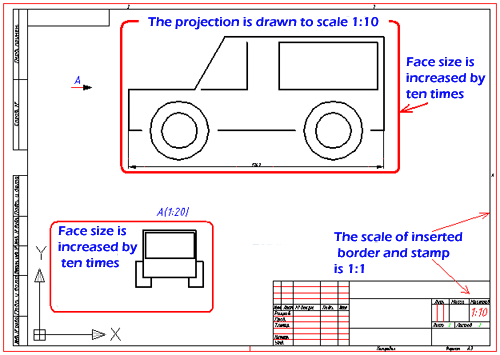
Example of drawing. Frame in a 1:1 projection in a given scale
Under this option, registration in model space frame with projections printed at a scale of 1:1. This variant of design drawings in model space adopted in Construction Site 23.
Option 3. Making projections in paper space
The most convenient way to design drawings projections. All images of objects executed in one-to-one scale model space.
Border and title stamp inserted in 1:1 scale in paper space.
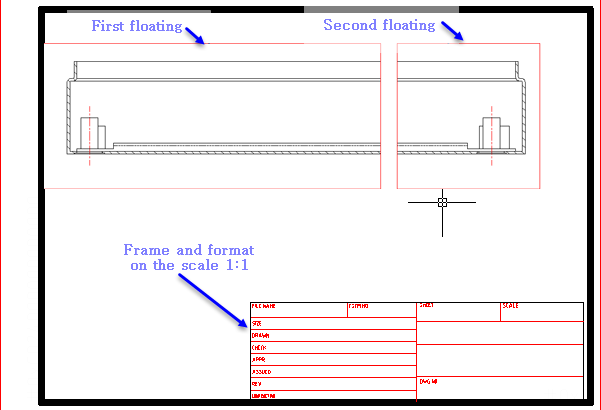
Scale for each species, cut or section is given in the floating viewport in paper space. No need to convert the nominal values of dimensional numbers. Floating viewport - a kind of lens with a predetermined magnification (scale) of the portion of the drawing.
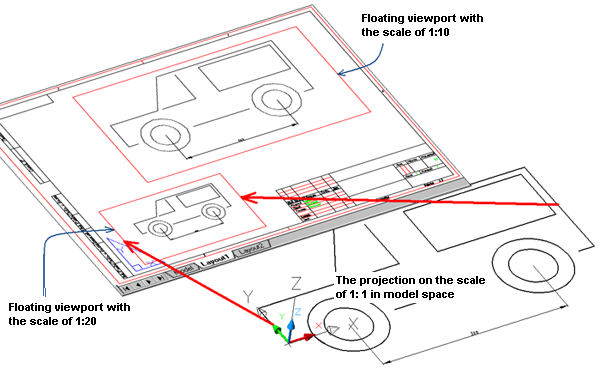
Border and two floating viewports placed in paper space
Scale factor when dimensioning for each species is taken into account automatically.
Frame with projections printed in 1:1. scale in nanoCAD Mechanica 23 frame and title block inserted in model space or sheet at a scale of 1:1.
When designing drawing projections in paper space, the context menu is available nanoCAD Mechanica 23. To call the menu, place the cursor in the area of the floating viewport and press RMB.
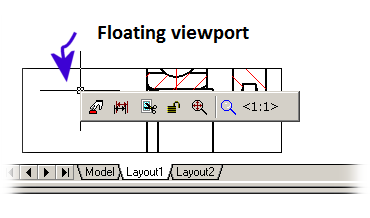
 Activate viewport - command activates viewport for editing.
 Refresh dimensions - command updates the dimensions in the viewport.
 Cut viewport - command allows you to change the shape of the viewport.
 Lock viewport - command fixes scales (including zoom commands) of viewport.
 Zoom all - command inserts all the graphics from the model space into the viewport.
 Scale - a drop-down spikok allows you to select a viewport scale.
Example of design drawings of extended objects
Especially useful when you make a paper space drawings of extended objects. A small example. In model space, one to one (in real terms) has been drawn projection with dimensions 500 mm horizontally.

Projection with dimensions of 500 mm horizontally
Objective: To formalize this projection in paper space on the frame size A3.
Result projection design in paper space

We turn to paper space by selecting a bookmark Sheet1 (Layout1). Insert Frame A3 clicking the icon format in the main toolbar nanoCAD Mechanica 23.
After placing the frame in paper space is created by default floating viewport rectangular shape. Inside it displays all the objects in the model space. Zoom while arbitrary and requires further editing.
Resize a floating screen. To do this by clicking on its contour the left mouse button, move the highlight corner points. Part of the projection will then be hidden loop viewport. We did a kind of trimming images.
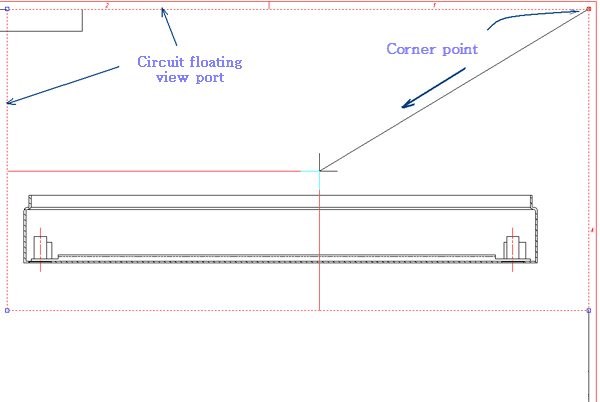
Move the corner points of the floating viewport
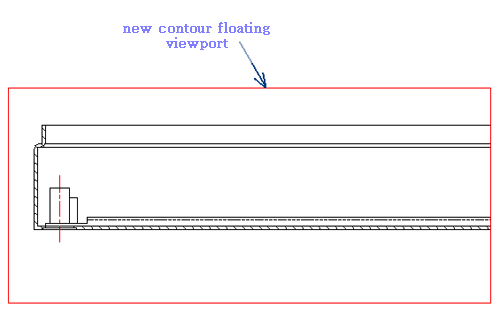
Result after the transfer of the image projection of the angular points of the contour floating viewport

Panel Viewports (Viewports)
Once the boundaries of the first viewport defined, define the scale of the image. Distinguish the border of the viewport. We define the scale of the image using the dashboard Viewports (Viewports) . To get the image on the right part of the projection make a copy of the floating screen and move it to the right.
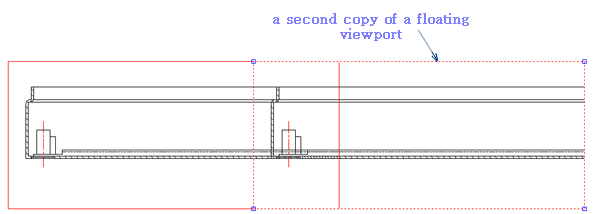
Move the copy right of the screen

Changed the boundary of the right floating viewport
With a team of pan define the right side projection view inside the right floating viewport. To do this, double-click the left mouse button within the contour of the viewport. Sign space layout changes to mark the user coordinate system (UCS-UCS).
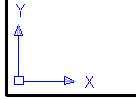
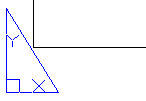
Before printing frame with the projections need to go out of the floating viewport to paper space. To do this, double-click the left mouse button outside the boundaries of the viewport. Sign appears in paper space.
Intelligent grips are intended for editing the properties of design elements inserted into the drawing without calling the editing dialog.
Intelligent grips are included in the settings nanoCAD Mechanica: Main options - Edit - Enable enchanced grips.
Descriptions of grip actions are found in the description of the corresponding design elements.
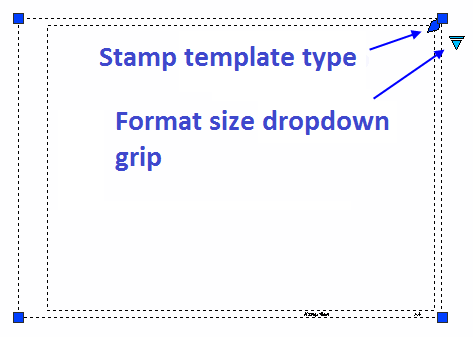
The appearance of the grip corresponds to its action (frequently used ones are shown):
 Node move grip
 Graphics move grip
 Grip for adding a new node
 Grip for adding additional graphics
 Direction grip
 Tilt grip
 Text alignment grip
 Grip for selecting a value from a drop-down list
The dialogs remote printing and editing tables are buttons insert special characters by which a dialog box in which you presented the symbols used in architectural design.
For remote printing button  "Insert special character".
To the Editor button table  "Insert Character".
Select the character you want by clicking on it with the left mouse button, after which it is automatically inserted at the current cursor editing table.
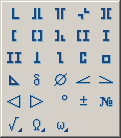
Buttons 

 opens a list of uppercase and lowercase letters of the Greek alphabet.


Special characters are correctly displayed only text based on the fonts nanoCAD Mechanica (.shx). Displaying characters when pasting in text based on TrueType-font, the screen looks incorrect (replaced by question marks, boxes, etc., depending on the settings of TrueType-font).
In the dialogs for editing nanoCAD Mechanica objects, there may be a  "Hatch" button, which opens the "Hatch" editing dialog other than nanoCAD.
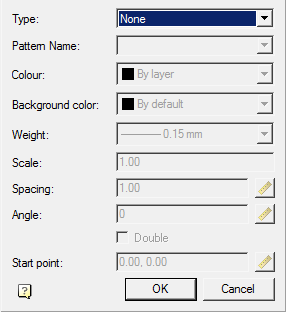
1. Select a hatch type:

· None - hatch will not;
· Predefined - hatch is selected by abrasive from the list of standard hatches;
· Custom - hatch is selected by abrasive pattern from the list of custom hatches;
· User-Defined - hatching is formed in the form of parallel lines with a set interval and rotation angle. When you turn on the "Double" switch, the second row of lines will be drawn perpendicular to the first.
2. Select a hatch pattern (if possible). Depending on the selected sample, certain parameters will become available.

3. Configure the available options.
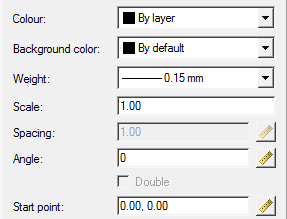
4. Click the "OK" button. The hatching will be adjusted and added to the appropriate location.
The nanoCAD Mechanica23 uses the concept of the current scale. The current scale is different from the current global proportions, expressed in units (units).
Scale objects made depending on the setting of "Use the global scope to design elements" (see. Customizing the appearance / General settings / Registration)
If the value of this setting - "Yes", the dimensions are scaled design elements and standard elements nanoCAD Mechanica23base data types defined by the appropriate scale lines.
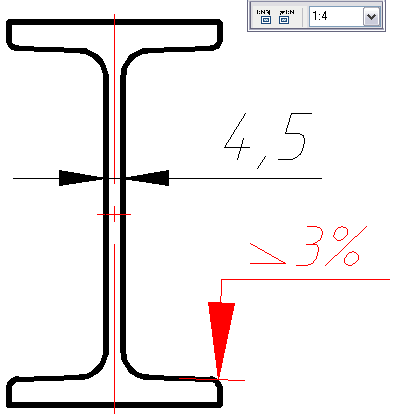
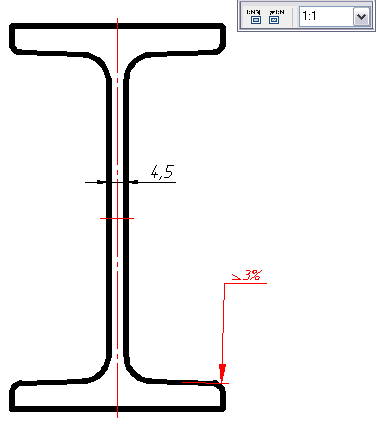
This setting is useful when drawing in model space on the scale of 1: 1, followed by design drawings in paper space viewport on an appropriate scale. In this case, design elements will appear consistently in viewports with different scales.
If the "apply globally to design elements" is set to "no" to the size of standard parts varies in accordance with the scale and size of the design elements remain unchanged. In addition, there is a linear scaling sizes by setting a linear scale factor.
This method is used when plotting the initial scale model other than 1:1.
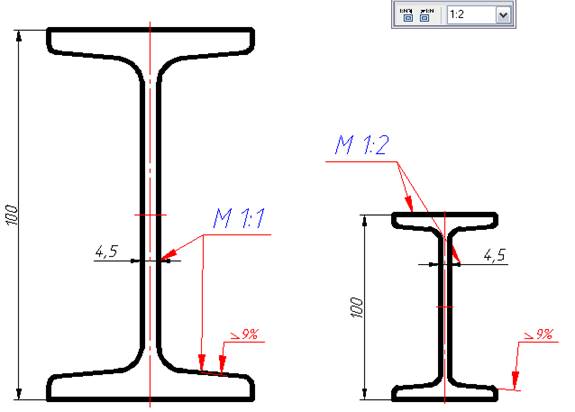
The scale of the database objects of standard products and design elements can be installed with the help of the scale.

In the absence of selected objects using the zoom panel zoom button or change the current zoom scale drawing.
If you have selected objects, the button and the panel scale display their scale. Zooming only affects the selected items without changing the current scale drawing.
The program features the ability to zoom the selected object nanoCAD Mechanica23 center of the screen as a display frame around the object (the default frame is disabled). To do this, move the cursor to the object that appeared "Overall corners", hold down the SHIFT key, click on the right mouse button - will automatically increase the screen of the selected object.
If you press on an object at the same time the right mouse button and SHIFT key returns to the previous display with automatic centering of the object on the screen.
Selecting the direction of drawing
When drawing some graphics nanoCAD Mechanica23 may require special functions choice of direction of drawing. For example, when constructing Weld seam.
Auxiliary toolbar "Destination" is automatically activated when a call instruction nanoCAD Mechanica23, which is available for control of the direction of drawing.

 Perpendicular. Construction perpendicular to the selected segment.
 Free. The choice is arbitrary direction.
 Along. Construction along the selected segment. The direction of the object is aligned to the segment, and will not indicate the direction of the opposite side.
 Parallel. Parallel to the selected segment.
When constructing select the desired command and specify the length of the drawing, to be followed by leveling (except commands available).
Key Shift used:
· When placing the dimension number. To accommodate the size of close to any external dimension line, move the mouse pointer, hold down the SHIFT key. To complete the team, click on the left mouse button.

· To override entities included in the standard components a combination of Alt + right-click, which brings up a dialog:
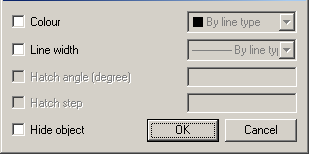
Allowed to override the following properties: color, line thickness, slope and pitch hatch of hidden objects.
· Used to set the angle of the extension lines when placing dimensions.

· Used in the form editor to select the type of control when you drag a variable in a custom form.
· Editing a table at the place called the keyboard shortcut Ctrl + left click.
Ctrl+5 - strikethrough text works in text input fields (in callouts, sizes, etc.), table cells, TT and TX.
Ctrl+U - text underline, works in input text fields (in callouts, sizes, etc.).
Ctrl+O - overline text, works in input text fields (in callouts, sizes, etc.).
Tools nanoCAD Mechanica23 for the geometric constructions are specific for mechanical design. All objects created with their help, made up of primitives nanoCAD, and does not require special tools for editing.
Editing inserted objects in a drawing can be performed using a universal object editor nanoCAD Mechanica23, called button  Editing. After selecting the object being edited is automatically recognized by the type and loads the appropriate dialog box.
Furthermore, editing objects nanoCAD Mechanica23 it can be made by other means:
· clicking the right mouse button and then selecting the command "Edit in the context menu";
· double-clicking the left mouse button on the object nanoCAD Mechanica23. Adjust settings registration (Customizing the appearance / General settings / edit / double click);
· use grips;
· in window"Properties";
· standard command prompt ERASE, MOVE, COPY, ROTATE, STRETCH.
Object-specific details - the details of this database nanoCAD Mechanica23 with the described properties of behavior when they are placed in the context of the assembly. With the change in the parameters of one such detail all the related object-specific details are automatically changed in accordance with their values in the database. Using this technology works, it is important to take into account the order of application of object-dependent items.
When applying standardized object-dependent parts of the image cursor-pointer signals the automatic recognition of the insertion point and the direction of the applied rendering details.
In the context menu the following entry is available.
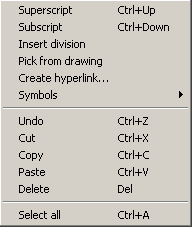
History - recall last entry.
Recent - recall the most frequently used values.
Superscript - insert superscript (a combination of Ctrl+Up).
Subscript - insert a subscript (a combination of Ctrl+ Down ).
Insert division - insert shot.
Pick from drawing - the command allows you to take data from the drawing and the properties of a standard part. When you select this command, the panel Select the value apperas :

 Measure distance (Z) - to take drawing diamensionally linear or geometric size. Command can be selected by pressing Z.
 Measure angle (X) - take the angular size of the drawing. Command can be selected by pressing X.
 Measure Perimeter (C) - to take drawing the perimeter of a closed polygonal line or length. Command can be selected by pressing C.
 Measure area (V) - take the value of the drawing area of the closed loop. Command can be called by pressing V.
 Complex area(Shift+V) - take a few drawing value areas closed loop.
 Calculator (M) - Calculate the number with built-in calculator in nanoCAD Mechanica 23.
 Take from notes (,) - insert text information from the notebook.
 Take from property (B) - allows you to take command of the sub-parameters database in Construction Site 23. Parameter is inserted preserving the dynamic link with the object. When you change a parameter line items are changed in the input field.
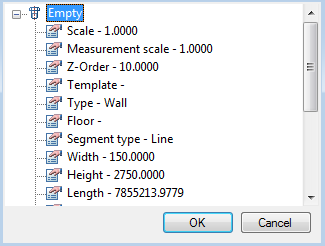
|
Note: |
To insert static text, hold the Ctrl key while selecting parameter. |
 Mark text object (N) - to take the text from the drawing.
Cancel - stop the command and return to the Previous menu.
Symbols - inserting special characters
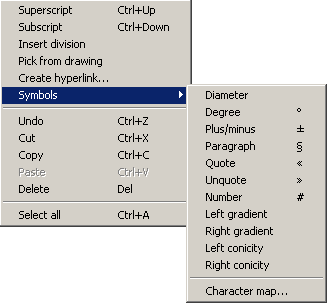
Undo - Undo the last command (the combination of Ctrl+Z).
Clipboard operations
Cut (a combination of Ctrl+X).
Copy (combination Ctrl+C).
Paste (a combination of Ctrl+V).
Delete - Delete the entry field.
Select all - highlight the input field.
Templates are used to create objects of the same type with the same properties.
An example of creating and applying a template based on callouts.
1. There is a rectangle of arbitrary area. Let's assign a callout to it. Open the callout editing dialog.
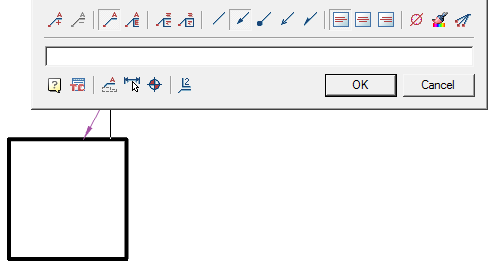
2. From the entry field callouts call the context menu and select the command "Pick from drawing." The "Value picker" dialog opens.
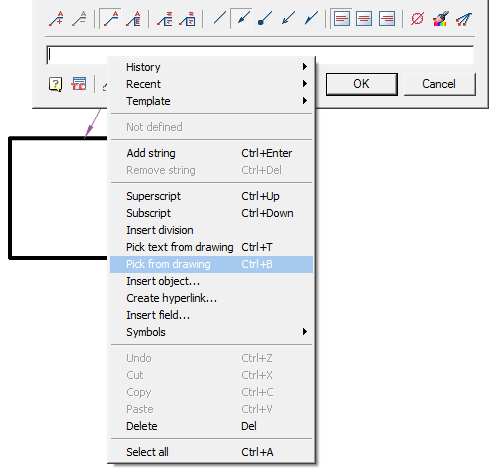
3. In dialogue "Value picker" call command  "Take from property.
4. Select a rectangle and press the key "Enter".
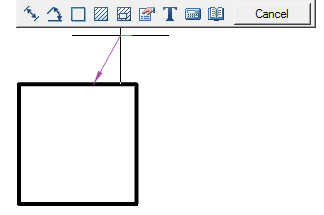
5. In dialogue "Properties" selecting "Area" and press "OK".
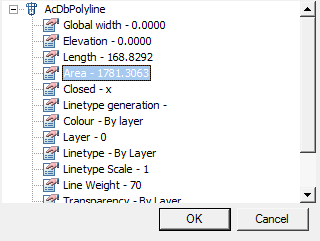
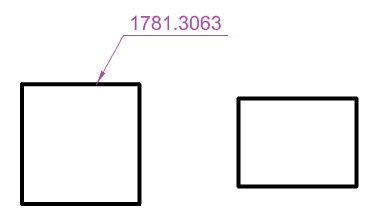
6. The link to the property appeared in the text of the callout, in this case - the area of the figure.

7. From the entry field callouts call the context menu and select the command "Template - Append".

8. Close the callout editing dialog.
9. We build another rectangle, different in size from the first.
10. Assign him a callout. Open the callout editing dialog.
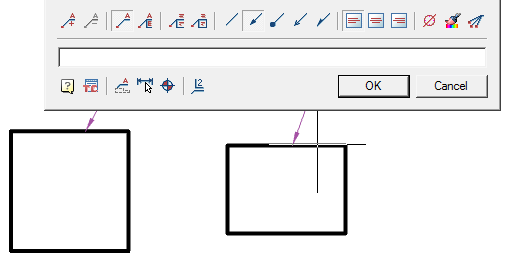
11. From the entry field callouts call the context menu and select the command "Template - Polyline.Scale".

12. Select the second rectangle to calculate the area. The area will be calculated automatically.
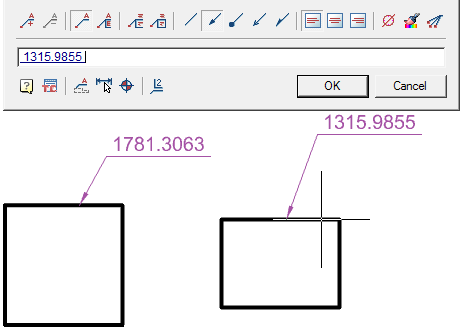
Such templates can be used not only for callouts, but also for other elements, for example:
· position designation;
· node designation;
· note level field;
· e.t.c.
 Command line: MCREGEN, RE, REGEN.
· Update objects nanoCAD Mechanica
· It recalculates table
· Updates overlapping objects
· Updates automatically calculates the attribute values
Depending on the graphics platform (AutoCAD or Autodesk Inventor) and executes commands mouse pointer takes different forms.
The application of a single object
Under a single object we understand insert parts from a database without automatic reference to other object-dependent parts.

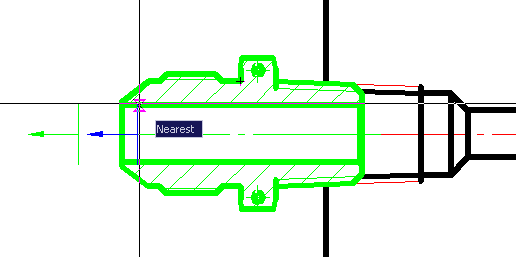
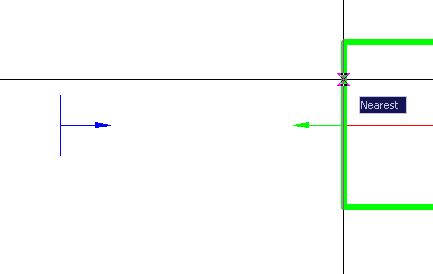
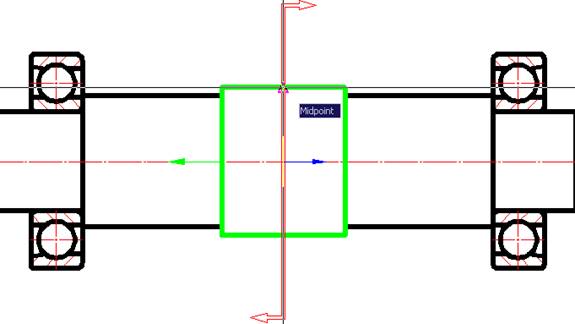
In the nanoCAD mouse pointer is displayed as a standard cross-hair, blue arrows and if there is a preview of the items - the item itself displayed.
Blue arrow indicates the insertion point and the direction of the applied drawing object.
After you specify the insertion point of the applied object of the cursor, the mouse pointer changes, the user is prompted to set the direction of drawing an object, it will coincide with the direction of the blue arrow. To confirm the direction you need to click the left mouse button.
Recognition of object-dependent parts
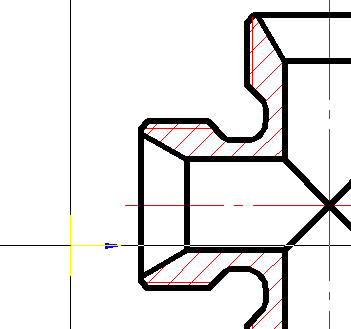
If you insert a part in an assembly before the cursor passes over the inserted workpiece, with inserted part can be installed according to the parts over which the cursor is, the original item is highlighted, and the position is determined automatically inserted details. To confirm the installation of dependencies inserted details, just click the left mouse button.
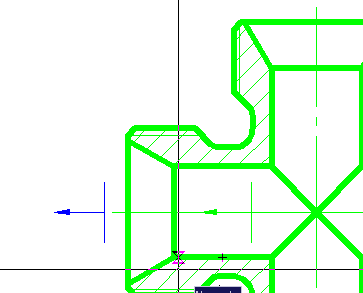
After this, a dialog box appears with parameters inserted parts.
Application of the bearing on the shaft neck
The cursor-pointer indicates that as the insertion point of the bearing end of the bead is recognized and given the direction of its rendering (left).
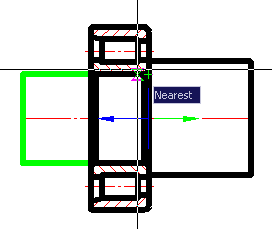
Recognition of the insertion point in the tapered portion of the pipe bushings
Application of standard shaft end


 De
De  Es
Es  Fr
Fr  Pt
Pt 
