De
De  Es
Es  Fr
Fr  Pt
Pt 

-
-
-
-
-
-
-
-
-
-
-
-
-
-
-
-
-
-
-
-
-
-
-
-
-
-
-
-
-
-
-
-
-
-
-
-
-
Revision Cloud
-
-
-
-
-
-
-
-
-
-
-
-
-
-
-
-
-
-
Revision Cloud
 Ribbon: Home - Draw >
  Revision Cloud
Menu: Draw – Revision Cloud
Toolbar: Draw –
 Command line: REVCLOUD
Revision clouds are polylines that consist of sequential arcs.
Revision Clouds are used to drawing explanatory labels and markings on the drawings.
When you start the command, the current parameters of the revision cloud are displayed in the command line (for Symbol scale 1:100):
Minimum arc length: 15000.000000 Maximum arc length: 15000.000000 Style: Normal
|
|
Attention |
|
The last specified arc length value is stored into the registry. To ensure consistency when you use different scale factors, this value is multiplied by the current value of the DIMSCALE system variable, which corresponds to the current value of the Dimension Scale or Symbol Scale. |

|
REVCLOUD command options |
Description |
||||
|
? |
Calls additional options to select the objects. |
||||
|
Arc length |
Specifies the minimum and maximum length of the arcs in a revision cloud. The options opens prompts in the command line: Specify minimum length of arc <1500.0000>: Specify maximum length of arc <1500.0000>: The maximum arc length of segments cannot exceed the minimum length by more than three times. |
||||
|
Object |
Specifies a closed object (line, arc, circle, ellipse, polyline or spline) to be converted to a revision cloud or to reverse the direction of the arcs in the revision cloud. Opposite direction of arcs:
|
||||
|
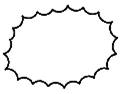
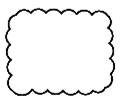
Rectangular |
Enables the Rectangle cloud type – creating a cloud using two opposite points (similar to the method of constructing a rectangle using two points).
|
||||
|
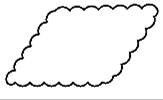
Polygonal |
Enables the Polygon cloud type – creating a cloud by sequentially specifying three or more points (similar to the method for constructing a closed polyline).
|
||||
|
Freehand |
Enables Freehand cloud type – creating a cloud by specifying its outline with the cursor.
|
||||
|
Style |
Specifies the style of the revision cloud: Normal or Calligraphy.
The option opens the prompt in the command line: Select arc style or [Normal/Calligraphy]:
|
||||
|
Modify |
Enables cloud editing mode. The option displays prompts in the command line: Select polyline to modify or [?]: – select an object to edit on the screen and specify the first point on the selected contour; Specify next point or [First point]: – sequentially specify new cloud points (Polygon type). The last point should lie on the contour; Pick a side to erase or [?]: – select a part of the cloud to delete on the screen. |


To create a cloud:
1. Run the Revision Cloud command. The command line will display the current cloud parameters.
2. If necessary, change the minimum and maximum arc length by selecting the Arc_length option in the command line and specifying the lengths.
3. If necessary, change the cloud type by selecting the Rectangular, POlygonal or Freehand option.
4. If necessary, change the cloud style by selecting the Style option and selecting the Normal or Calligraphy style.
5. Specify the cloud points one by one. For a rectangle, two opposite ones, for a polygon, at least three consecutive ones, and for the freehand type, draw an outline with the cursor. When the cursor approaches the starting point, the cloud outline is automatically closed and the command is completed. You can also press ENTER to complete the cloud creation. The cloud is now built.
6. To create a cloud from an existing object, after setting the arc length and style, select the Object option and specify the object on the screen that will be converted into a cloud. The direction of the object’s arcs will be shown on the screen. To reverse the arc direction, select the Yes option in response to the command line prompt Reverse direction [Yes/No]. The cloud is built.
To edit a cloud:
1. Run the Revision Cloud command.
2. Select the Modify option in the command line.
3. At the command line prompt Select polyline to modify or [?]: specify the editing start point on the cloud. You can redefine the first point by selecting the First point option.
4. Specify new cloud points one by one. To cancel the last entered point, select the Undo option. You can cancel all specified points except the start point.
5. Specify the last point of the new cloud contour (should lie on the contour).
6. At the command line prompt Select the side to delete or [?]: specify on the screen the part of the original cloud that will be deleted (highlighted in green).
7. The direction of the cloud arcs will be shown on the screen. To reverse the arc direction, select the Yes option at the command line prompt Reverse direction [Yes/No]. The cloud has been edited.
You can also edit a Cloud object using regular grips. In this case the number of grips on the object is controlled by the REVCLOUDGRIPS system variable:
· 0 – grips are displayed for each cloud arc segment
· 1 – grips are displayed at significant points of the original cloud object (polyline)