

 De
De  Es
Es  Fr
Fr  Pt
Pt 

-
-
-
-
-
-
-
-
-
-
-
-
-
-
-
-
-
-
-
-
-
-
-
-
-
-
-
-
-
-
-
-
-
-
-
-
-
-
-
-
Situation
-
-
-
-
-
-
-
-
-
-
-
-
-
-
Situation
 Ribbon: Topoplan –Situation>
  Map Underlay
Menu: Topoplan –Situation >  Map Underlay
Toolbar: Situation >  Map Underlay
 Command line: MAPVIEW
Inserts map underlay into the current drawing.
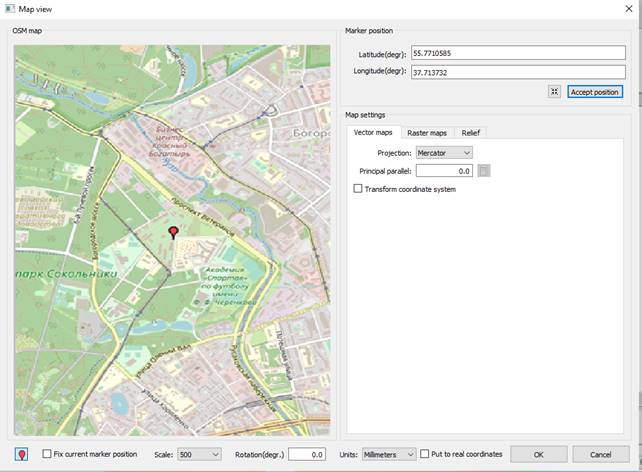
In the dialog box that opens, you can configure the required parameters.
The dialog box allows you to load two types of maps: vector or raster. Each type of map is configured on its own tab on the right side of the dialog box
Vector maps
The vector map provider is the OpenStreetMap service.
Go to the Vector map tab.
In the preview window, select the required import area. The map is moved by holding down the left mouse button, and scaled by rotating the wheel.
After selecting the required area, the following settings are required at the bottom of the dialog:

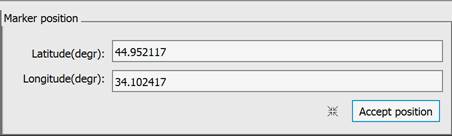
1. Specify the position of the marker relative to which the insertion into the drawing will be performed. To do this, click the marker button  at the bottom of the dialog. It is fixed in the pressed state. After that, the marker position on the map is specified by double-clicking the left mouse button. In addition, the position can be specified by manually entering coordinates in the Marker Position section.
2. Checking the Fix current marker posiiton box fixes the last set position for all windows.
3. Specify the map scale and drawing units.
4. The Centered map around marker button centers the map area with the marker in the window.
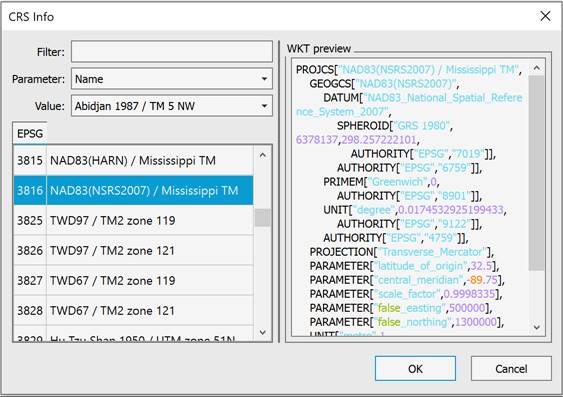
5. Assign CRS – Opens a dialog for selecting the coordinate system to be used for the drawing. You can choose from a standard list of EPSG codes or a custom one.
6. Region – The button is active if a coordinate system is defined. It allows you to specify an area in the drawing within which the underlay will be inserted. If the coordinate system is not suitable for the specified area, an error message will be displayed. Clicking this button hides the dialog box, allowing you to specify points for the area in the drawing. Once you’ve completed entering the points, the dialog box reappears for further configuration.
After setting all the necessary properties, click the OK button and specify the insertion point in the drawing. The marker position will be placed at this point.
Raster maps
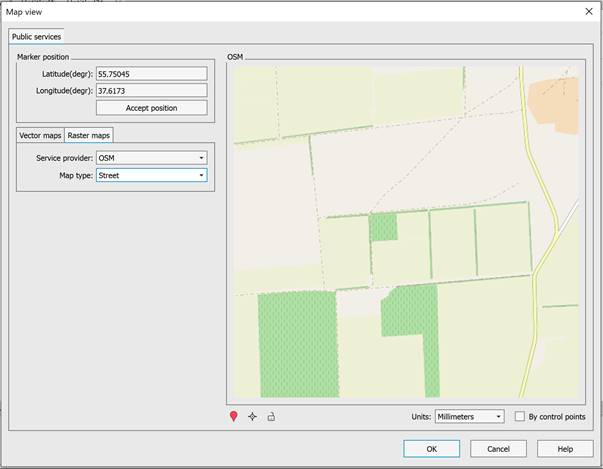
There are several services that provide raster maps (Service Provider field): OpenStreetMaps (OSM), Google Maps, Yandex, OpenTopo, MapBox, ArcGis, Bing and Rosreestr.
In addition, some providers propose different types of maps (Map Type field): street maps, satellite, hybrid, relief, topographic.
Import settings are similar to those for vector maps.
Additionally, for raster maps, you can specify the Relief option, which allows you to add terrain heights to the raster. The image becomes a texture stretched over a 3-dimensional terrain model.
To insert raster map underlays by control points, check the By control points box. After clicking the Insert button, another dialog box will open in which you will need to specify the source and resulting control point pairs by which an attempt will be made to insert the raster map.
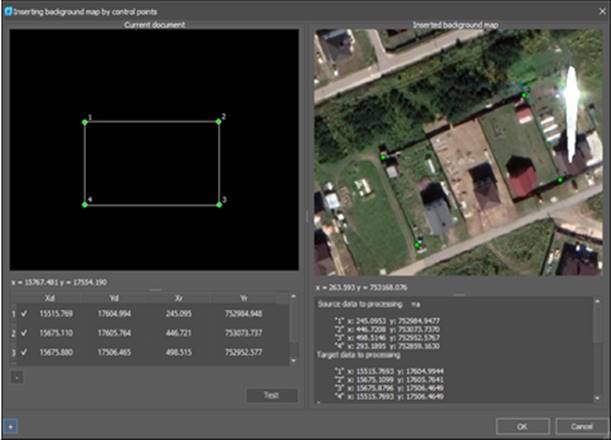
Stretch the preview areas of the current document (top left) and raster underlay (top right) if they are too small.
1. Click the plus  button.
2. Click in the left preview area of the current document to set the first target point.
3. Click in the right preview area of the raster underlay to mark the corresponding source point.
4. The coordinates of the first pair of points will appear in the left part of the dialog box.
5. Specify at least three more pairs of points. The points will change color from red to green.
6. To delete a pair of points, select it in the table and click the minus  buttonBy clicking the Test button, you can see the conversion results and the maximum error. To exclude a pair of points from the calculation, it is not necessary to delete it, just uncheck the box next to it.
7. If the conversion result is satisfactory, click OK.
To select an area, Google terrain raster images or MapBox satellite images are used. The model is provided by the MapBox service.
In addition to the standard import settings, the following are available: vertical terrain scale, choice of color palette of heights, shading.