

 De
De  Es
Es  Fr
Fr  Pt
Pt 

-
-
-
-
-
-
-
-
-
-
-
-
-
-
-
-
-
-
-
-
-
-
-
-
-
-
-
-
-
-
-
-
-
-
-
-
-
-
-
-
-
-
Project Location
-
-
-
-
-
-
-
-
-
-
-
Project Location
 Ribbon: Topoplan – Settings >
  Project Location
Menu: Topoplan – Settings > Project Location
Toolbar: Topoplan Settings > Project Location
 Command line: NG_GEOPOSITION
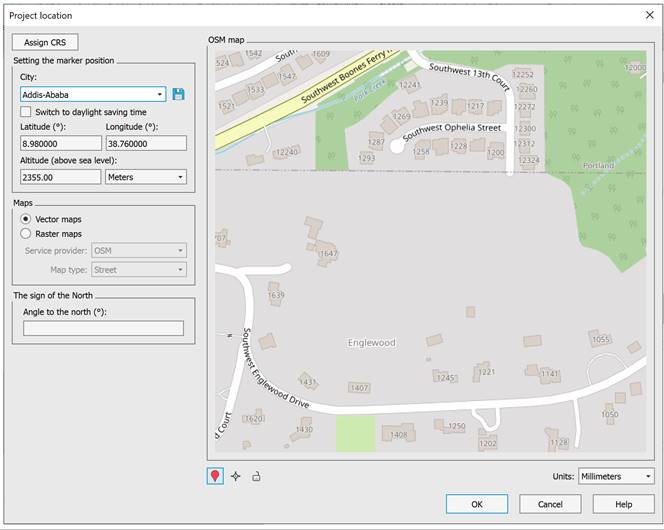
The command sets the location and coordinate system for the project, as well as and inserts a map underlay.
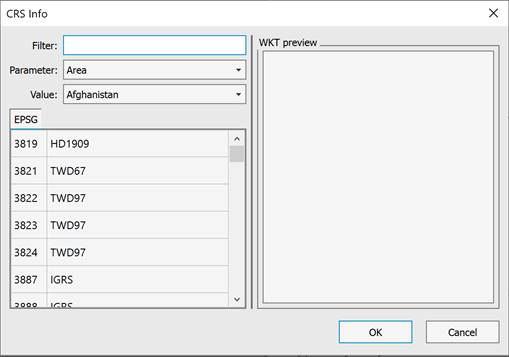
First, define a coordinate system using the Assign CRS button.
Clicking this button will open the standard coordinate system selection dialog, where you can select the desired projection.
Important! If a coordinate system (CRS) is not specified, the underlay is inserted at the specified location in the drawing and remains unrelated to the CRS. However, it is not possible to insert another underlay with a specified CRS to avoid errors. To insert a new underlay with an assigned CRS, delete any existing underlays without it.
When creating an underlay with an assigned CRS, it will be unavailable to specify another underlay with a different CS. The Assign CRS button will be disabled to avoid errors.
Setting the Marker Posiiton
In this section, you can quickly set the project location by selecting a city from the list.
1. In the City drop-down list, select the desired city.
2. When you select a city, the Latitude, Longitude, and Altitude (above sea level) fields are filled automatically.
3. The Switch to Daylight Saving Time checkbox allows you to take into account the daylight saving time for the selected city.
If the desired city is not in the list, you can add it manually:
1. Enter the latitude, longitude, and altitude values in the appropriate fields.
2. After entering the coordinates, the  Save button will become active. Click the button, and the dialog box for saving the new city to the city file will open.
3. The new city will be added to the settings file and will become available in the list for future use.
Loading a Map Underlay
In the Maps section, you can load and configure a map underlay.
Select the underlay type to be used:
· Vector maps – recommended for high accuracy and scalability.
· Raster maps – suitable for quick viewing and general orientation.
In the Service provider field, you can select a map source from the list and specify the Map type in the corresponding field.
Setting the Project Orientation
The orientation relative to true north is set in The sign to the North section.
You can enter a value manually in the Angle to the north field.
 The marker lock feature is enabled by default. The marker remains stationary on the map, while the map itself moves when scrolling or dragging.
 This feature centers the map relative to the marker.

 This feature locks the marker’s position.
Inserting an Underlay into the Project
If the CRS is not ssigned:
· The underlay is inserted into the drawing at the specified rotation angle.
· When you click OK, the program prompts you for an insertion point. The underlay will be inserted so that the map marker aligns with the specified insertion point, and the map itself will be rotated by the specified angle.
· The underlay will remain unrelated to geographic coordinates.
If CRS is assigned:
· The rotation angle is ignored.
· The underlay is inserted automatically at the geographic coordinates converted to the selected coordinate system.
· A permanent pointer to the north will appear at the marker’s location.
· The altitude and time zone information will be displayed in the console.