nanoCAD Platform
Convenient printing - Unique nanoCAD Feature
It is difficult to make the CAD printing process simple and intuitive, as there are many different settings and characteristics to consider, such as rotation rules, alignment rules, print margins, and many others. Nevertheless, we made the plotting as convenient as possible.
By choosing the paper size and plotter, we can accurately align the image, while having a physical sheet of paper with dimensions, orientation, and print margins in front of our eyes. In addition, we can fit a drawing to the paper and thus reduce paper consumption if the drawing is output on rolls. A visual icon in the upper corner will show how the paper will come out of the plotter. It is also possible to switch to the preview mode to see how plot styles are applied to the drawing.
Open the Plot.dwg file.
Choose a printer and select the Show Page Preview option. You will see that the drawing includes margins. Select the Fit to paper option: it allows you to adjust the plot area scale so that it perfectly fits the page of the current format (fig. 54):
Click the Plot button: you will get the same result as it was on the preview.
By choosing the paper size and plotter, we can accurately align the image, while having a physical sheet of paper with dimensions, orientation, and print margins in front of our eyes. In addition, we can fit a drawing to the paper and thus reduce paper consumption if the drawing is output on rolls. A visual icon in the upper corner will show how the paper will come out of the plotter. It is also possible to switch to the preview mode to see how plot styles are applied to the drawing.
Open the Plot.dwg file.
1. Plot from the paper space to the Internal PDF Printer (fig. 49).
Open an A3 layout.
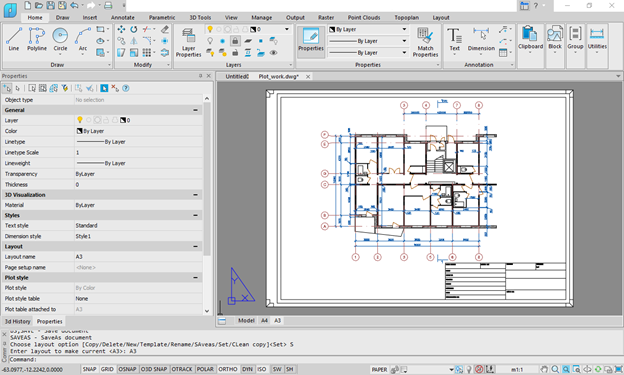
Fig. 49. Paper space
2. Click the Plot button in the Quick Access bar (fig. 50):
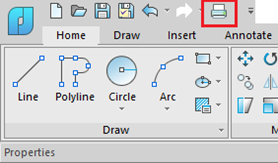
Fig. 50. The Plot command
3. Use the Internal PDF Plotter. Set A3 paper size, 1:1 scale. Select the Show Page Preview option. Specify the Plot Style table – monochrome.ctb (fig. 51):
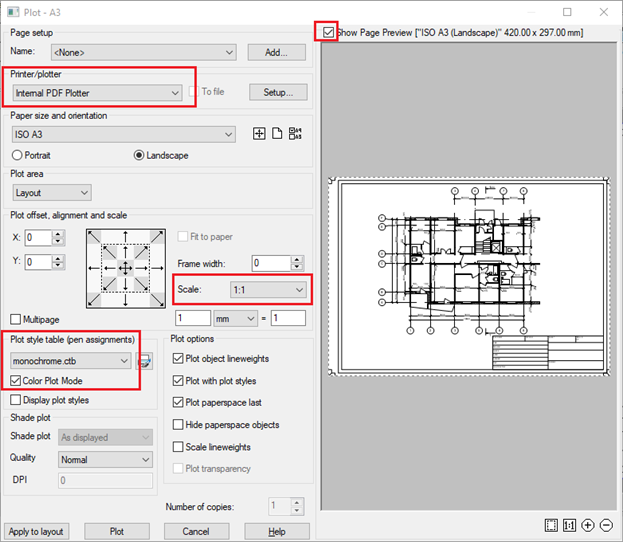
Fig. 51. The Plot manager
4. Click the Plot button. Choose the folder and then click Save.
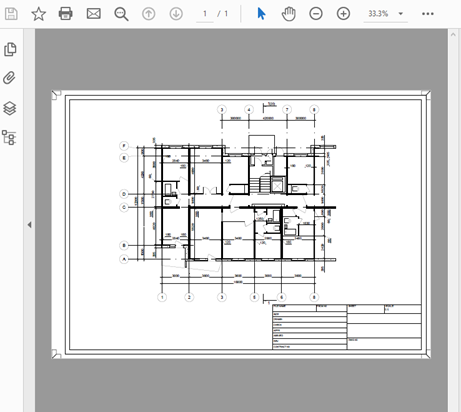
As a result, you will get a document in the .pdf file format (fig. 52):
Fig. 52. Drawing in PDF
5. Align layout
Now we will plot the drawing on the physical printer. Go to the Model space, and choose a printer. Select the Paper Size: A2, the Plot area – Window. Click the New window print area button, then specify the print area on the drawing (fig. 53):
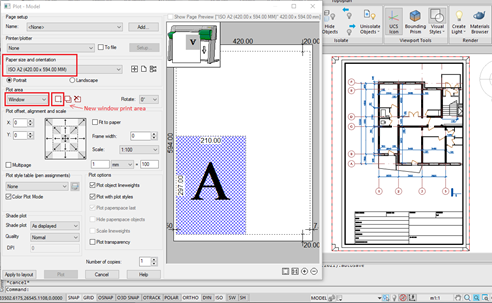
Fig. 53. Plot settings
Choose a printer and select the Show Page Preview option. You will see that the drawing includes margins. Select the Fit to paper option: it allows you to adjust the plot area scale so that it perfectly fits the page of the current format (fig. 54):
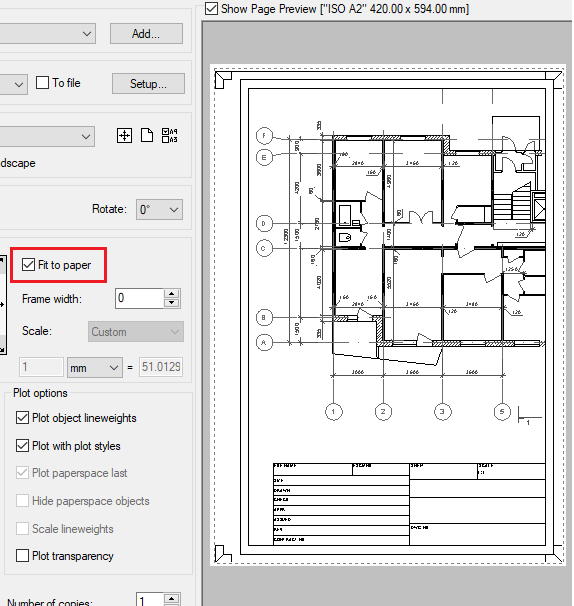
Fig. 54. The Fit to paper option
Click the Plot button: you will get the same result as it was on the preview.


 De
De  Es
Es  Fr
Fr 

