Symbols
1. Insert designation of bases.Click the Datum identifier button on the Symbols tab or use the following path in the classic interface: Mechanica → Symbols → Datum identifier. Select a point on the left edge of the shaft axis with the Endpoint anchor, as shown in Fig. 42.
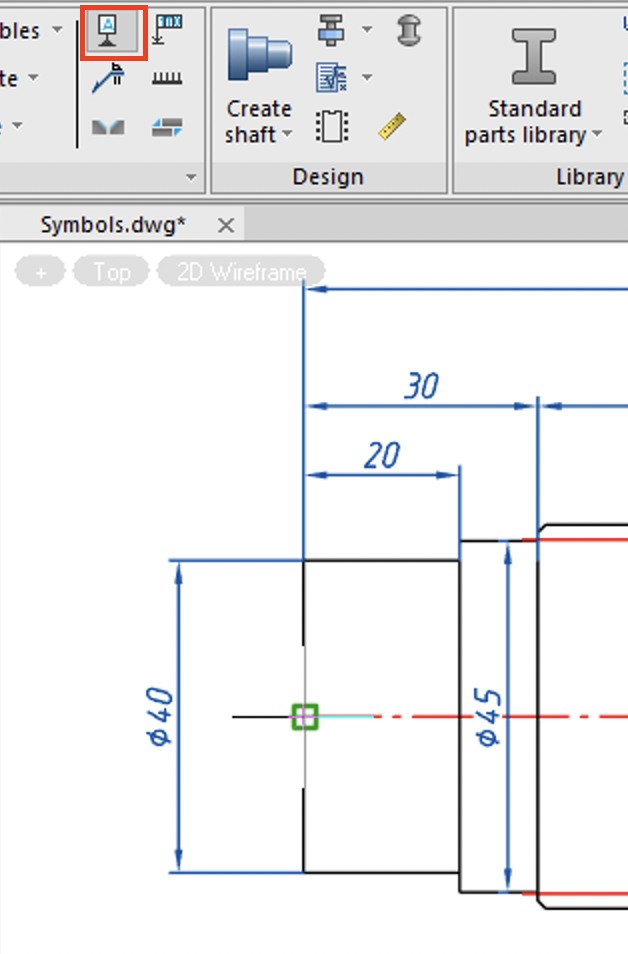
Fig. 42. Endpoint on the shaft axis to insert the datum symbol
Select the symbol position in the drawing and press Enter or left-click to confirm.
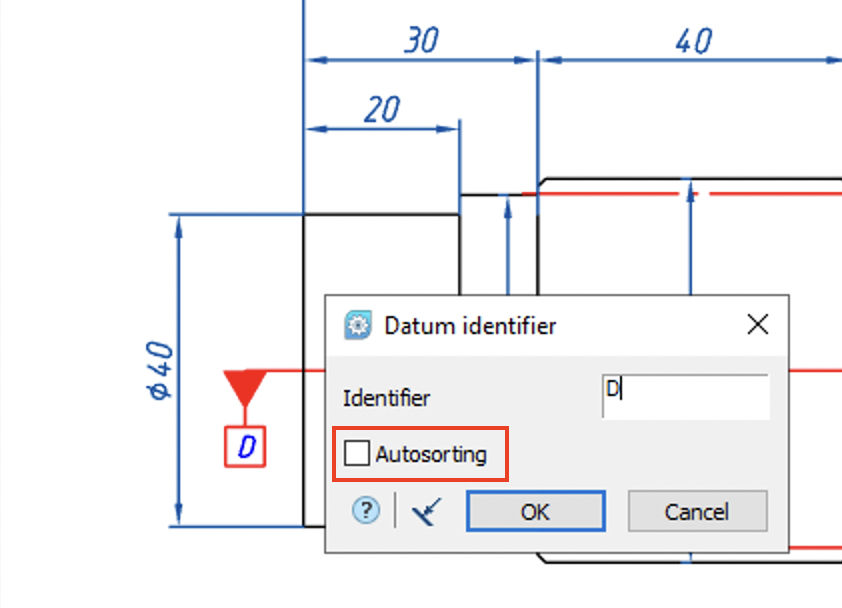
Fig. 43. Setting the designation of the base and its editing
Double-click on the base designation to open the Datum identifier window and disable the autosorting option: enter D in the Identifier field (Fig. 43) and click OK.
Once the Autosorting field is activated, the base designations are sorted in alphabetical order, with the previously used letter designations taken into account.
Enable the ORTHO mode in the status bar or press F8.
2. Designation of form and position tolerances.
Click Feature control frame on the Symbols tab, or open from the menu in the classic interface: Mechanica → Symbols → Feature control frame. Set a point on the first section of the shaft. When you select a base surface, the graphic is highlighted in green.
Pick the next point to anchor the sign line.
Place the tolerance mark under the third section of the shaft: indicate new points in the drawing by moving the cursor (Fig. 44). If you need to undo the actions, use the Back command from the context menu or from the command line.
Press Enter to finish setting the location.
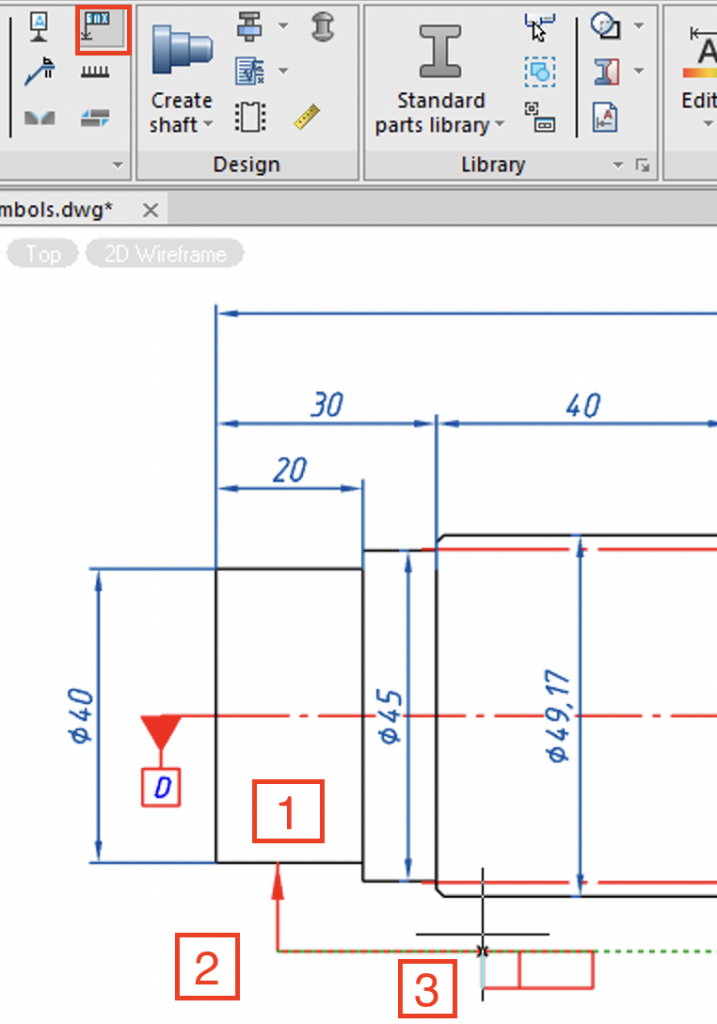
Fig. 44 Setting designation of form and location tolerances
Set Coaxial tolerance in the first field of the Form&plane position tolerance window (Fig. 45).
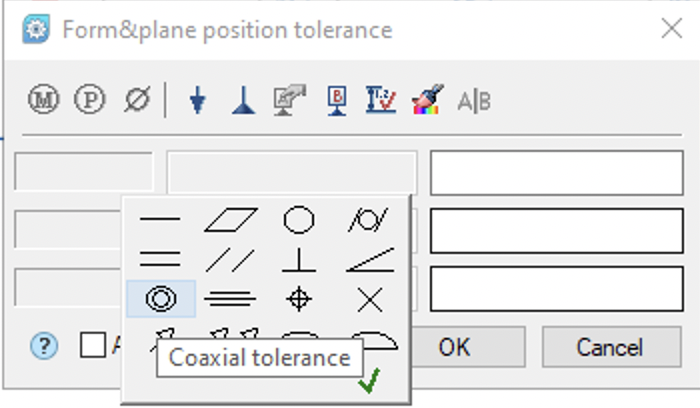
Fig. 45. Choosing tolerance type
Right-click on the second field and select the value of the tolerance deviation 0.01 from the context menu by expanding the table of the standard series (Fig. 46).
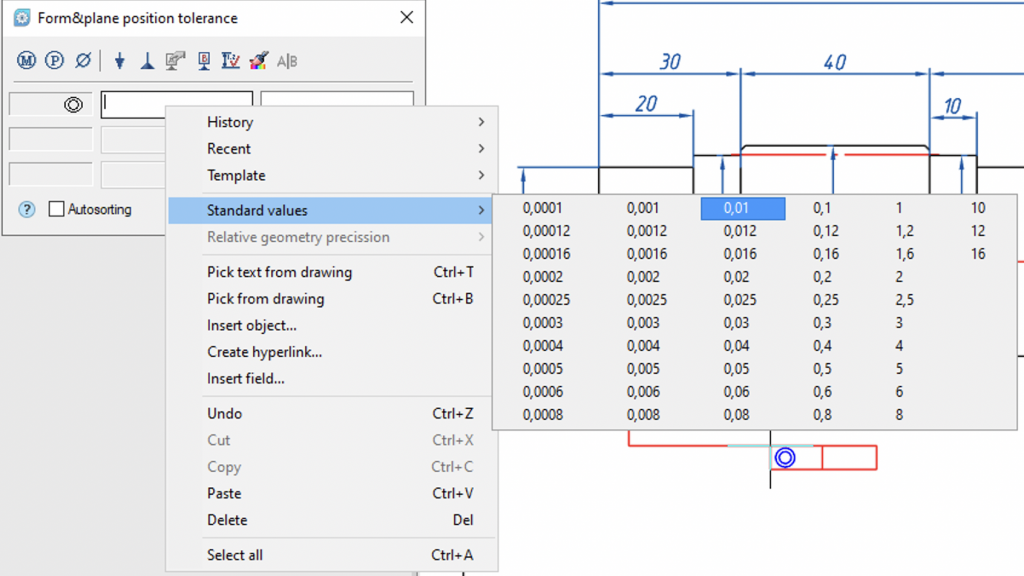
Fig. 46. Selecting a tolerance value from a standard range
Click on the third field and choose Specify base (Figure 47). Follow the instructions on the command line and select the base D previously installed in the drawing. The symbol is automatically displayed in the Form&plane position tolerance window. Click OK.
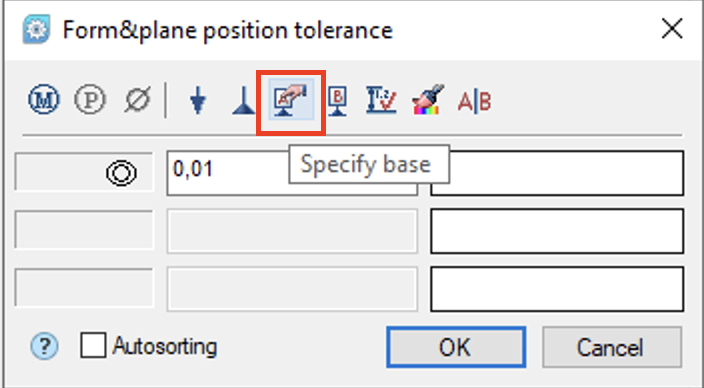
Fig. 47. Base specification
3. Install additional leaders to the fourth and fifth sections of the shaft: double-click on the tolerance designation and go to its editing window.
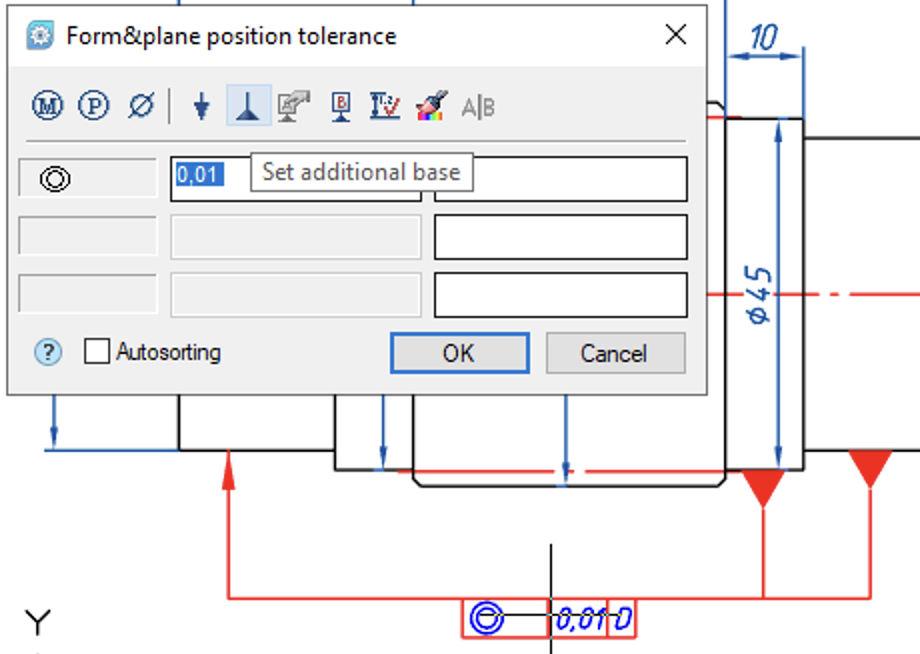
Fig. 48. The command for setting additional leader lines
Click on Set additional base command. Specify an object. Bring the leader line to the tolerance mark (Fig. 48).
4. Change the display of the leader’s end.Select the leader. Click on the triangular marker that appears on the right end of the leader. In the list appeared select the Arrow option (Fig. 49). The leader type can also be changed in the context menu: the leader lines settings. Repeat the procedure for the remaining lines.
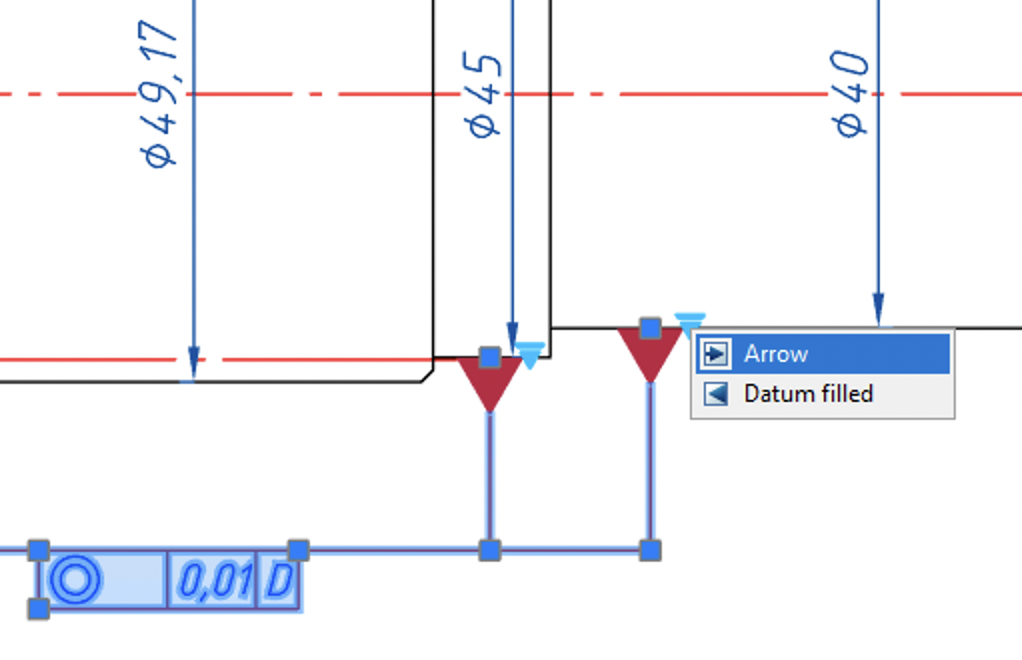
Fig. 49. Changing the arrow type of the leader line.
5. Insert a roughness symbol.Call the Surface texture command by clicking the corresponding button on the Symbols tab or through the path in the classic interface: Mechanica → Symbols → Surface texture → Surface texture menu.
Move the cursor to the left of the first section of the shaft, up to the extension line (Fig. 50) and right click.
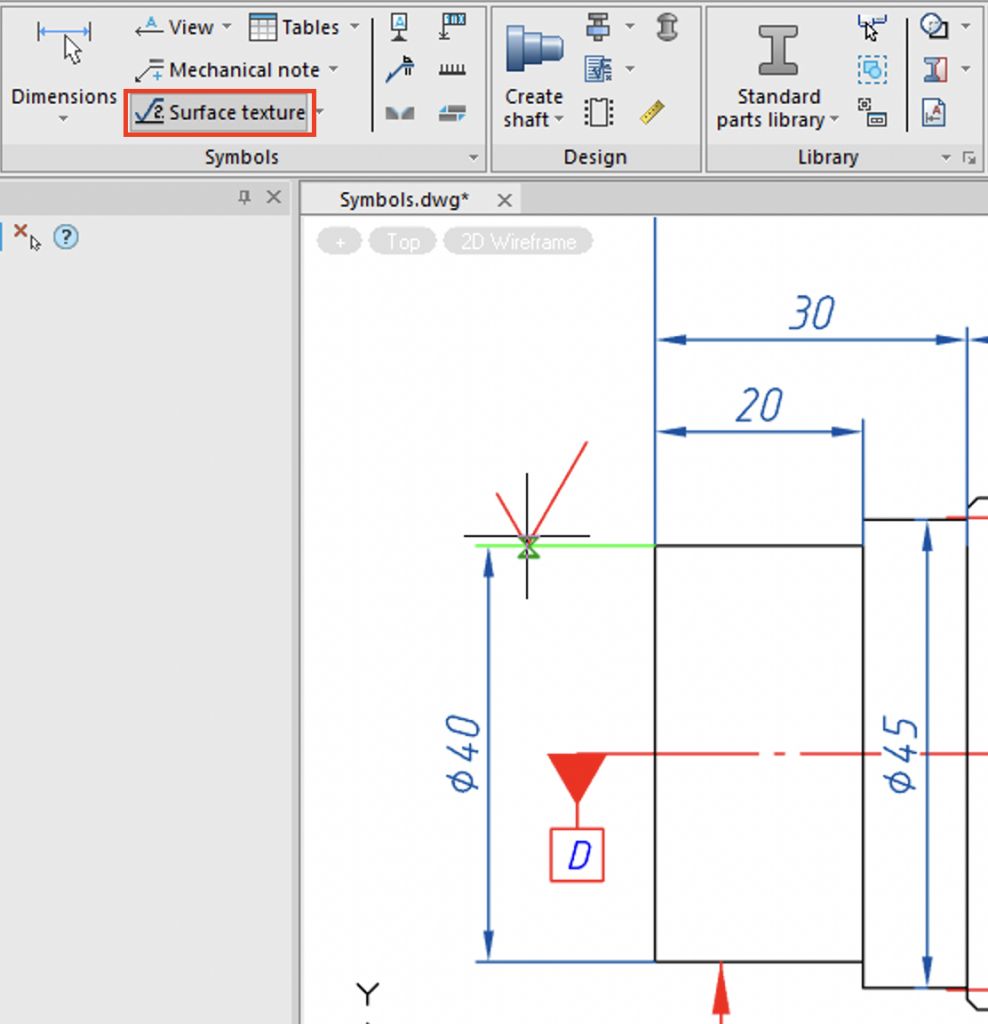
Fig. 50. Surface texture
In the dialog box that appeared right-click to call the context menu of the upper field under the flange and select the roughness value Ra 2.5 (Fig. 51).
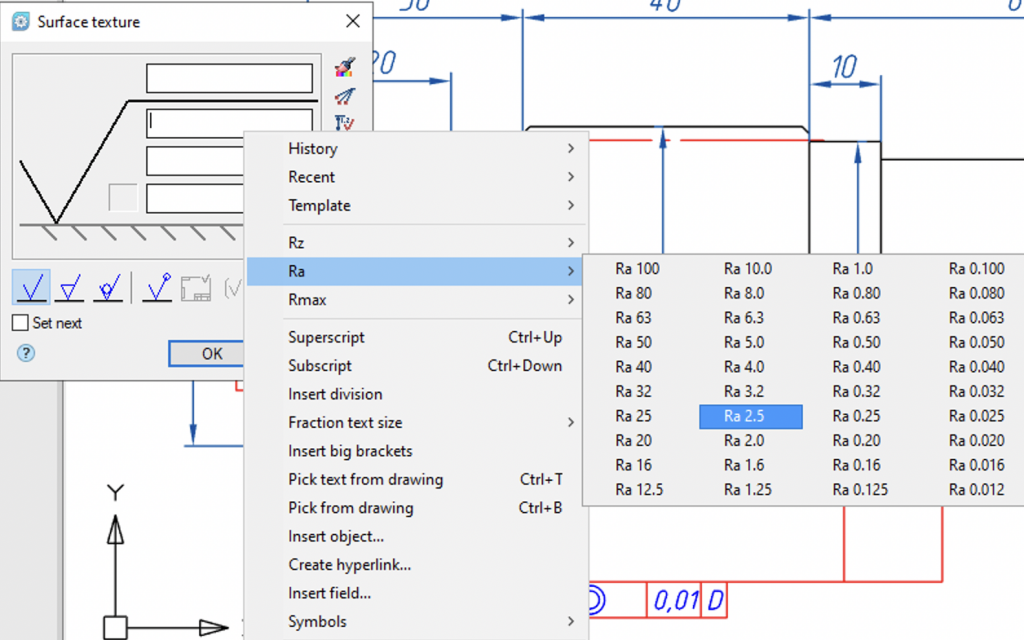
Fig. 51. Selection of the roughness value from the standard Ra list
Activate the Set next option to save the selected roughness value for the next symbol settings. Click OK. (Fig. 52.)
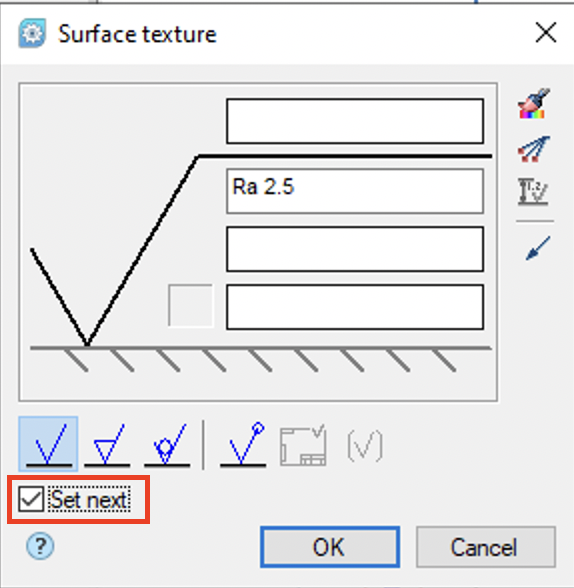
Fig. 52. Set next option
6. Break symbolsOn the Utilities tab, call the Break lines command. Specify the first point of the break line on the fifth section of the shaft and move the mouse cursor down. Call the context menu and select Two curved (or Mechanica → Utilities → Break lines → Two curved menu). Click at the bottom point of the break (Fig. 53), move the mouse cursor to the right and enter the break width - 2. Press Enter.
Set a break on the first section of the shaft.
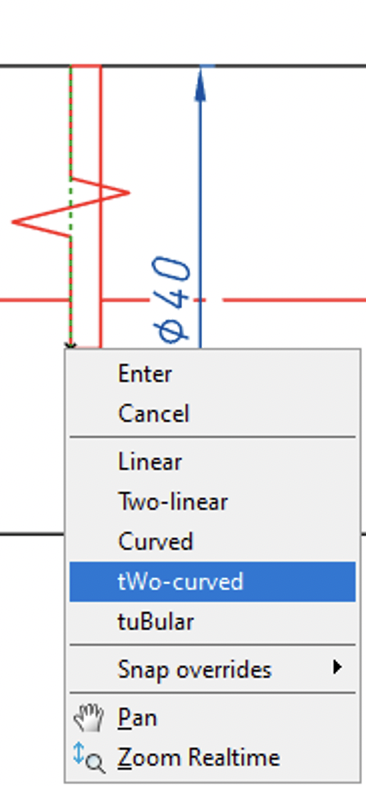
Fig. 53. Break symbols
Edit the values of the dimensions of the shaft sections with breaks and define them as 50, 60 and 100. Set the total length as 310.
The final view of the shaft with installed breaks is shown in Fig. 54.
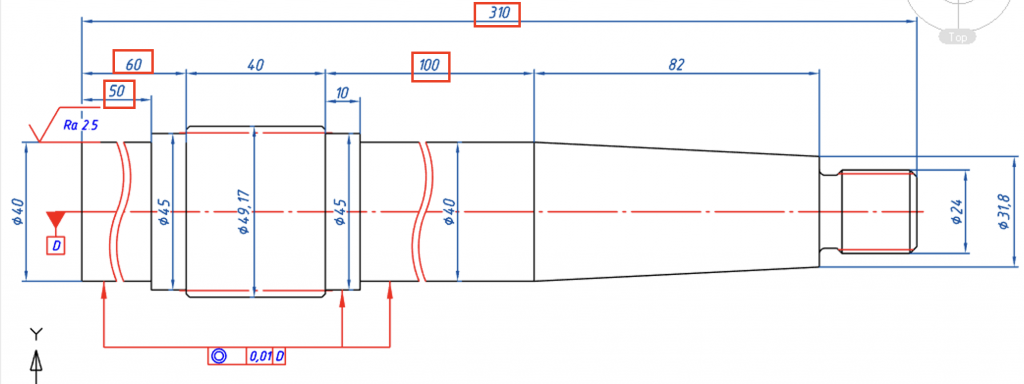
Fig. 54. Shaft with breaks
7. Setting the dimension tolerance.Double-click on the diameter 40 of the fifth shaft section to open the edit window. Call the method of recording tolerances and replace it with a letter designation (Fig. 55).
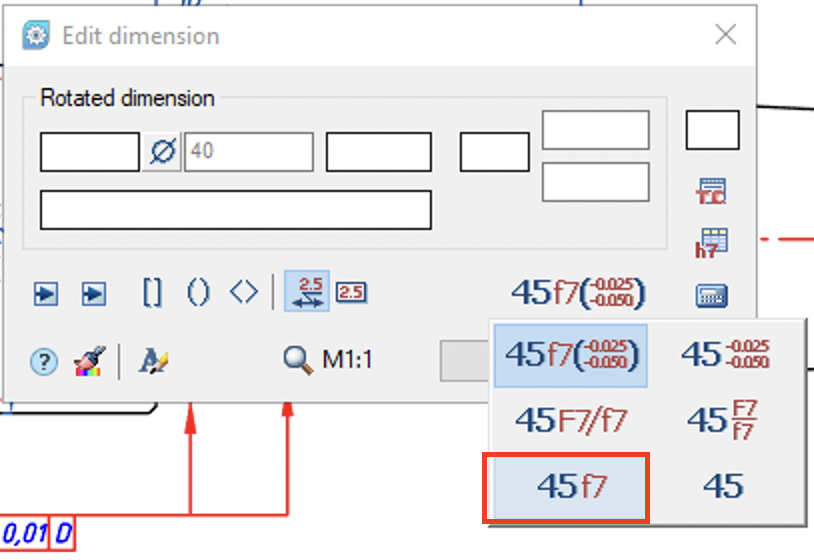
Fig. 55. Dimension editing window
Set the tolerance: open the dimension editing and press the Fit table button. In the Tolerances window switch to the Shaft tab and set the tolerance value as k6. Click OK (Fig. 56).
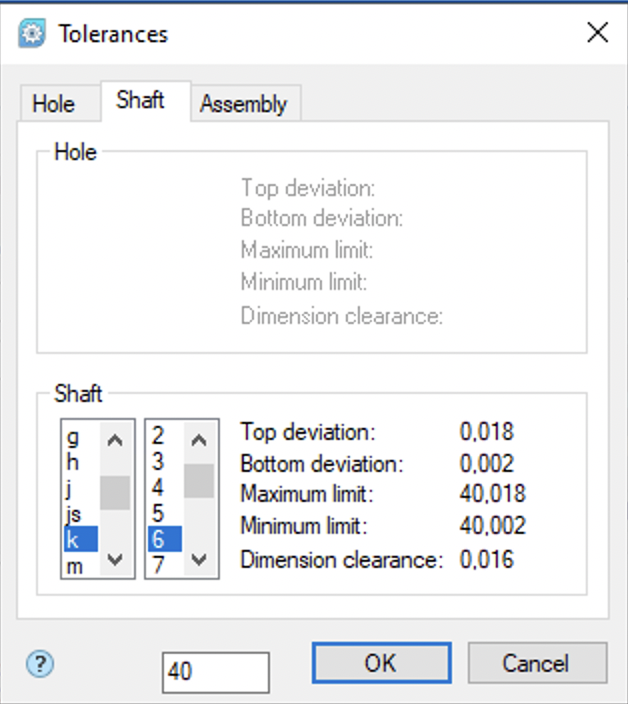
Fig. 56. Tolerances dialog
Repeat for the fourth shaft section.
8. Copying properties.Proceed to edit dimension 40 of the first shaft section.
Click the Match Properties button in the dimension edit window. Select the previously edited 40k6 size.
The properties are automatically set as for the specified first section size: tolerance k6.
Confirm the action by clicking OK.
The final view of the shaft with the referenced base, roughness, gaps, dimensions and tolerances is shown in Fig. 57
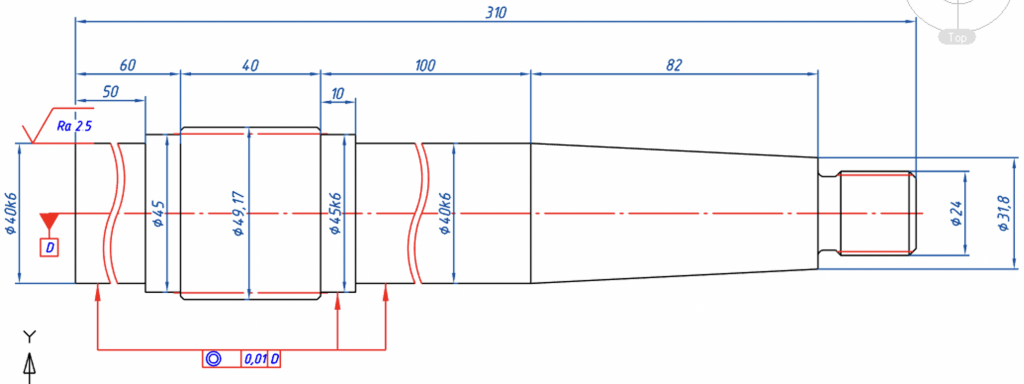
Fig. 57. Shaft with edited design
Save the file to the Exercises folder.


 De
De  Es
Es  Fr
Fr  Pt
Pt 
