nanoCAD Mechanica Module
Specification
Open the Specification.dwg file.
Follow the instructions on the command line and specify the start and end points of the position (Figure 30). The start point position in shaft specifications should be defined on the axis of the part. In standard products (bearings, covers) — by indicating their contour.
In the Name field of the Position leader editor pop-up window, change the standard name to Driven shaft (Fig. 31). The Partition field will be filled in automatically. Close the window. Press the spacebar to reactivate the command.
Note. Name the larger wheel Wheel in the specification, and name the cylindrical pinion shaft Leading Pinion Shaft. No changes are required for standard products.
The final view of the gear train with placed positions is shown in fig. 32.
 on the Part list tab or via the path in the classic interface scheme: Mechanica → Part list → Position align drop-down menu. Specify the leaders of the low-speed shaft: use the frame from right to left for faster selection (Fig. 33). Press Enter.
Type L in the command-line interface and press Enter, or select Line in the context menu (Fig. 34). Specify the start and end points to position the line in alignment with the leaders.
Align the high speed shaft positions in the same way. The final view of the gear train with placed and aligned positions is shown in fig. 35.
 and click Drawing title/borders on the Title blocks tab,
 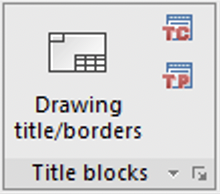 . In the Format window select A2 and click OK (Fig. 36). Place the format appeared on the sheet at the origin with the End point anchor.
Double-click on the title block’s outline to edit. In order to fill the title block fields and additional graphs, double-click on any line of the title block (Fig.37). Press OK.
4. Specification settings.
Go to sheet A4. Click the Specification edit button on the Specification tab or via the path: Mechanica → Part list → Part list drop-down menu (in the classic interface scheme).
In the Specification edit dialog box, click on the Assembly unit list on the left side. Double-click Parts and sort the names in alphabetical order with the Sort button (Fig. 38). Repeat the actions for Standard parts.
In the Specification edit dialog box, click the Specification settings button (Service → Specification settings). On the Numbering tab, set the parameters for the Parts and Standard parts sections as shown in fig. 39. Click OK.
Press Do numbering .
The final view of the specification window is shown in Fig. 40.
Press Export to drawing.
Paste the generated specification into the A4 format field (Fig. 41).
Close the Specification edit window. Save the file to the Exercises folder.
1. PositioningPosition the gear elements randomly: run the Balloons command on the Part list tab (fig. 29).
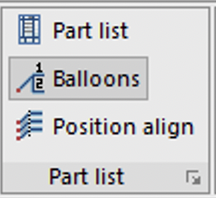
Fig. 29. The Balloons command on the Part list tab
Follow the instructions on the command line and specify the start and end points of the position (Figure 30). The start point position in shaft specifications should be defined on the axis of the part. In standard products (bearings, covers) — by indicating their contour.
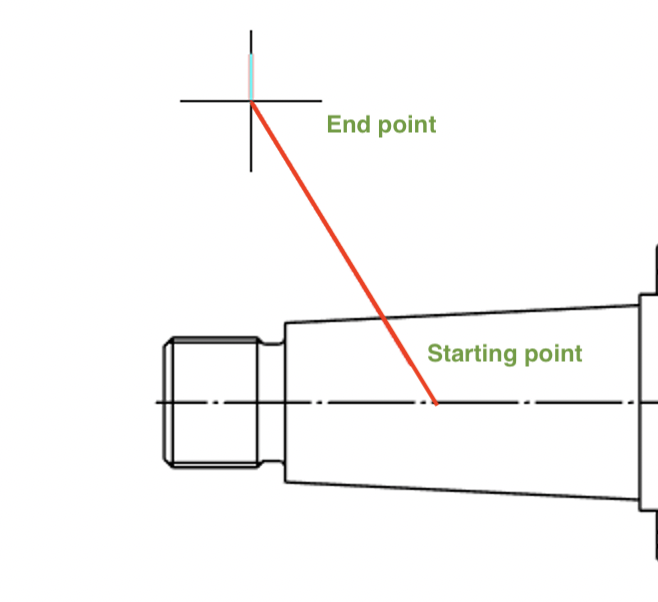
Fig. 30. Starting point and end point
In the Name field of the Position leader editor pop-up window, change the standard name to Driven shaft (Fig. 31). The Partition field will be filled in automatically. Close the window. Press the spacebar to reactivate the command.
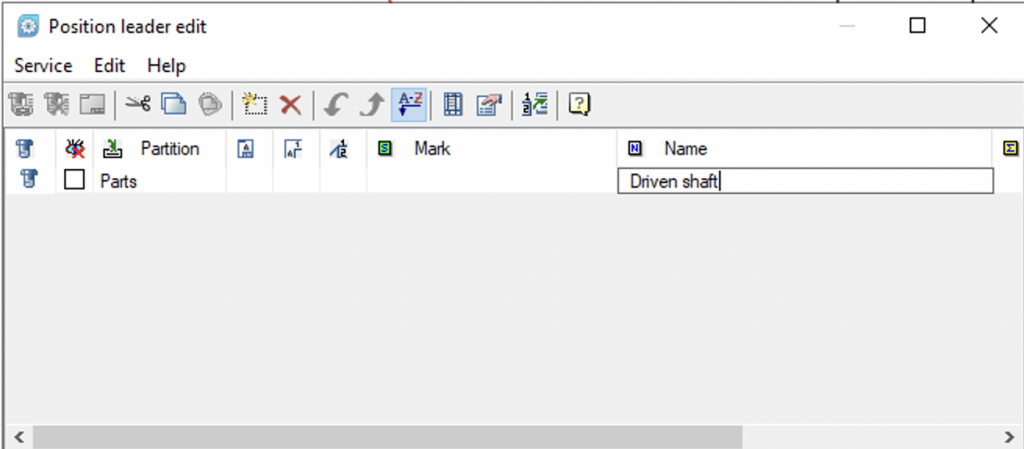
Fig. 31. The Position leader edit dialog box
Note. Name the larger wheel Wheel in the specification, and name the cylindrical pinion shaft Leading Pinion Shaft. No changes are required for standard products.
The final view of the gear train with placed positions is shown in fig. 32.
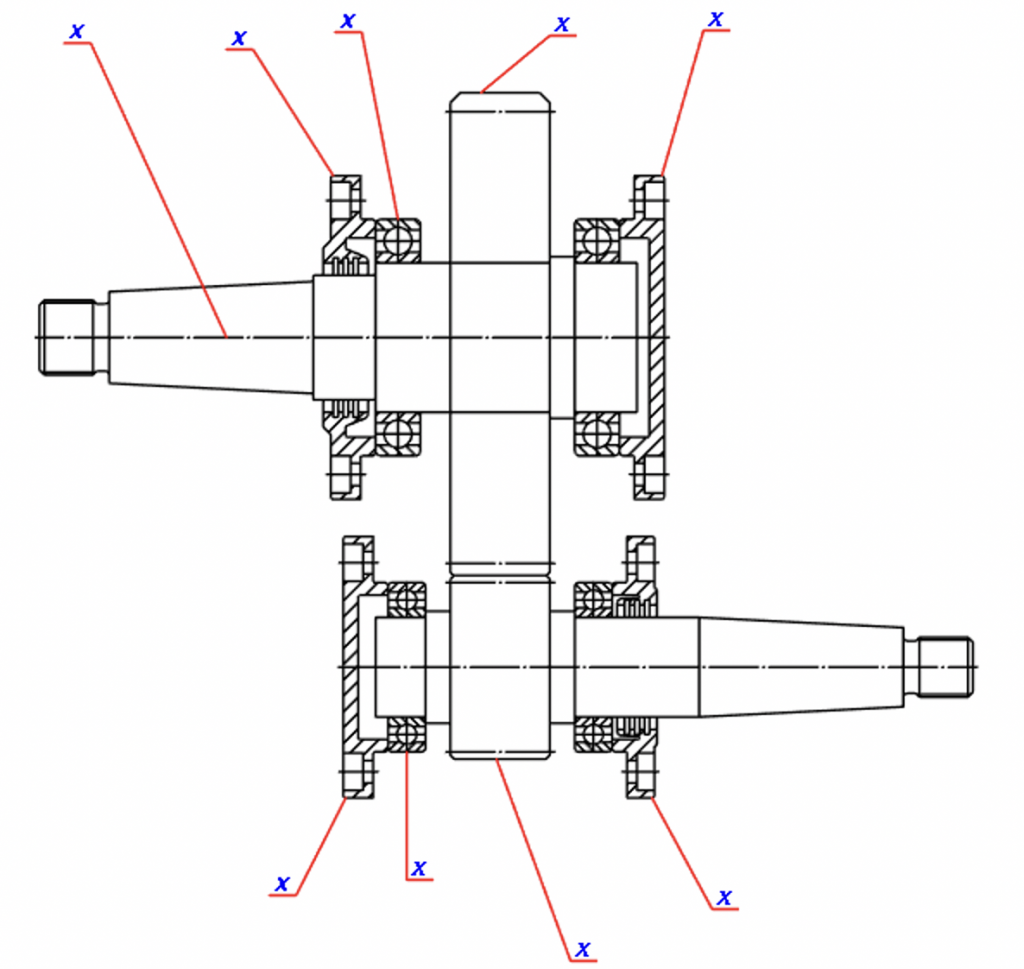
Fig. 32. The gear train with placed positions
2. Line position alignmentPress Position align
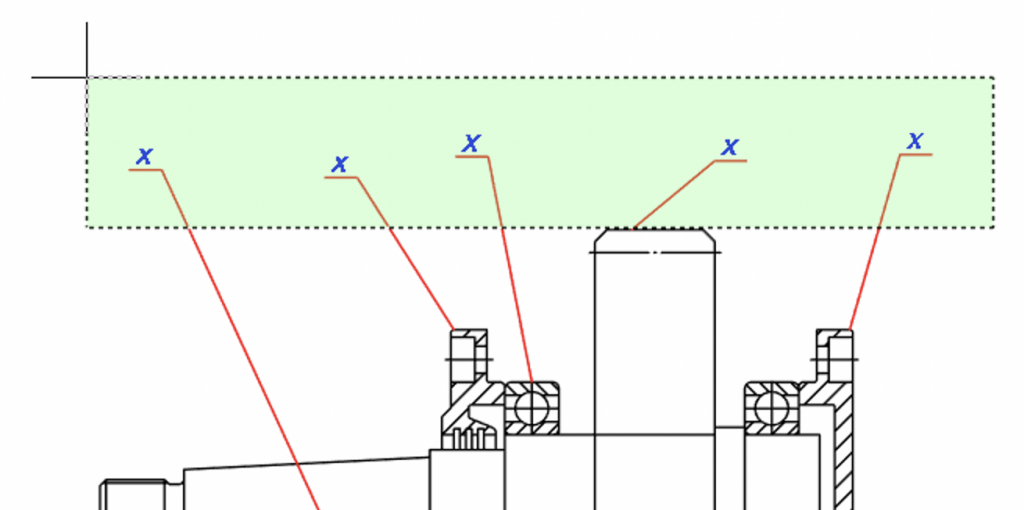
Fig. 33. Selected items
Type L in the command-line interface and press Enter, or select Line in the context menu (Fig. 34). Specify the start and end points to position the line in alignment with the leaders.
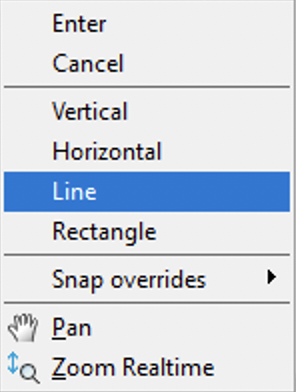
Fig. 34. The context menu of the Position align command
Align the high speed shaft positions in the same way. The final view of the gear train with placed and aligned positions is shown in fig. 35.
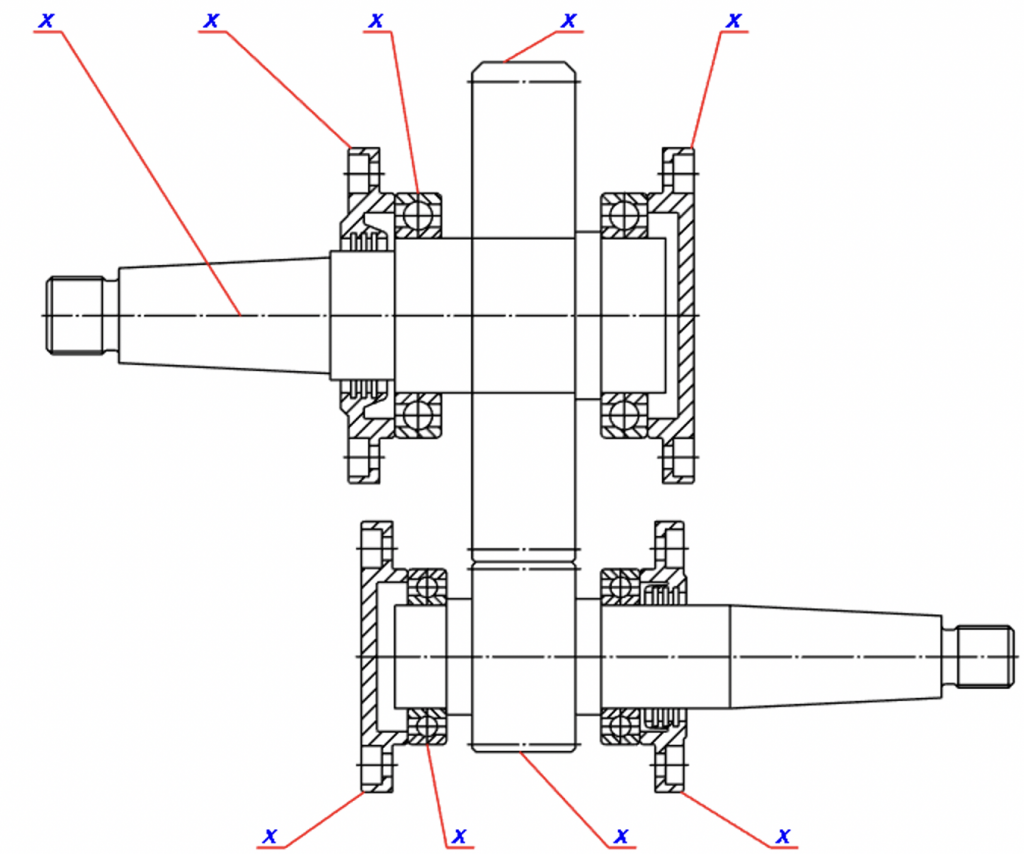
Fig. 35. The gear train with placed and aligned positions
3. Format and title block of the drawing.Create format and fill in the title block: switch from model space to sheet A2
 . In the Format window select A2 and click OK (Fig. 36). Place the format appeared on the sheet at the origin with the End point anchor.
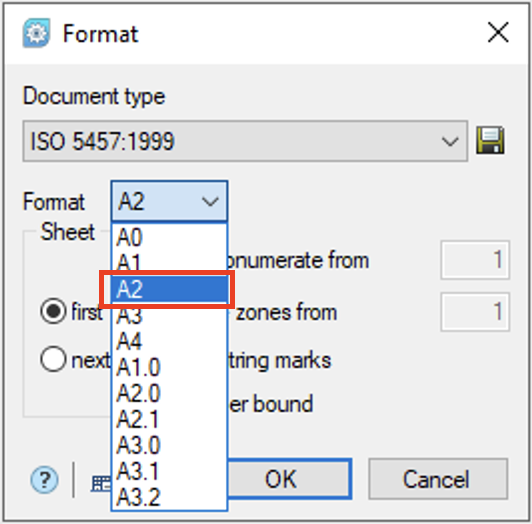
Fig. 36. Creating format
Double-click on the title block’s outline to edit. In order to fill the title block fields and additional graphs, double-click on any line of the title block (Fig.37). Press OK.
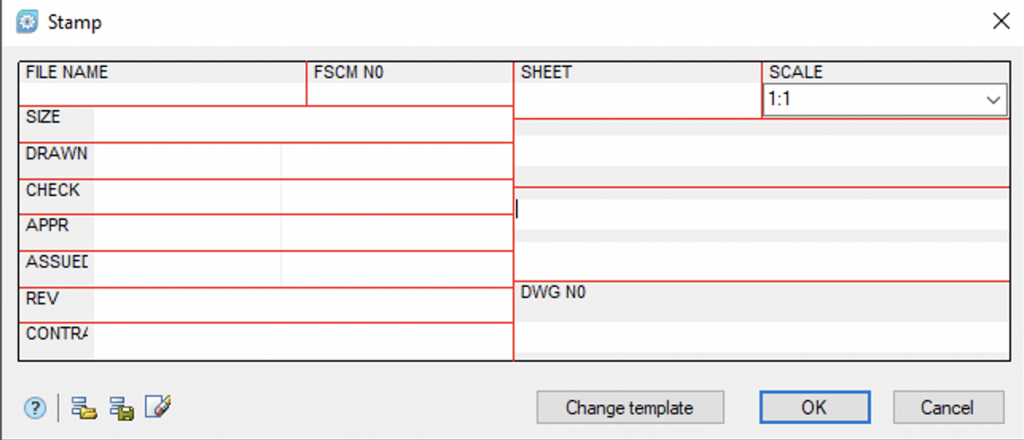
Fig. 37. Filling in the fields of the title block
4. Specification settings.
Go to sheet A4. Click the Specification edit button on the Specification tab or via the path: Mechanica → Part list → Part list drop-down menu (in the classic interface scheme).
In the Specification edit dialog box, click on the Assembly unit list on the left side. Double-click Parts and sort the names in alphabetical order with the Sort button (Fig. 38). Repeat the actions for Standard parts.
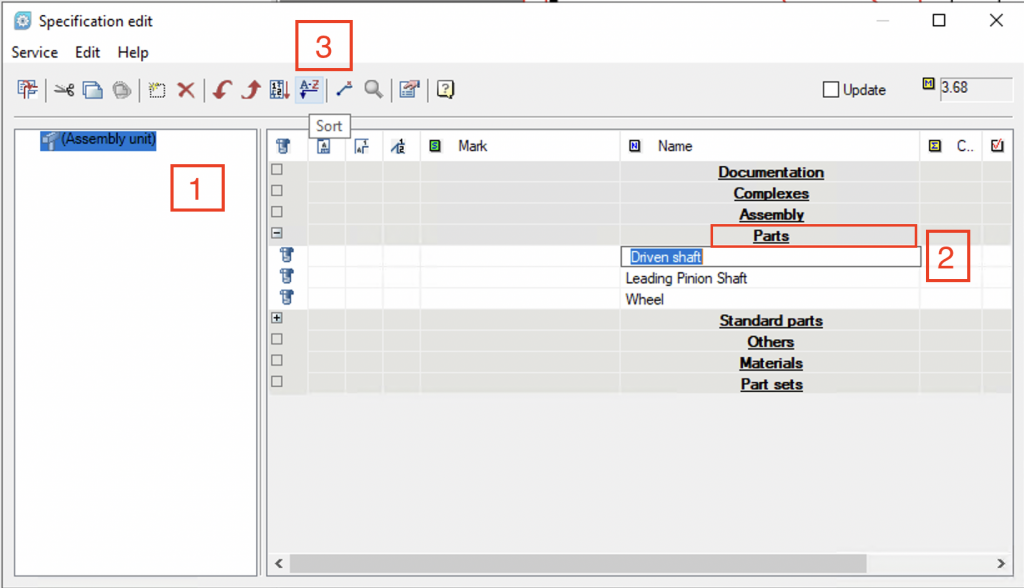
Fig. 38. Sorting titles alphabetically
In the Specification edit dialog box, click the Specification settings button (Service → Specification settings). On the Numbering tab, set the parameters for the Parts and Standard parts sections as shown in fig. 39. Click OK.
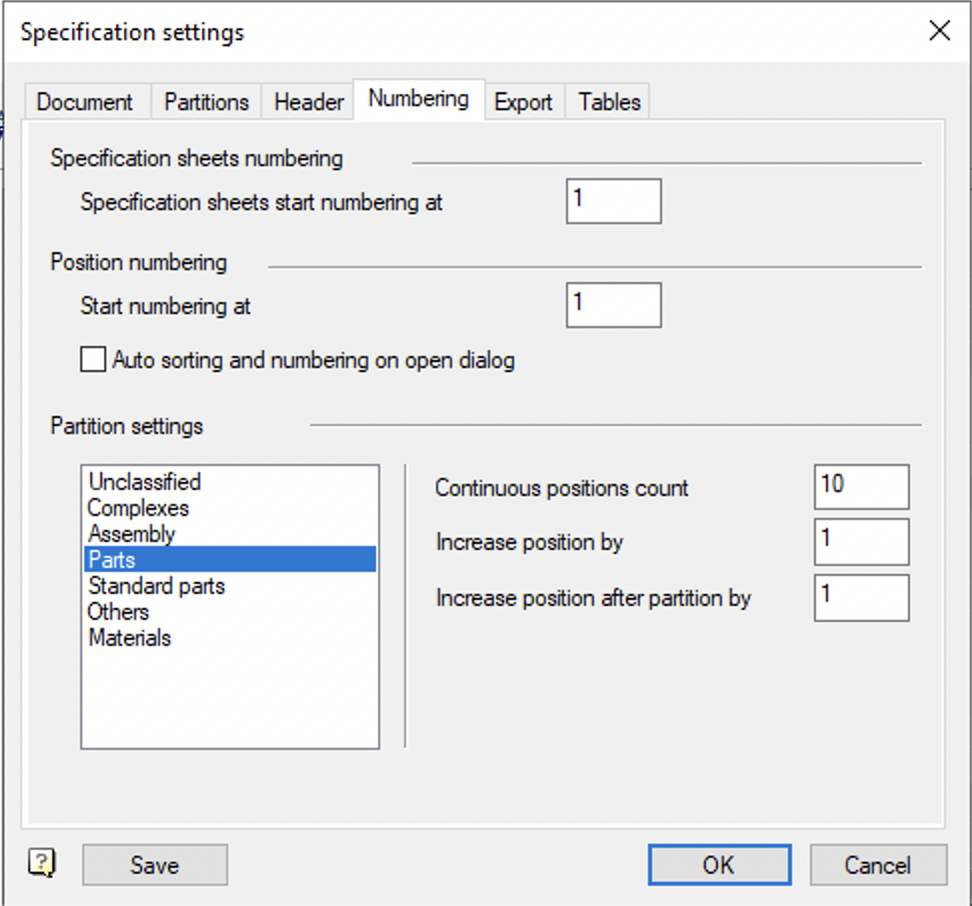
Fig. 39. Setting the numbering
Press Do numbering .
The final view of the specification window is shown in Fig. 40.
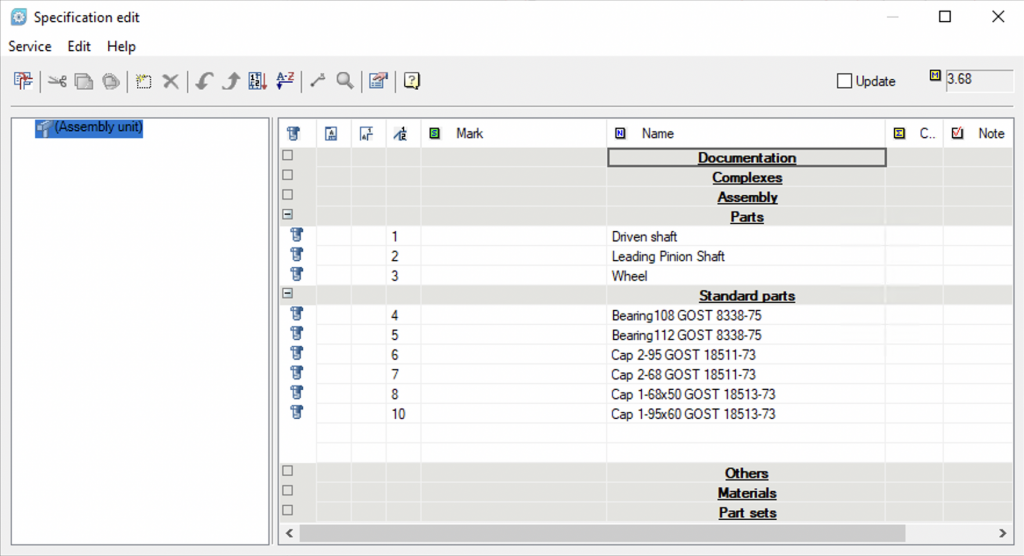
Fig. 40. Completed Specification edit window
Press Export to drawing.
Paste the generated specification into the A4 format field (Fig. 41).
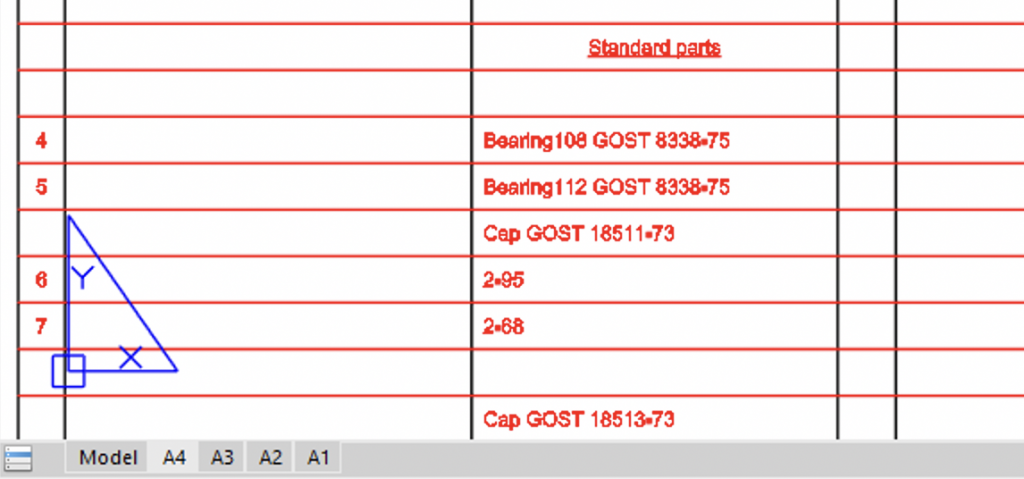
Fig. 41. Pasting the specification into the A4 format
Close the Specification edit window. Save the file to the Exercises folder.


 De
De  Es
Es  Fr
Fr  Pt
Pt 
