nanoCAD Mechanica Module
Shaft Design
Launch nanoCAD with Mechanica module.
Open the Shaft.dwg file.
7. Turn off the visibility of the AUXILIARY layer on the Properties bar by selecting it in the list of layers and clicking on the light bulb icon (Fig. 7).
Save the file to the Exercises folder.
Open the Shaft.dwg file.
1. In the Design group, click Create shaft (Fig. 1).

Fig. 1. The Create shaft button
2. You will see a dialog box and an arrow that indicates the direction in which the shaft segment is drawn. The command line displays the Select insertion point message.
- Specify the origin point for the shaft by entering coordinates in the command line (0,0). Press Enter.
- The command line displays the following message: Select direction.
- Specify the direction of the shaft axis by using the ORTHO snap: move the mouse cursor to the right of the center of coordinates and press Shift + left-click (Fig. 2).
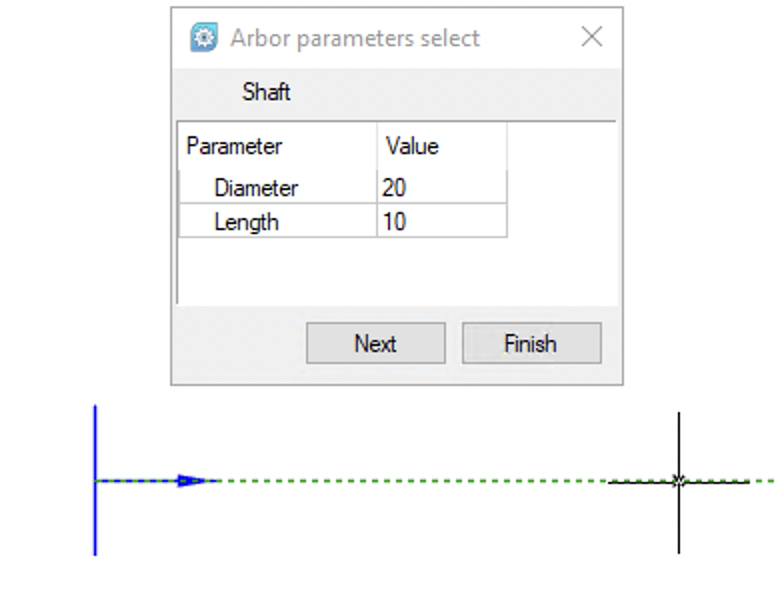
Fig. 2. Selecting the direction of the shaft axis
3. As you move the cursor, you will see how the diameter and length of the shaft section change in the Arbor parameters select dialog box (Fig. 3). Set the value of the shaft diameter 60 and length 10 by moving the cursor. You can move between the fields of values using the up and down keys. You can enter values in the digital keyboard, if it is more convenient. Press Next or just left-click in the model space, if the values are set by moving the cursor, to confirm.
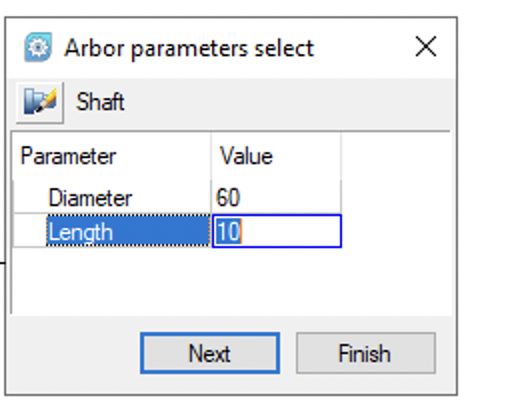
Fig. 3. The Arbor parameters select dialog box
4. After that, the command for drawing shaft sections will be resumed. The origin point of the next shaft section is the end point of the previous section. Draw the second section of the shaft. Enter 40 and 50 in the Diameter and Length text boxes. Confirm by clicking Next. The result is shown in Fig. 4.
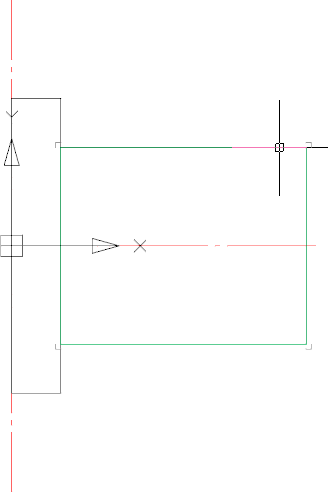
Fig. 4. Shaft with two sections
5. Click Shaft in the Arbor parameters select dialog box. Select the Conical Shaft End DIN 1448 in the drop-down menu (Fig. 5).
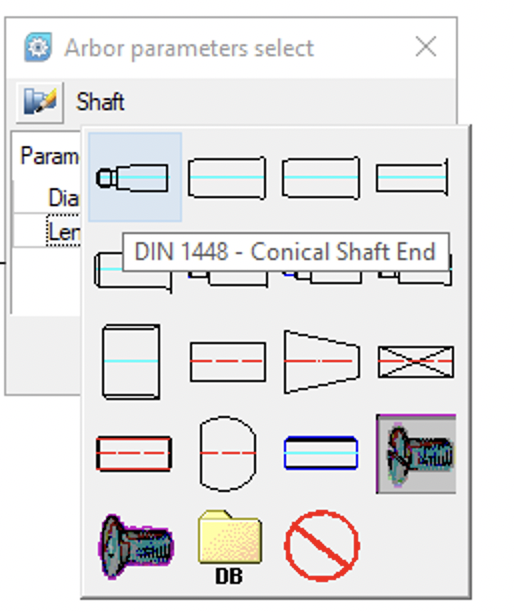
Fig. 5. Selecting a Standard Shaft End
6. Move the cursor to set the largest diameter of the shaft end to make it equal to the diameter of the cylindrical section. Use object snaps to do it (Fig. 6).Left click to complete the shaft drawing. The centerline is drawn automatically. The drawn object is a one-piece construction.
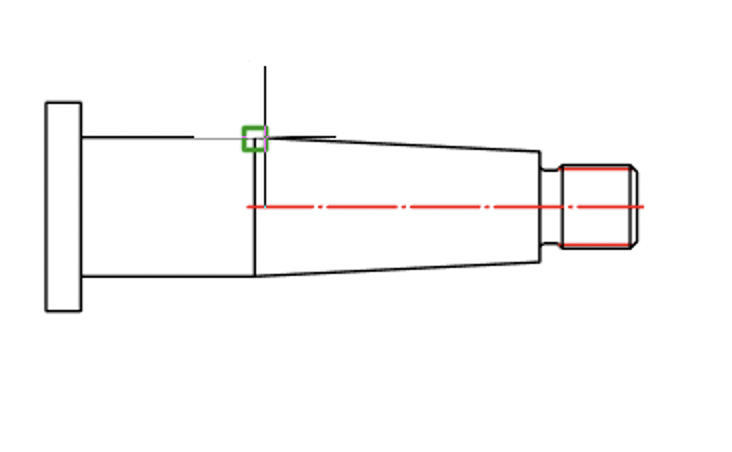
Fig. 6. Setting the largest diameter of the Standard Shaft End
7. Turn off the visibility of the AUXILIARY layer on the Properties bar by selecting it in the list of layers and clicking on the light bulb icon (Fig. 7).
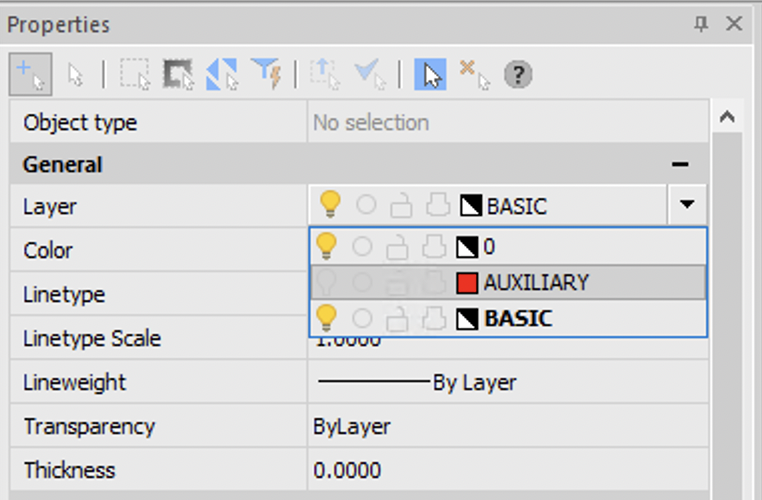
Fig. 7. Turning off layer visibility
Save the file to the Exercises folder.


 De
De  Es
Es  Fr
Fr  Pt
Pt 
