nanoCAD 3D Solid Modeling Module
Creating Flats and Holes
1. To create a flat on the ⌀75 diameter step of the Part, use the YZ plane as the sketch reference. Draw a rectangle and apply Auto Constraint (Fig. 21). Project the end rib before you set dimensional constraints.
2. After complete sketch construction, run the 3D Extrude command with the following options: Cut, Through, Both Directions.
3. Draw a second flat on the opposite side. Use the end face of the ⌀95 diameter step as a reference plane for the sketch. The length of the rectangle for the sketch must be at least 2/3 of the step diameter (Fig. 23).
Perform the 3D Extrude operation at the distance of 30 mm in the negative direction with the Cut option enabled (Fig. 24).
4. Create the thread holes on the constructed flats.
In the sketch mode, select the first flat and draw the hole ⌀14 in the center by using snaps (Fig. 25).
Apply the 3D Extrude operation with the Cut option at the distance of 30 mm in the negative direction. Create the chamfer 1,6 mm x 45° according to the dimensions shown in the drawing.
5. Create the hole ⌀17.4 mm in the second flat the same way.
6. Create the sketch for the ⌀12 hole (Fig. 26) on the YZ plane. Project ⌀140 diameter edge to link the dimension of the hole by X axis. Set the 3D Extrude options to Through, Negative direction.
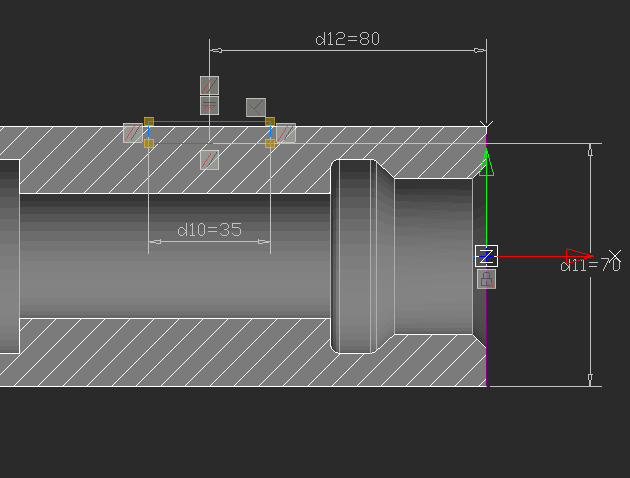
Fig. 21. The Sketch of the flat
2. After complete sketch construction, run the 3D Extrude command with the following options: Cut, Through, Both Directions.
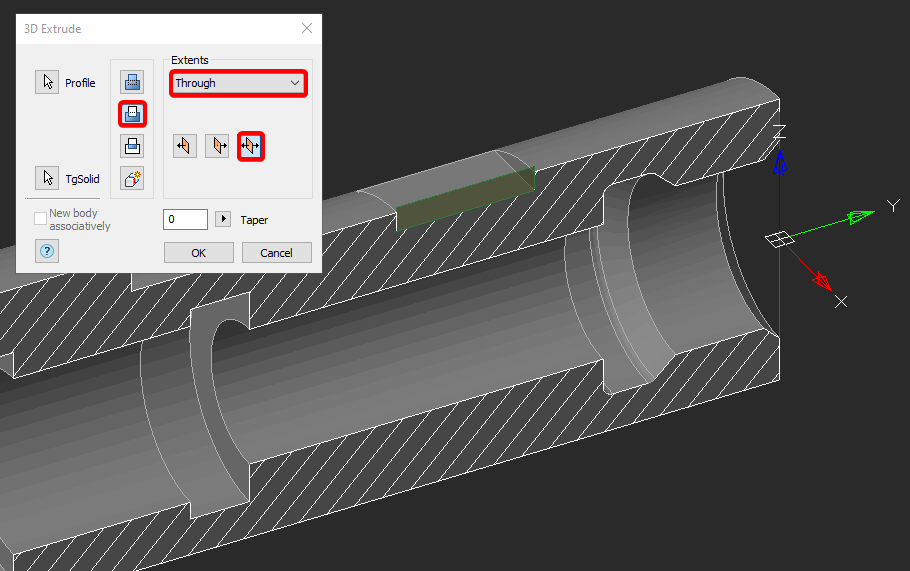
Fig. 22. The parameters of the 3D Extrude operation for the first flat
3. Draw a second flat on the opposite side. Use the end face of the ⌀95 diameter step as a reference plane for the sketch. The length of the rectangle for the sketch must be at least 2/3 of the step diameter (Fig. 23).
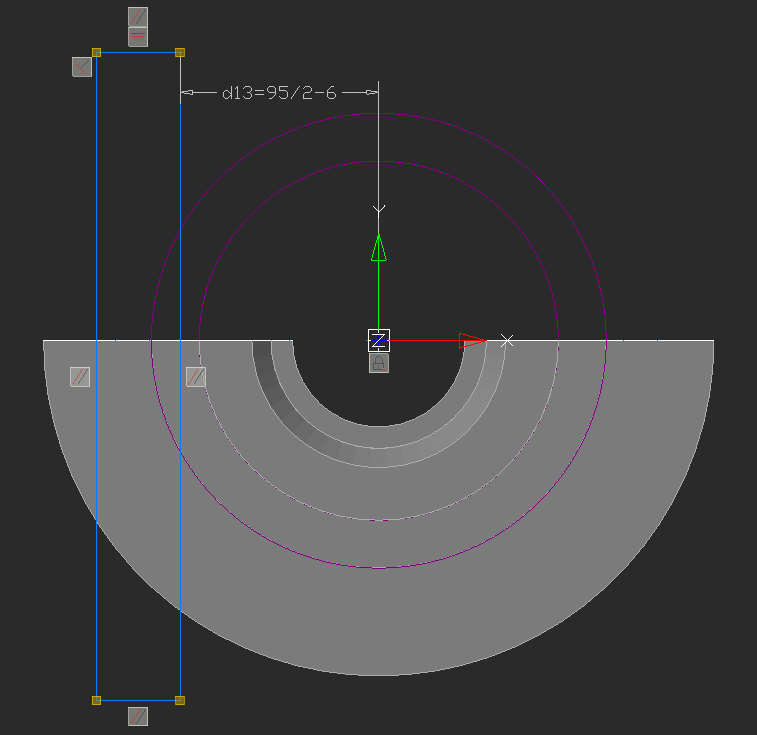
Fig. 23. The sketch of the second flat
Perform the 3D Extrude operation at the distance of 30 mm in the negative direction with the Cut option enabled (Fig. 24).
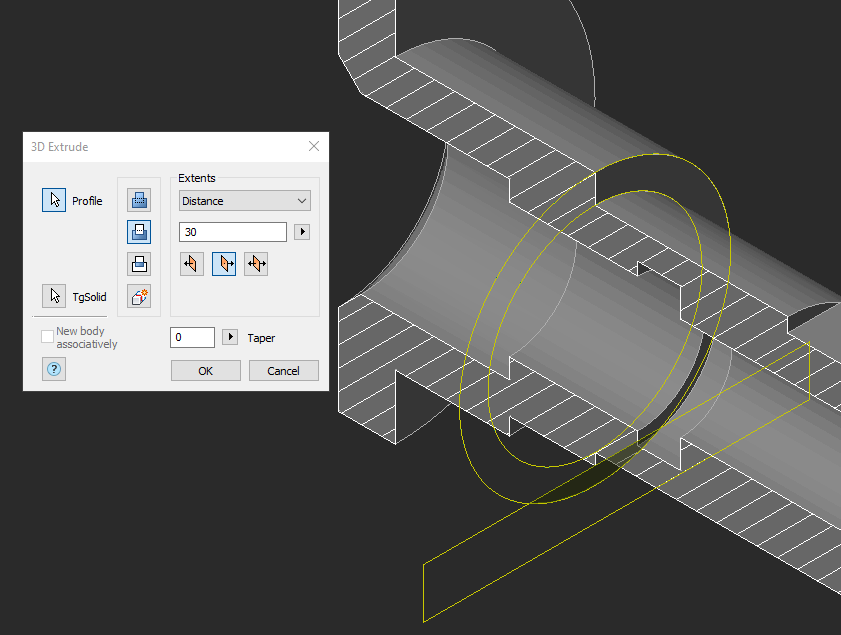
Fig. 24. Second flat draft
4. Create the thread holes on the constructed flats.
In the sketch mode, select the first flat and draw the hole ⌀14 in the center by using snaps (Fig. 25).
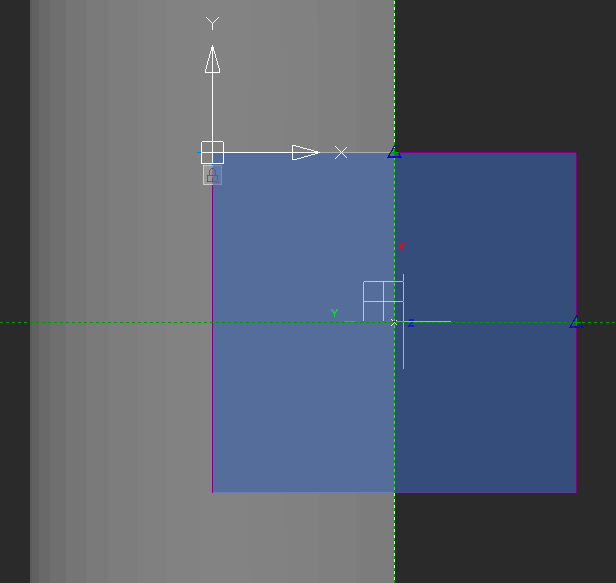
Fig. 25. Creating the hole sketch. The Midpoint snap.
Apply the 3D Extrude operation with the Cut option at the distance of 30 mm in the negative direction. Create the chamfer 1,6 mm x 45° according to the dimensions shown in the drawing.
5. Create the hole ⌀17.4 mm in the second flat the same way.
6. Create the sketch for the ⌀12 hole (Fig. 26) on the YZ plane. Project ⌀140 diameter edge to link the dimension of the hole by X axis. Set the 3D Extrude options to Through, Negative direction.
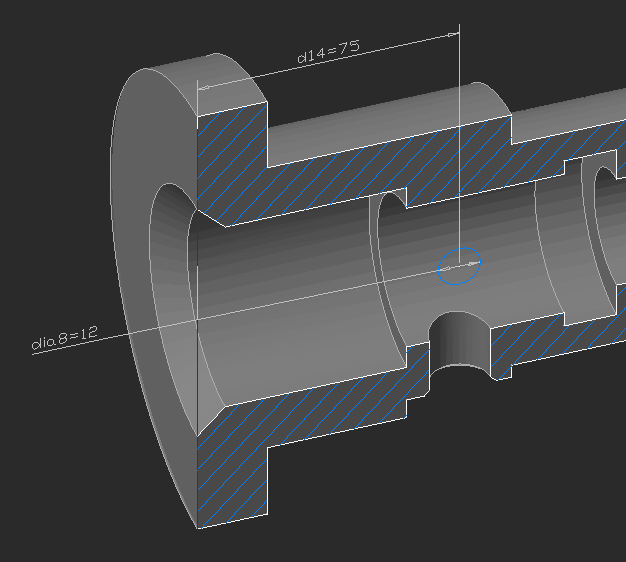
Fig. 26. The sketch for the ⌀12 hole


 De
De  Es
Es  Fr
Fr  Pt
Pt 
